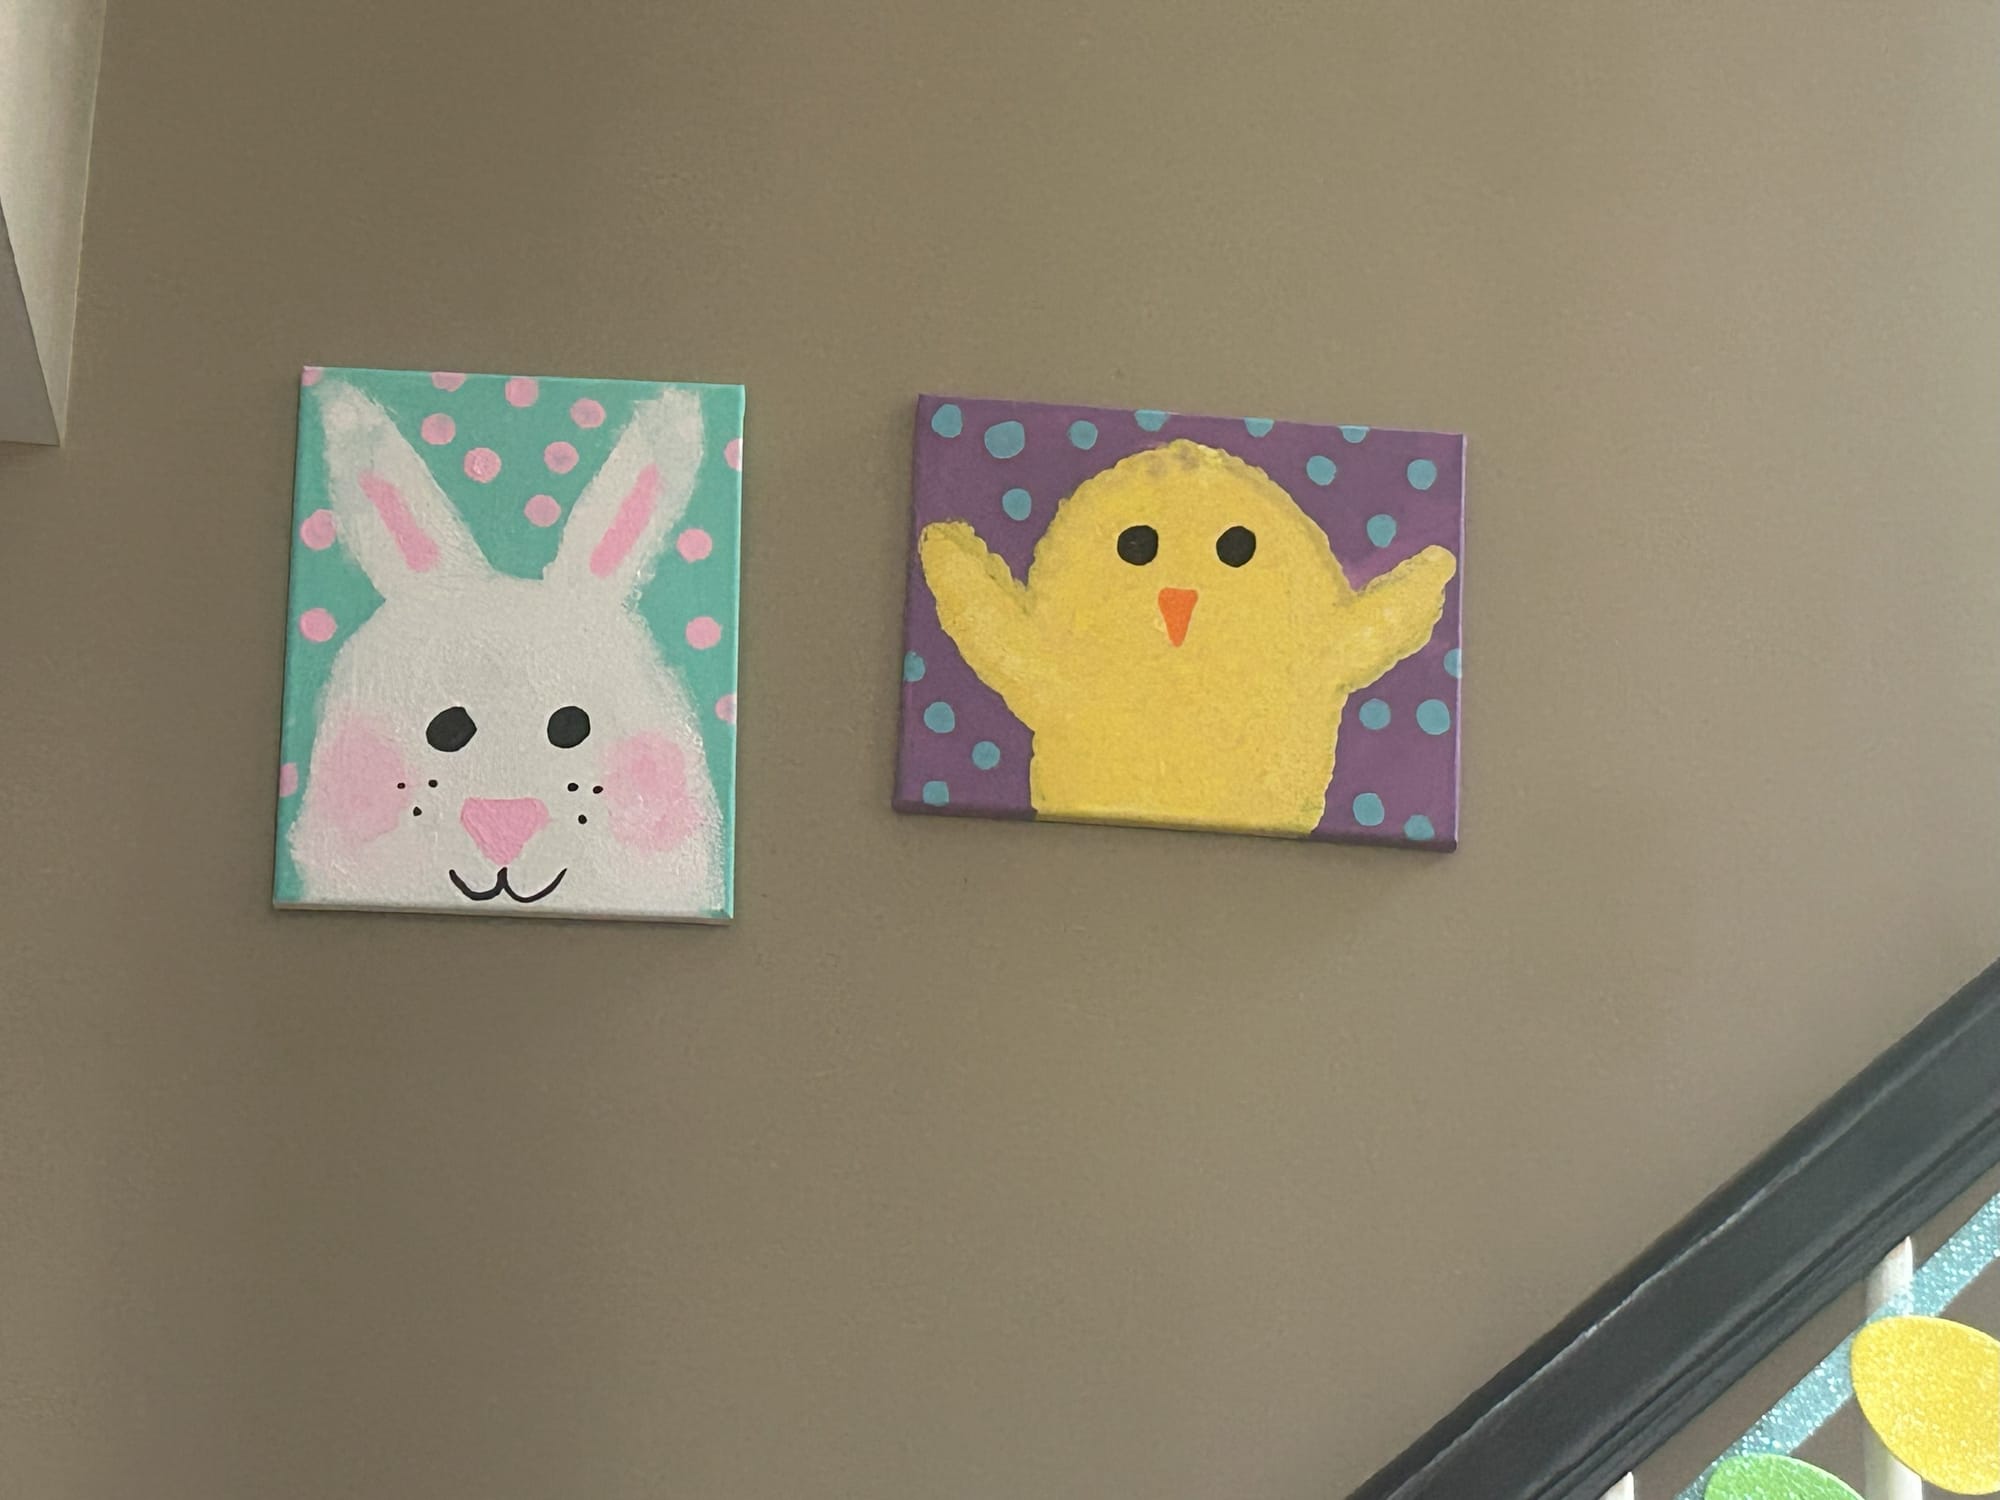
Easter Chick Painting DIY
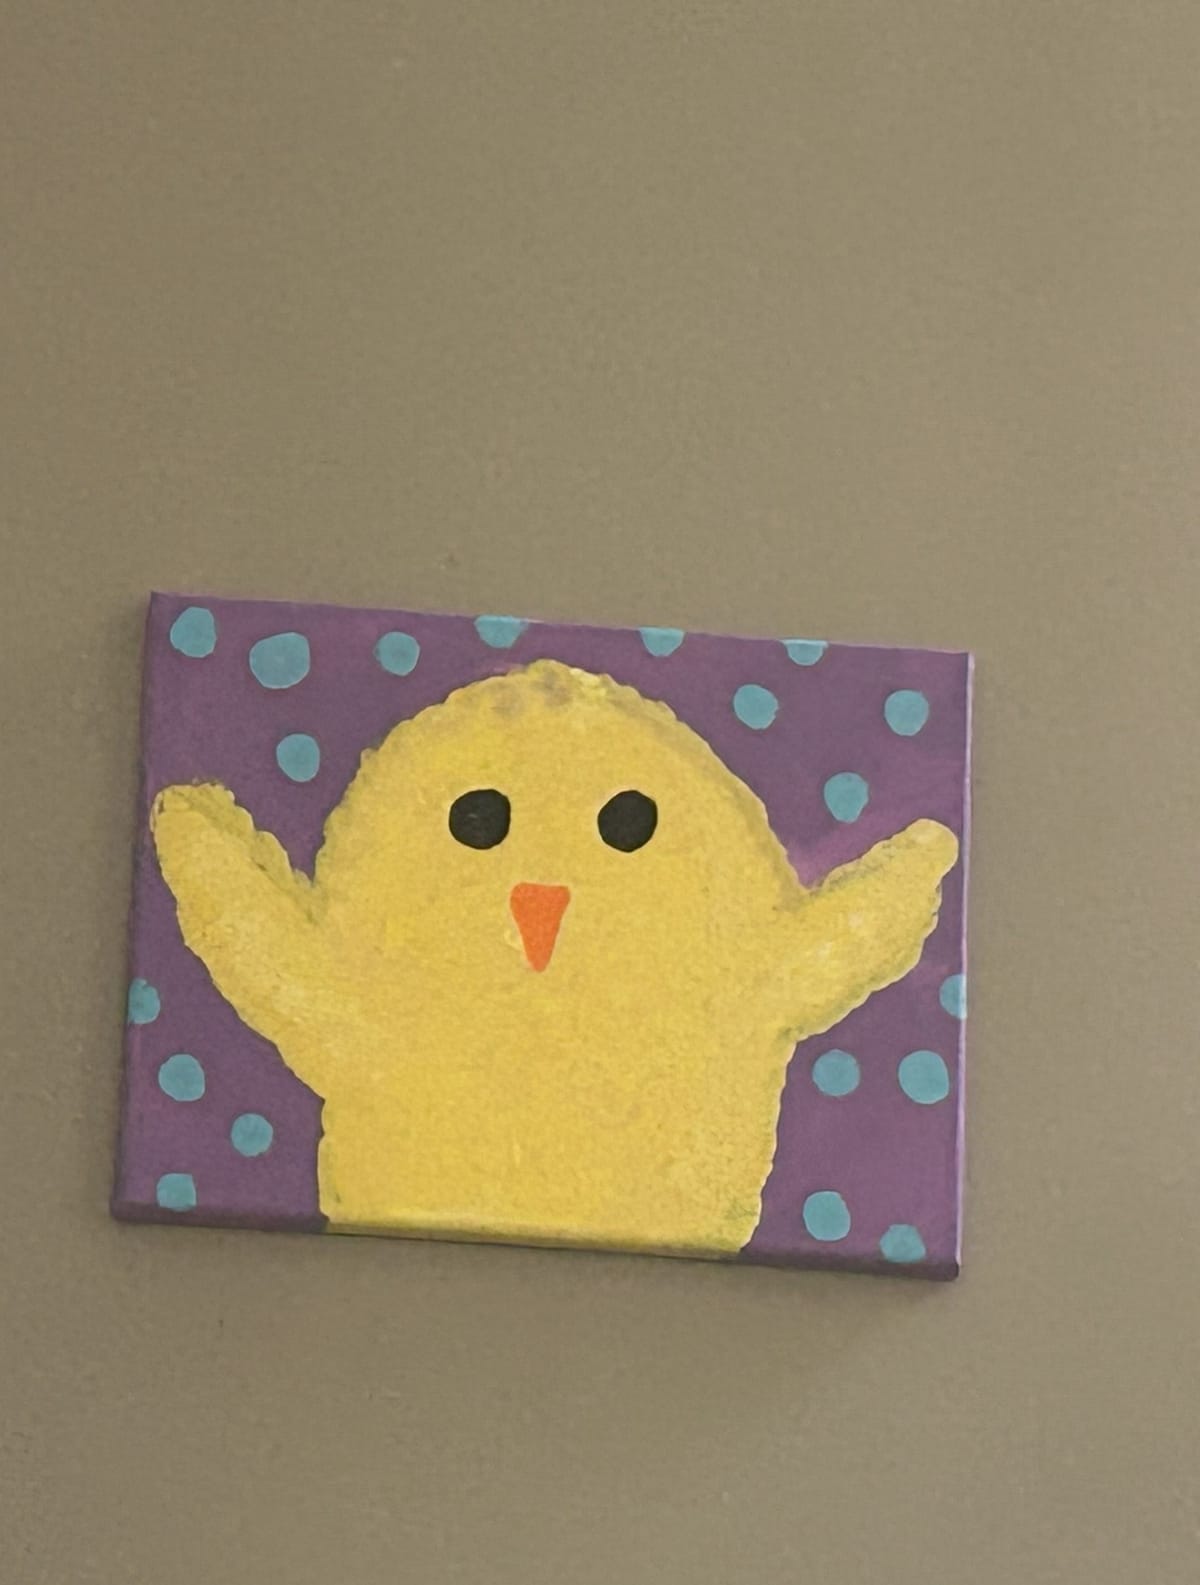
Want to add this cute little chick to your Spring decor? You will find this chick pretty simple to make. The nest part id if you mess up, simply paint over your mistake and try again.
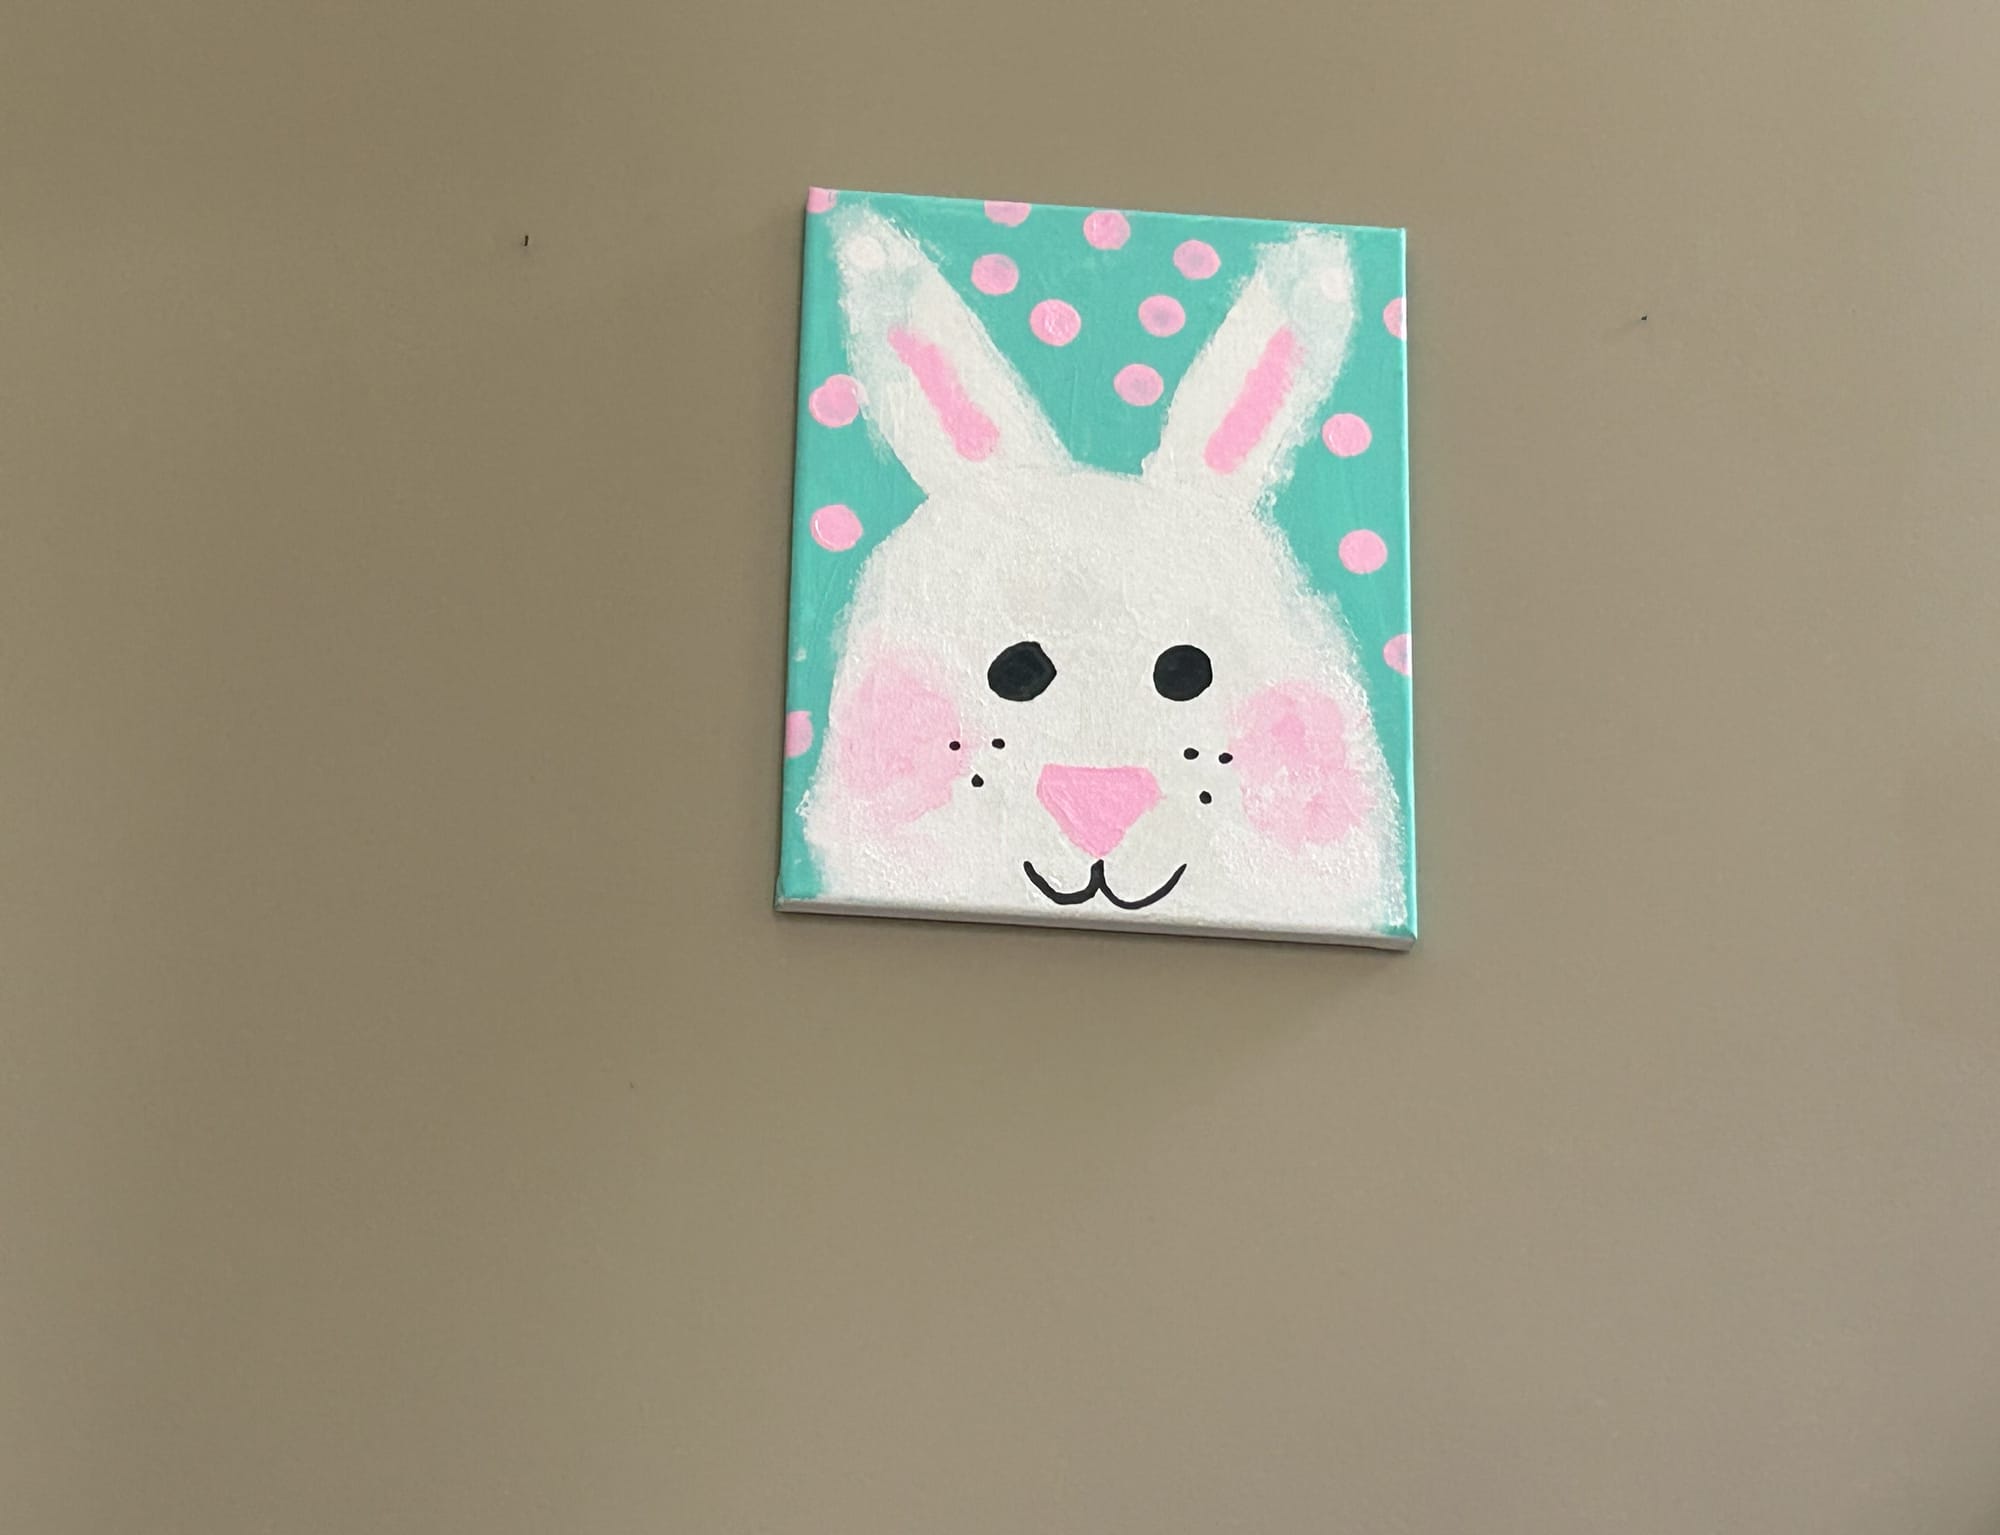
I painted a Easter bunny for my home before I painted this chick and it was not pretty. My bunny looked horrible, but again, I simply painted over my mistake. I have a few tips to help make the process easier. Check out my bunny painting post to see the process.
So, want to create this cure Eater chick. To begin gather the paint colors you would like to use and a canvas. You can use any size, I used an 11x14.
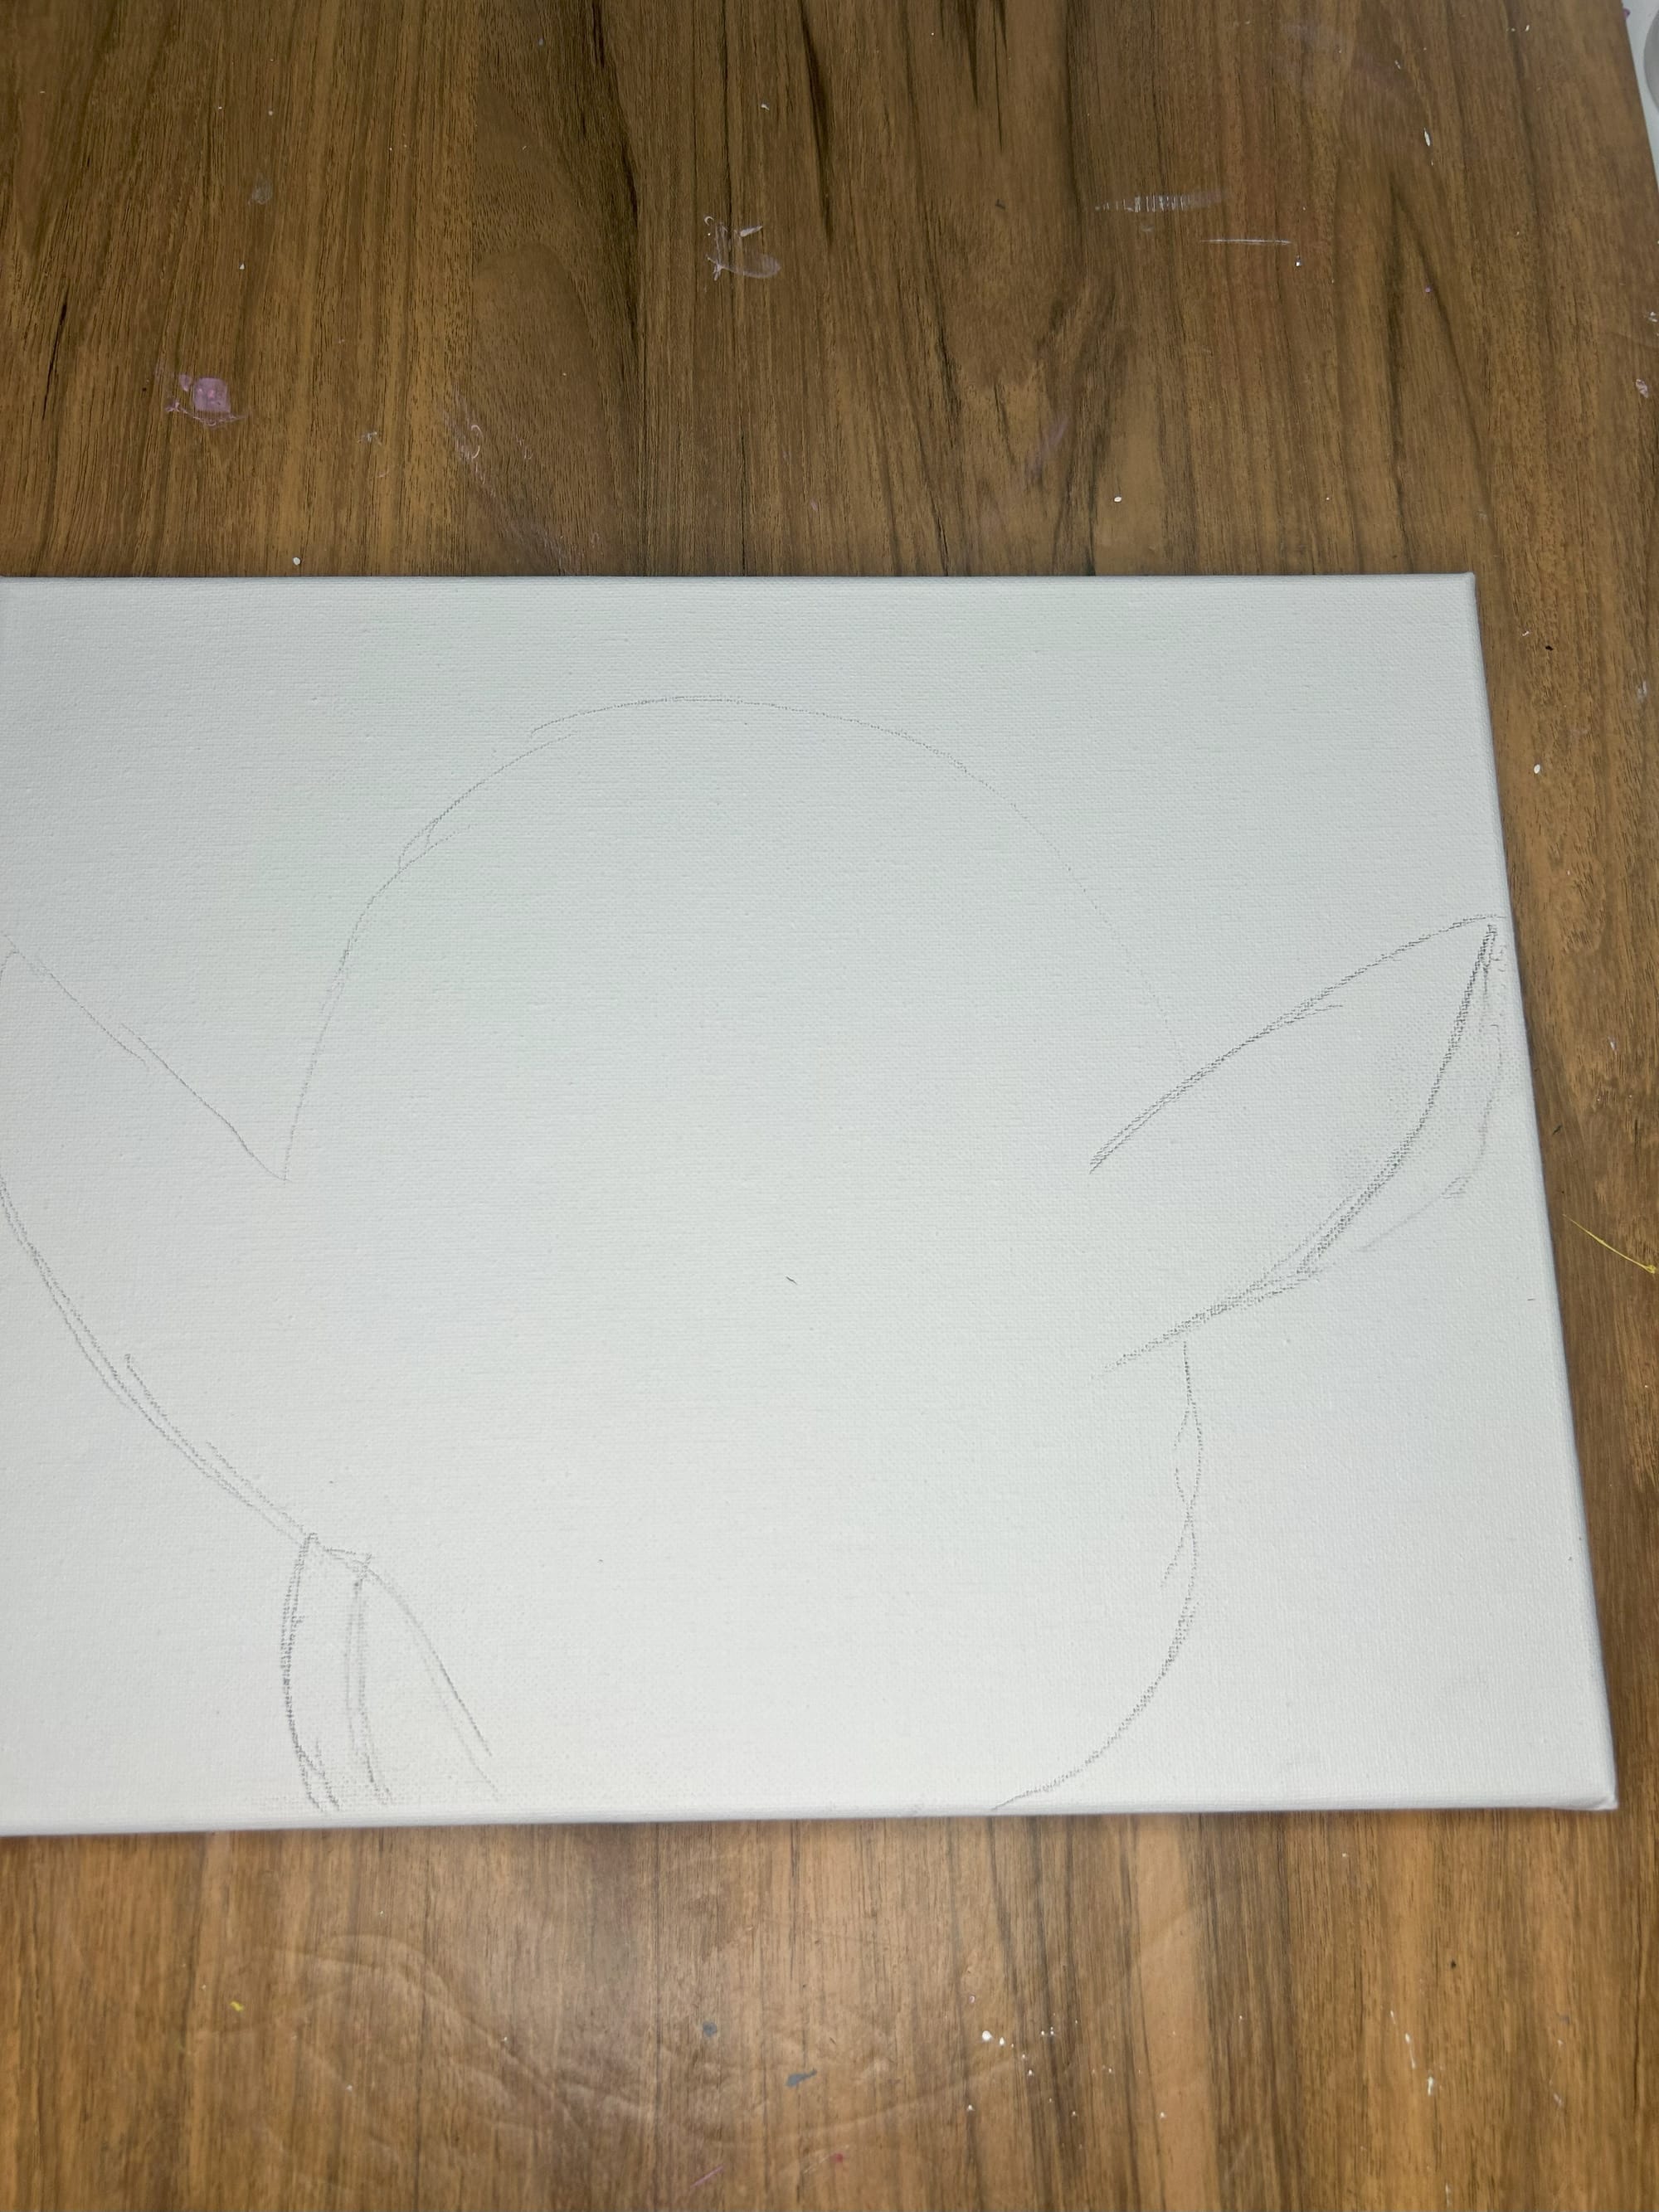
To begin, I recommend sketching out your design with pencil. I simply drew a half circle and then added 2 wings shapes and then completed the bottom half of the circle. Take your time, it does not need to be perfect.
Begin by painting your background using the color you selected. You may need more than 1 coat depending on how it looks.
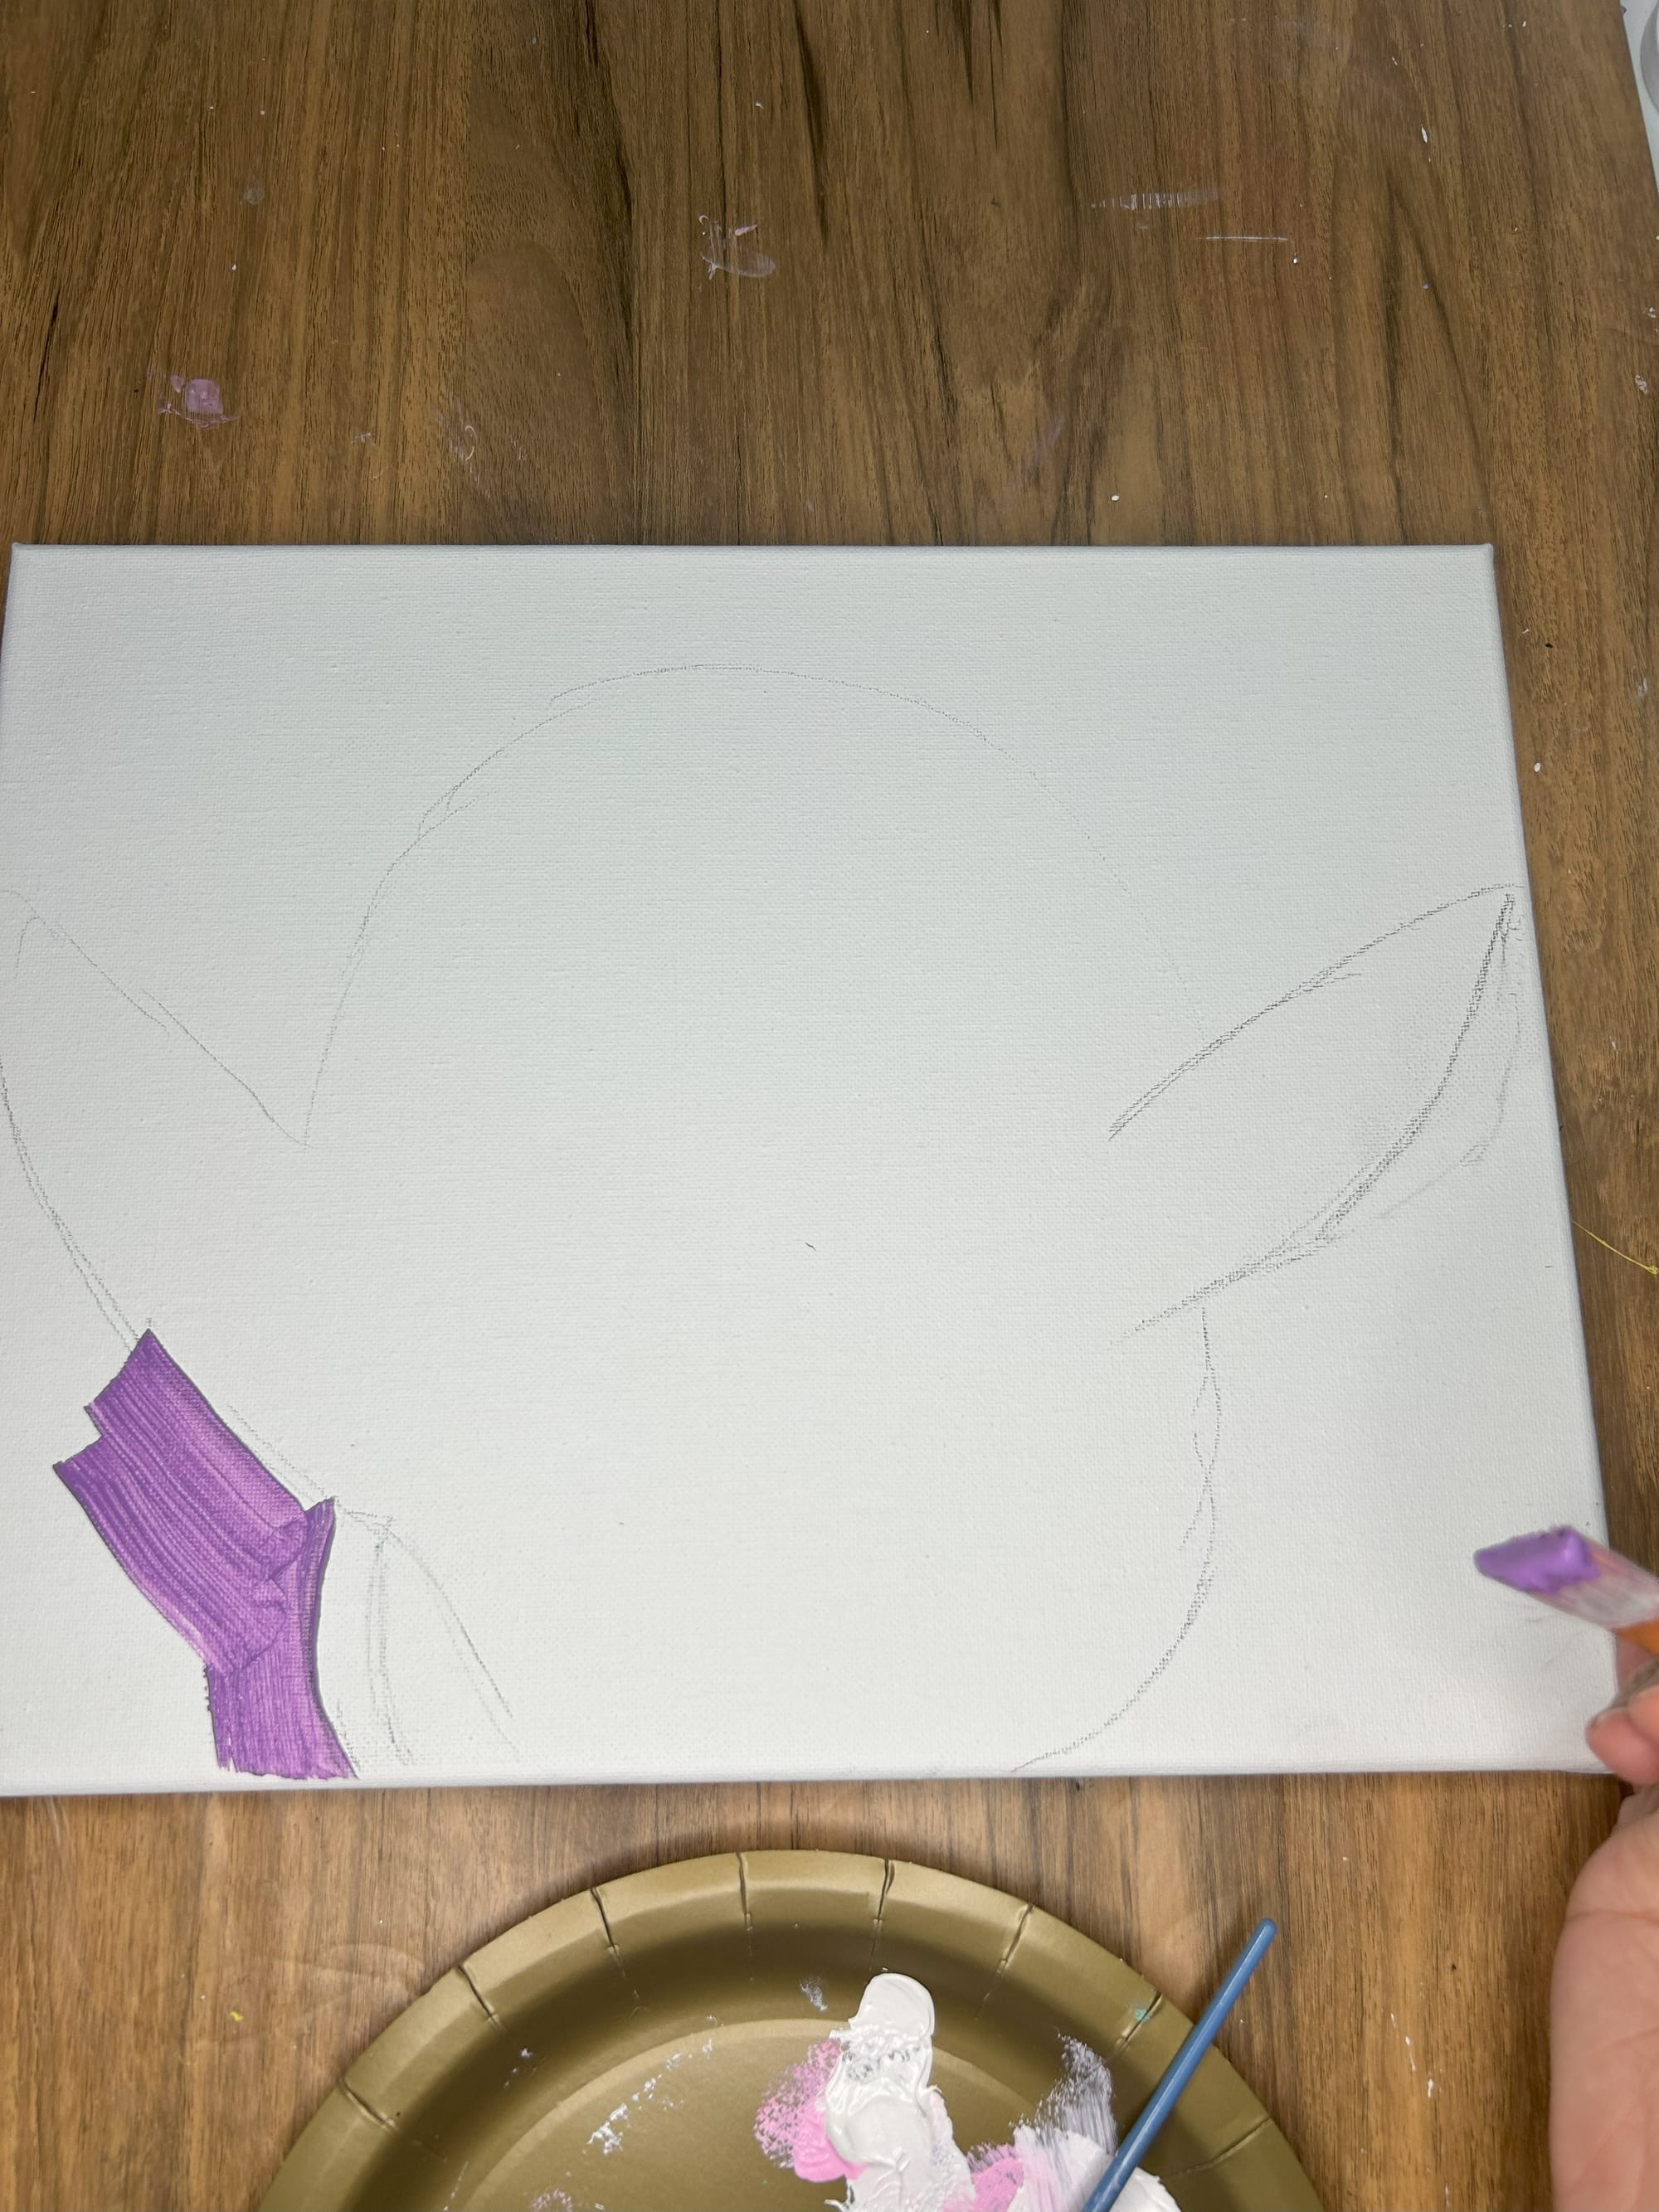
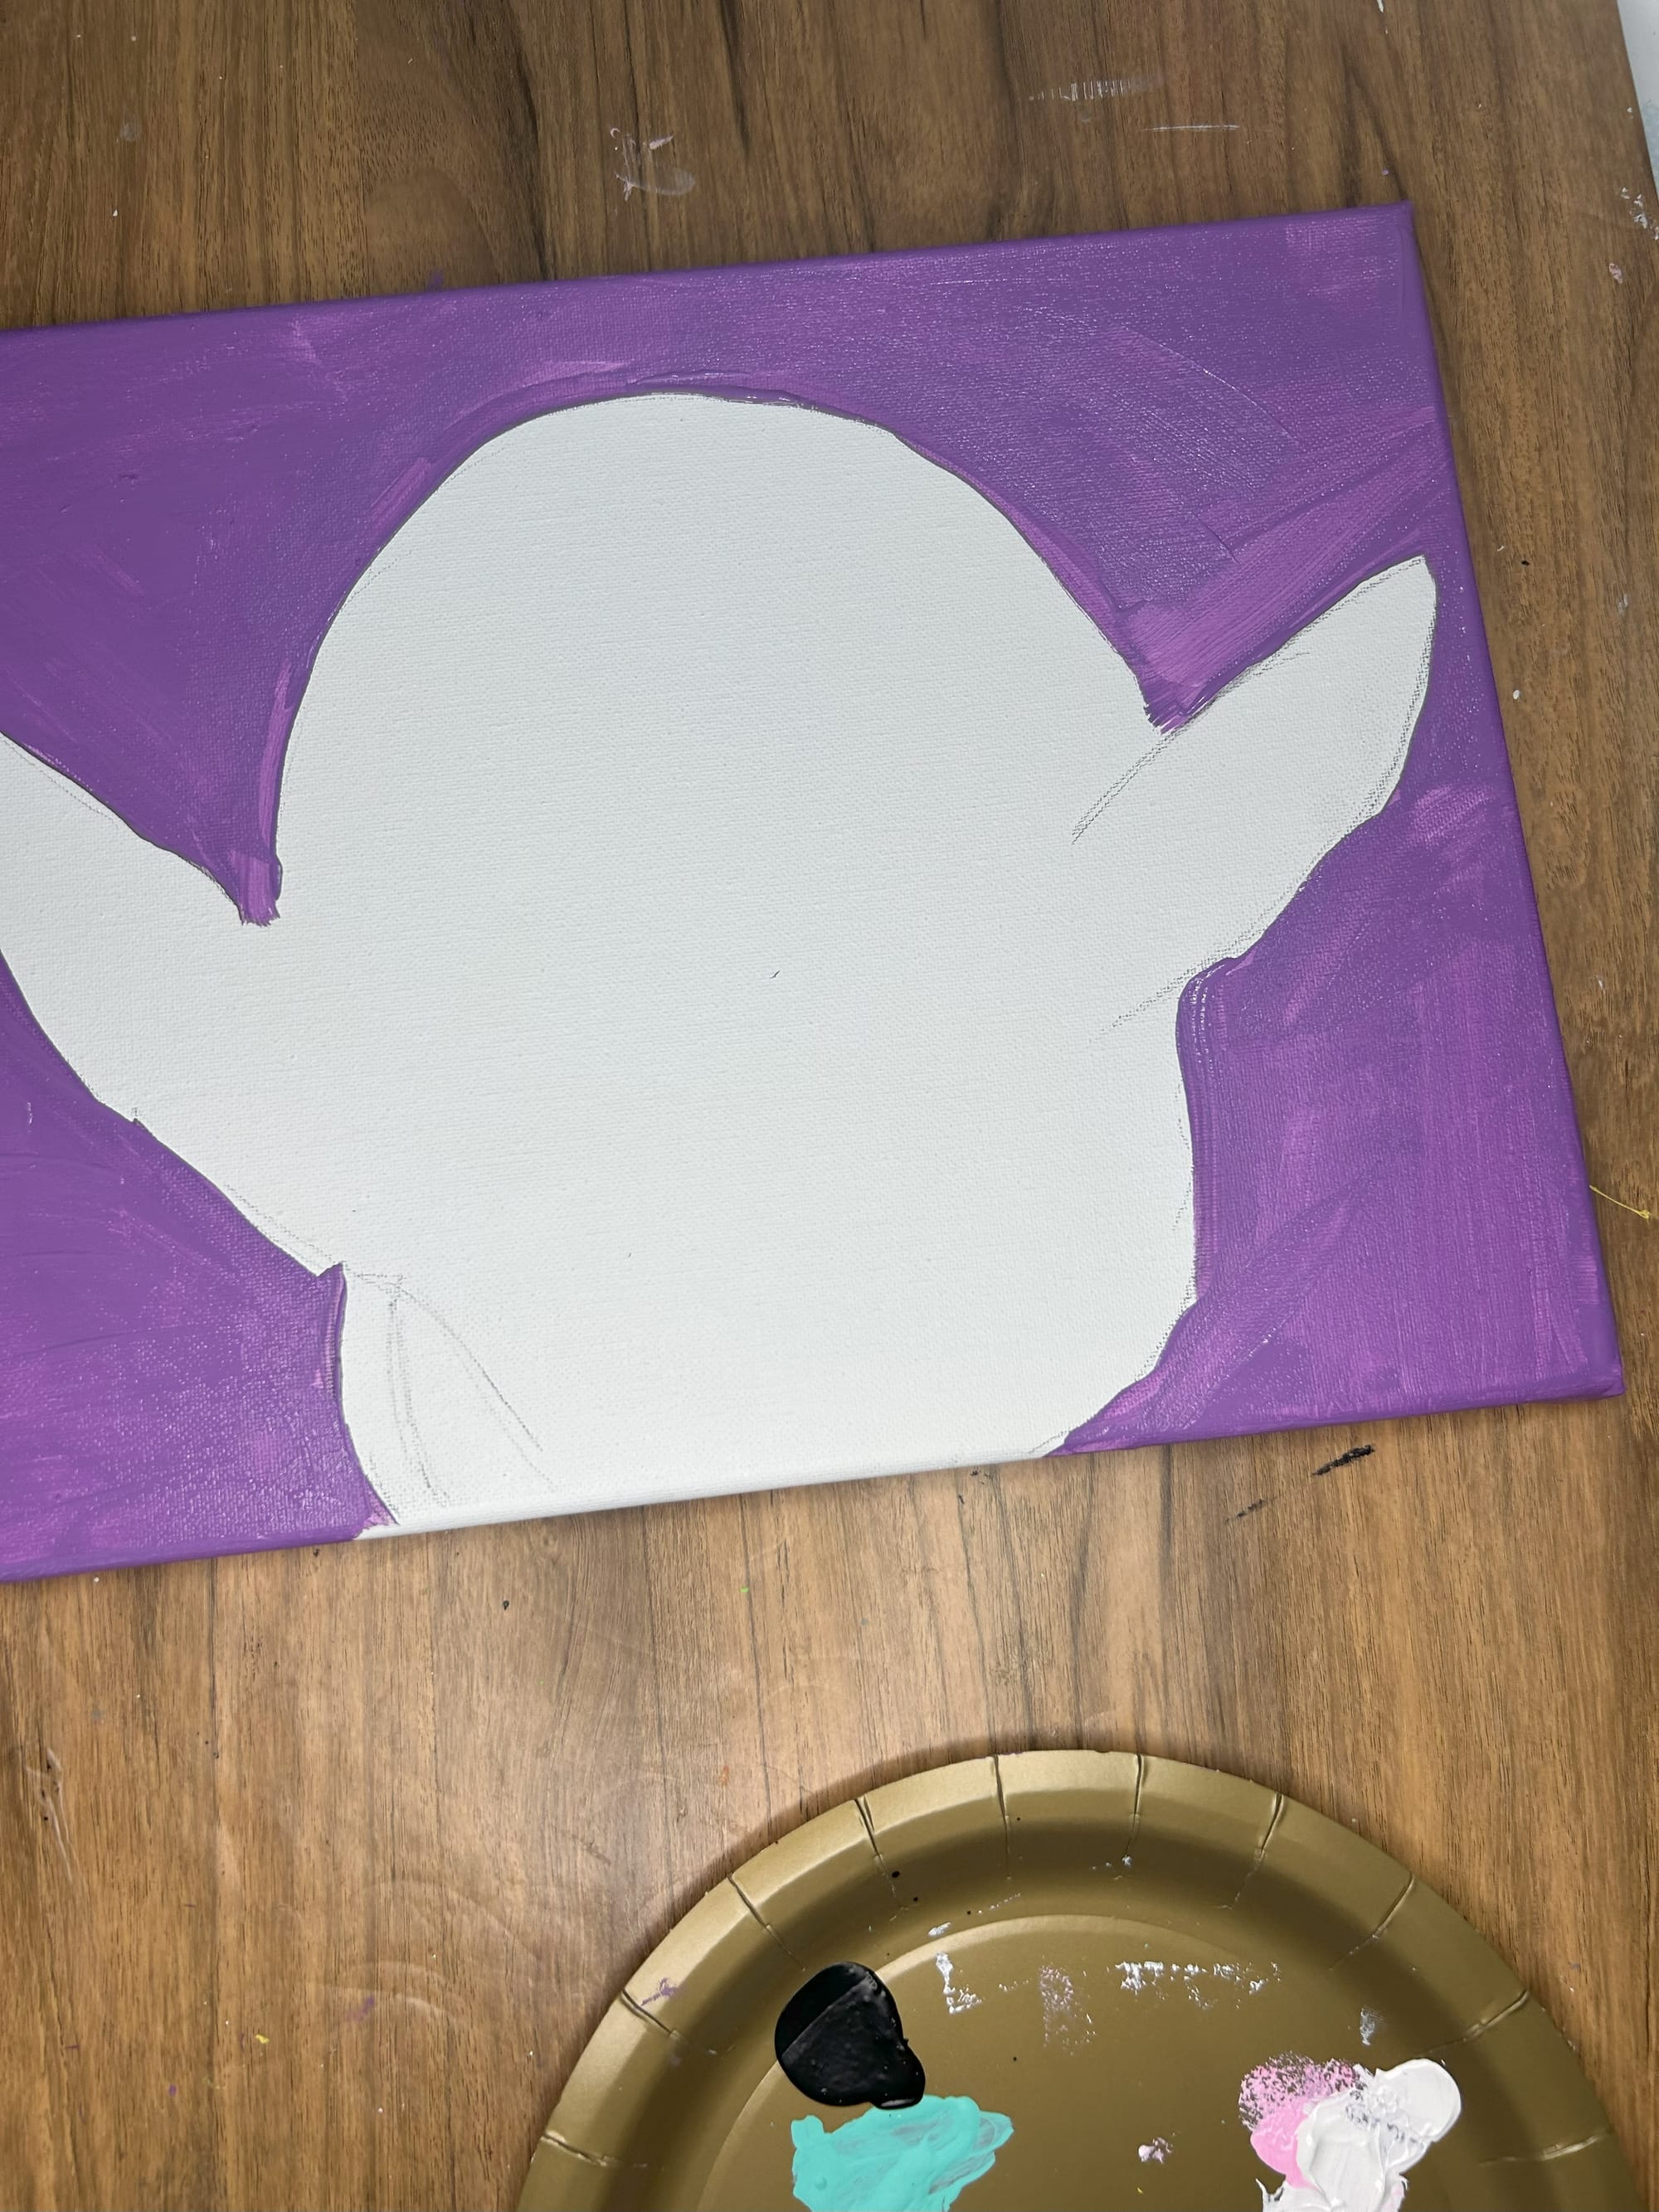
Paint the background around your chick drawing.
Next, use a sponge or sponge brush to add paint to the chick you drew. The sponge gives it some dimension and makes it look more realistic. I mixed several shades of yellow I had. Then at the end, I added some white in some places.
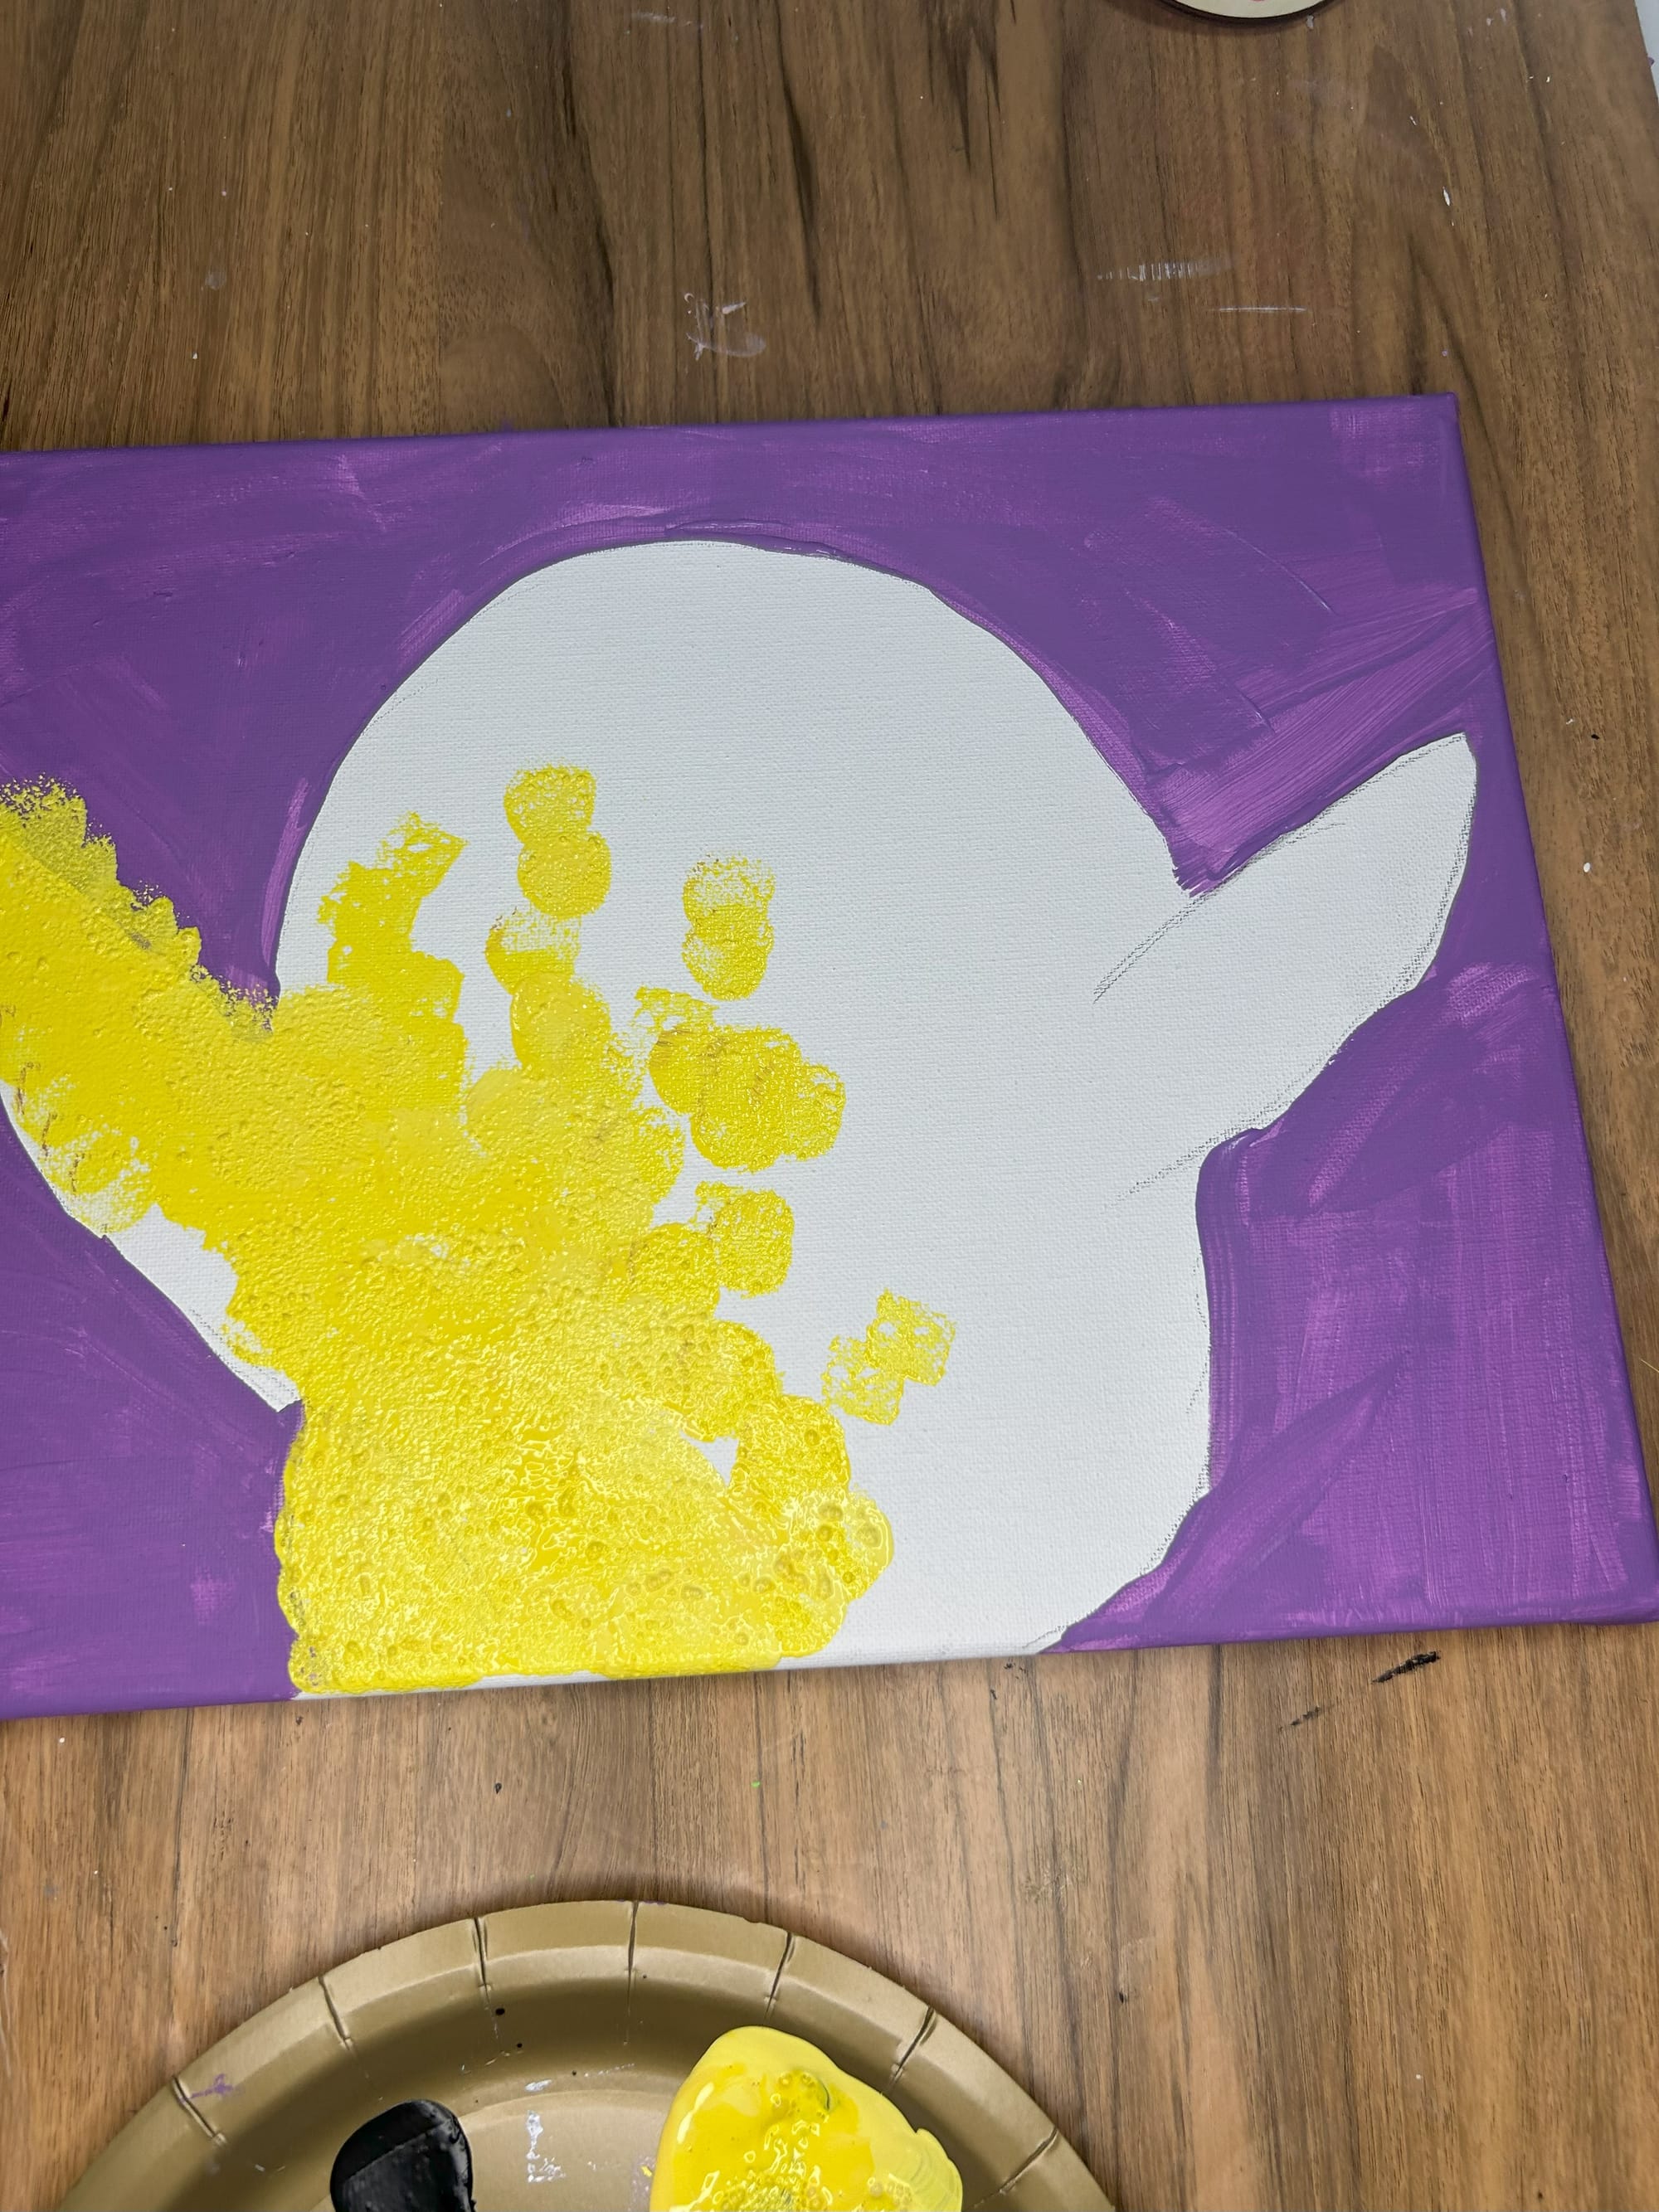
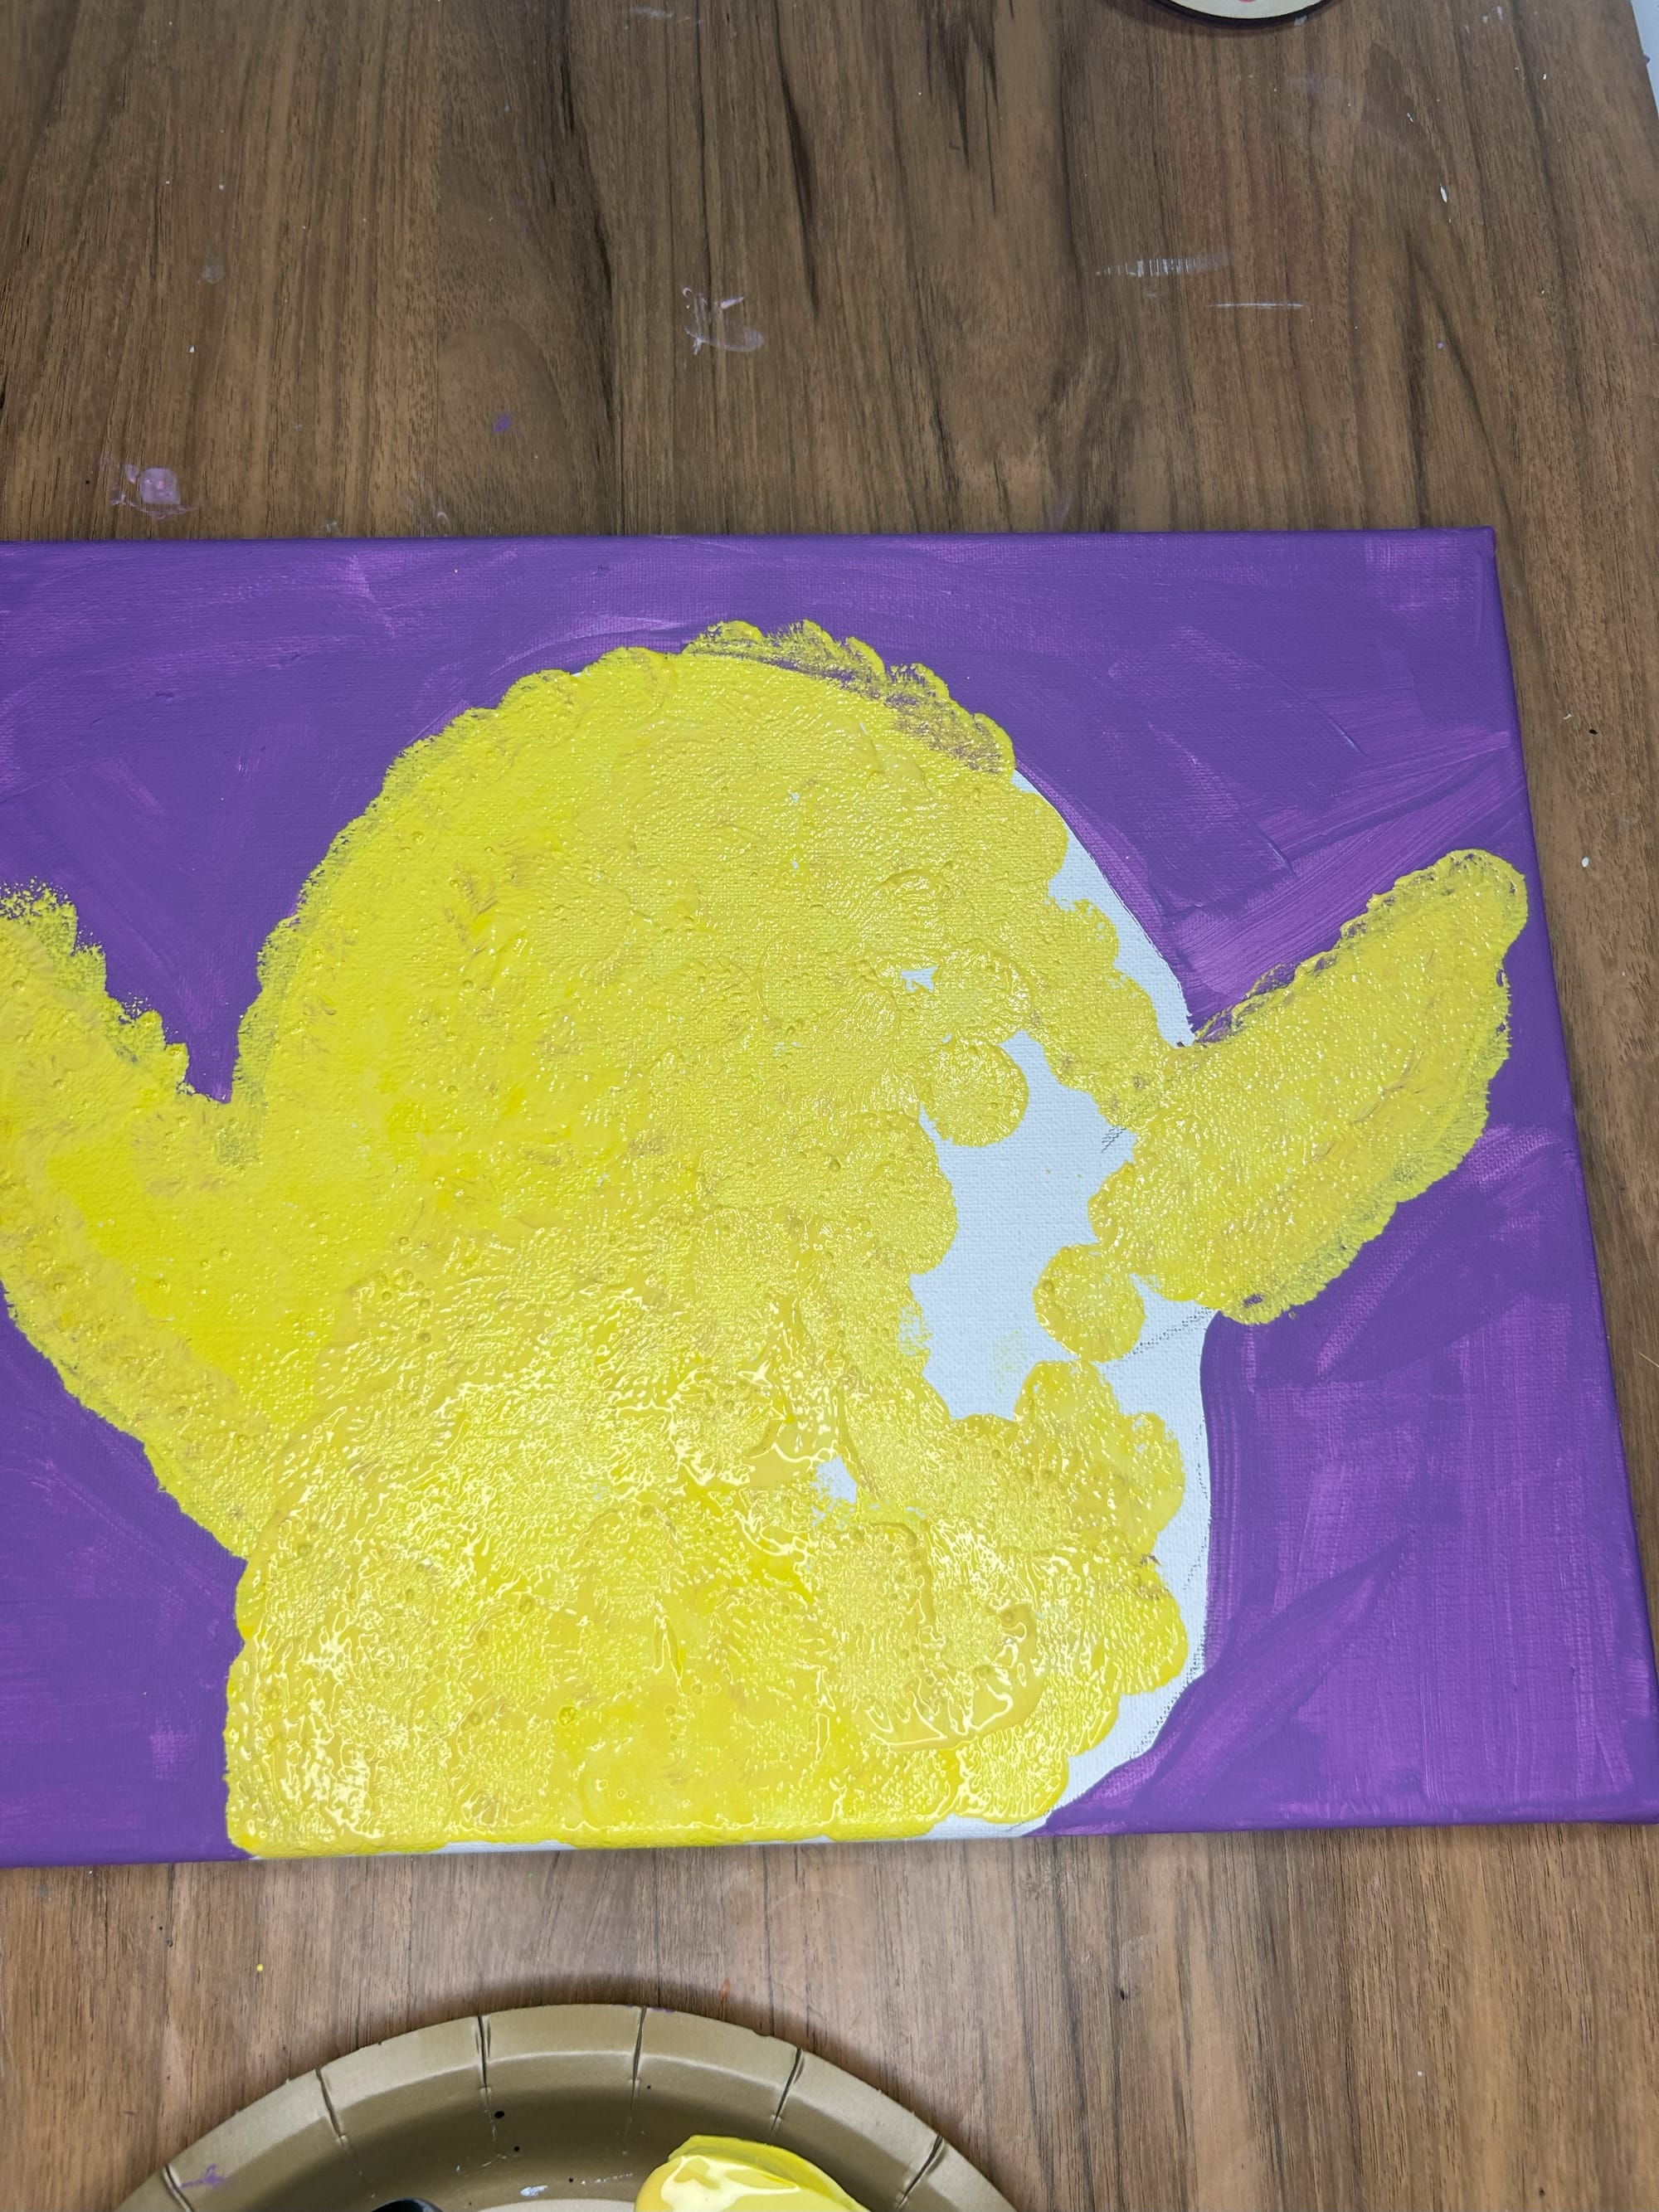
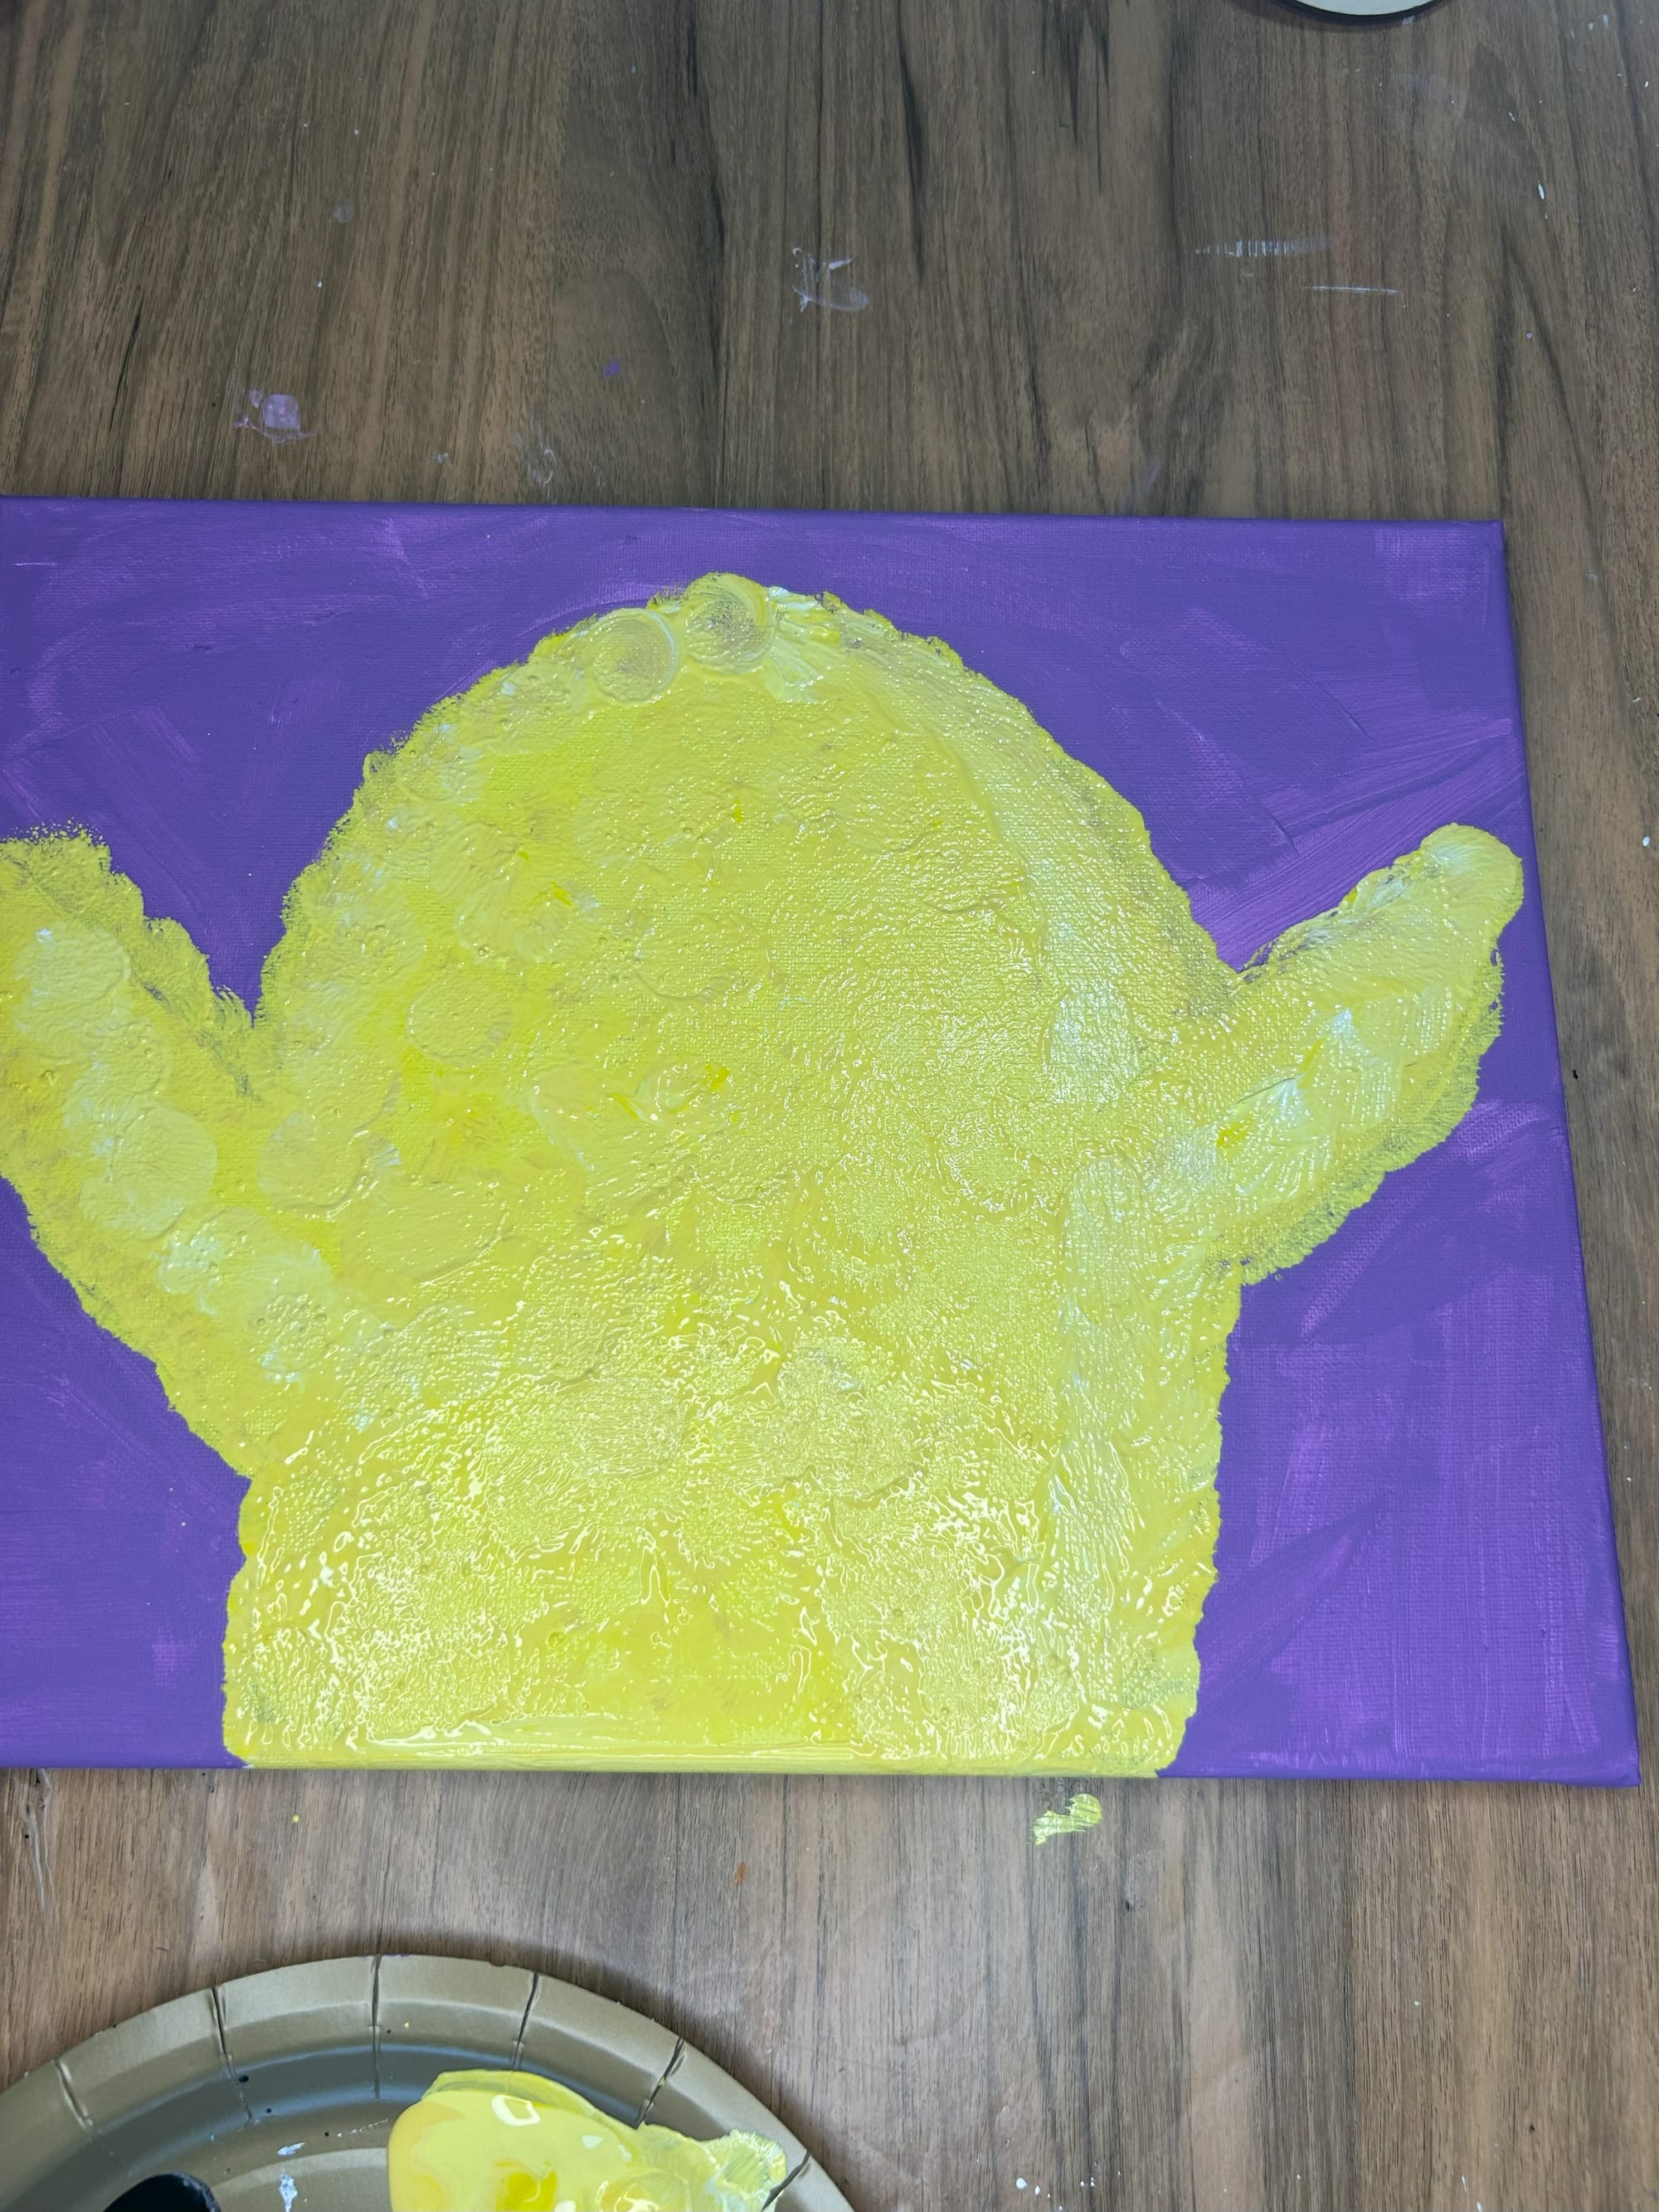
Add yellow paint in and around the chick outline.
Use another color paint to add dots to the background of your painting. This can be done with your finger or a circular sponge brush.
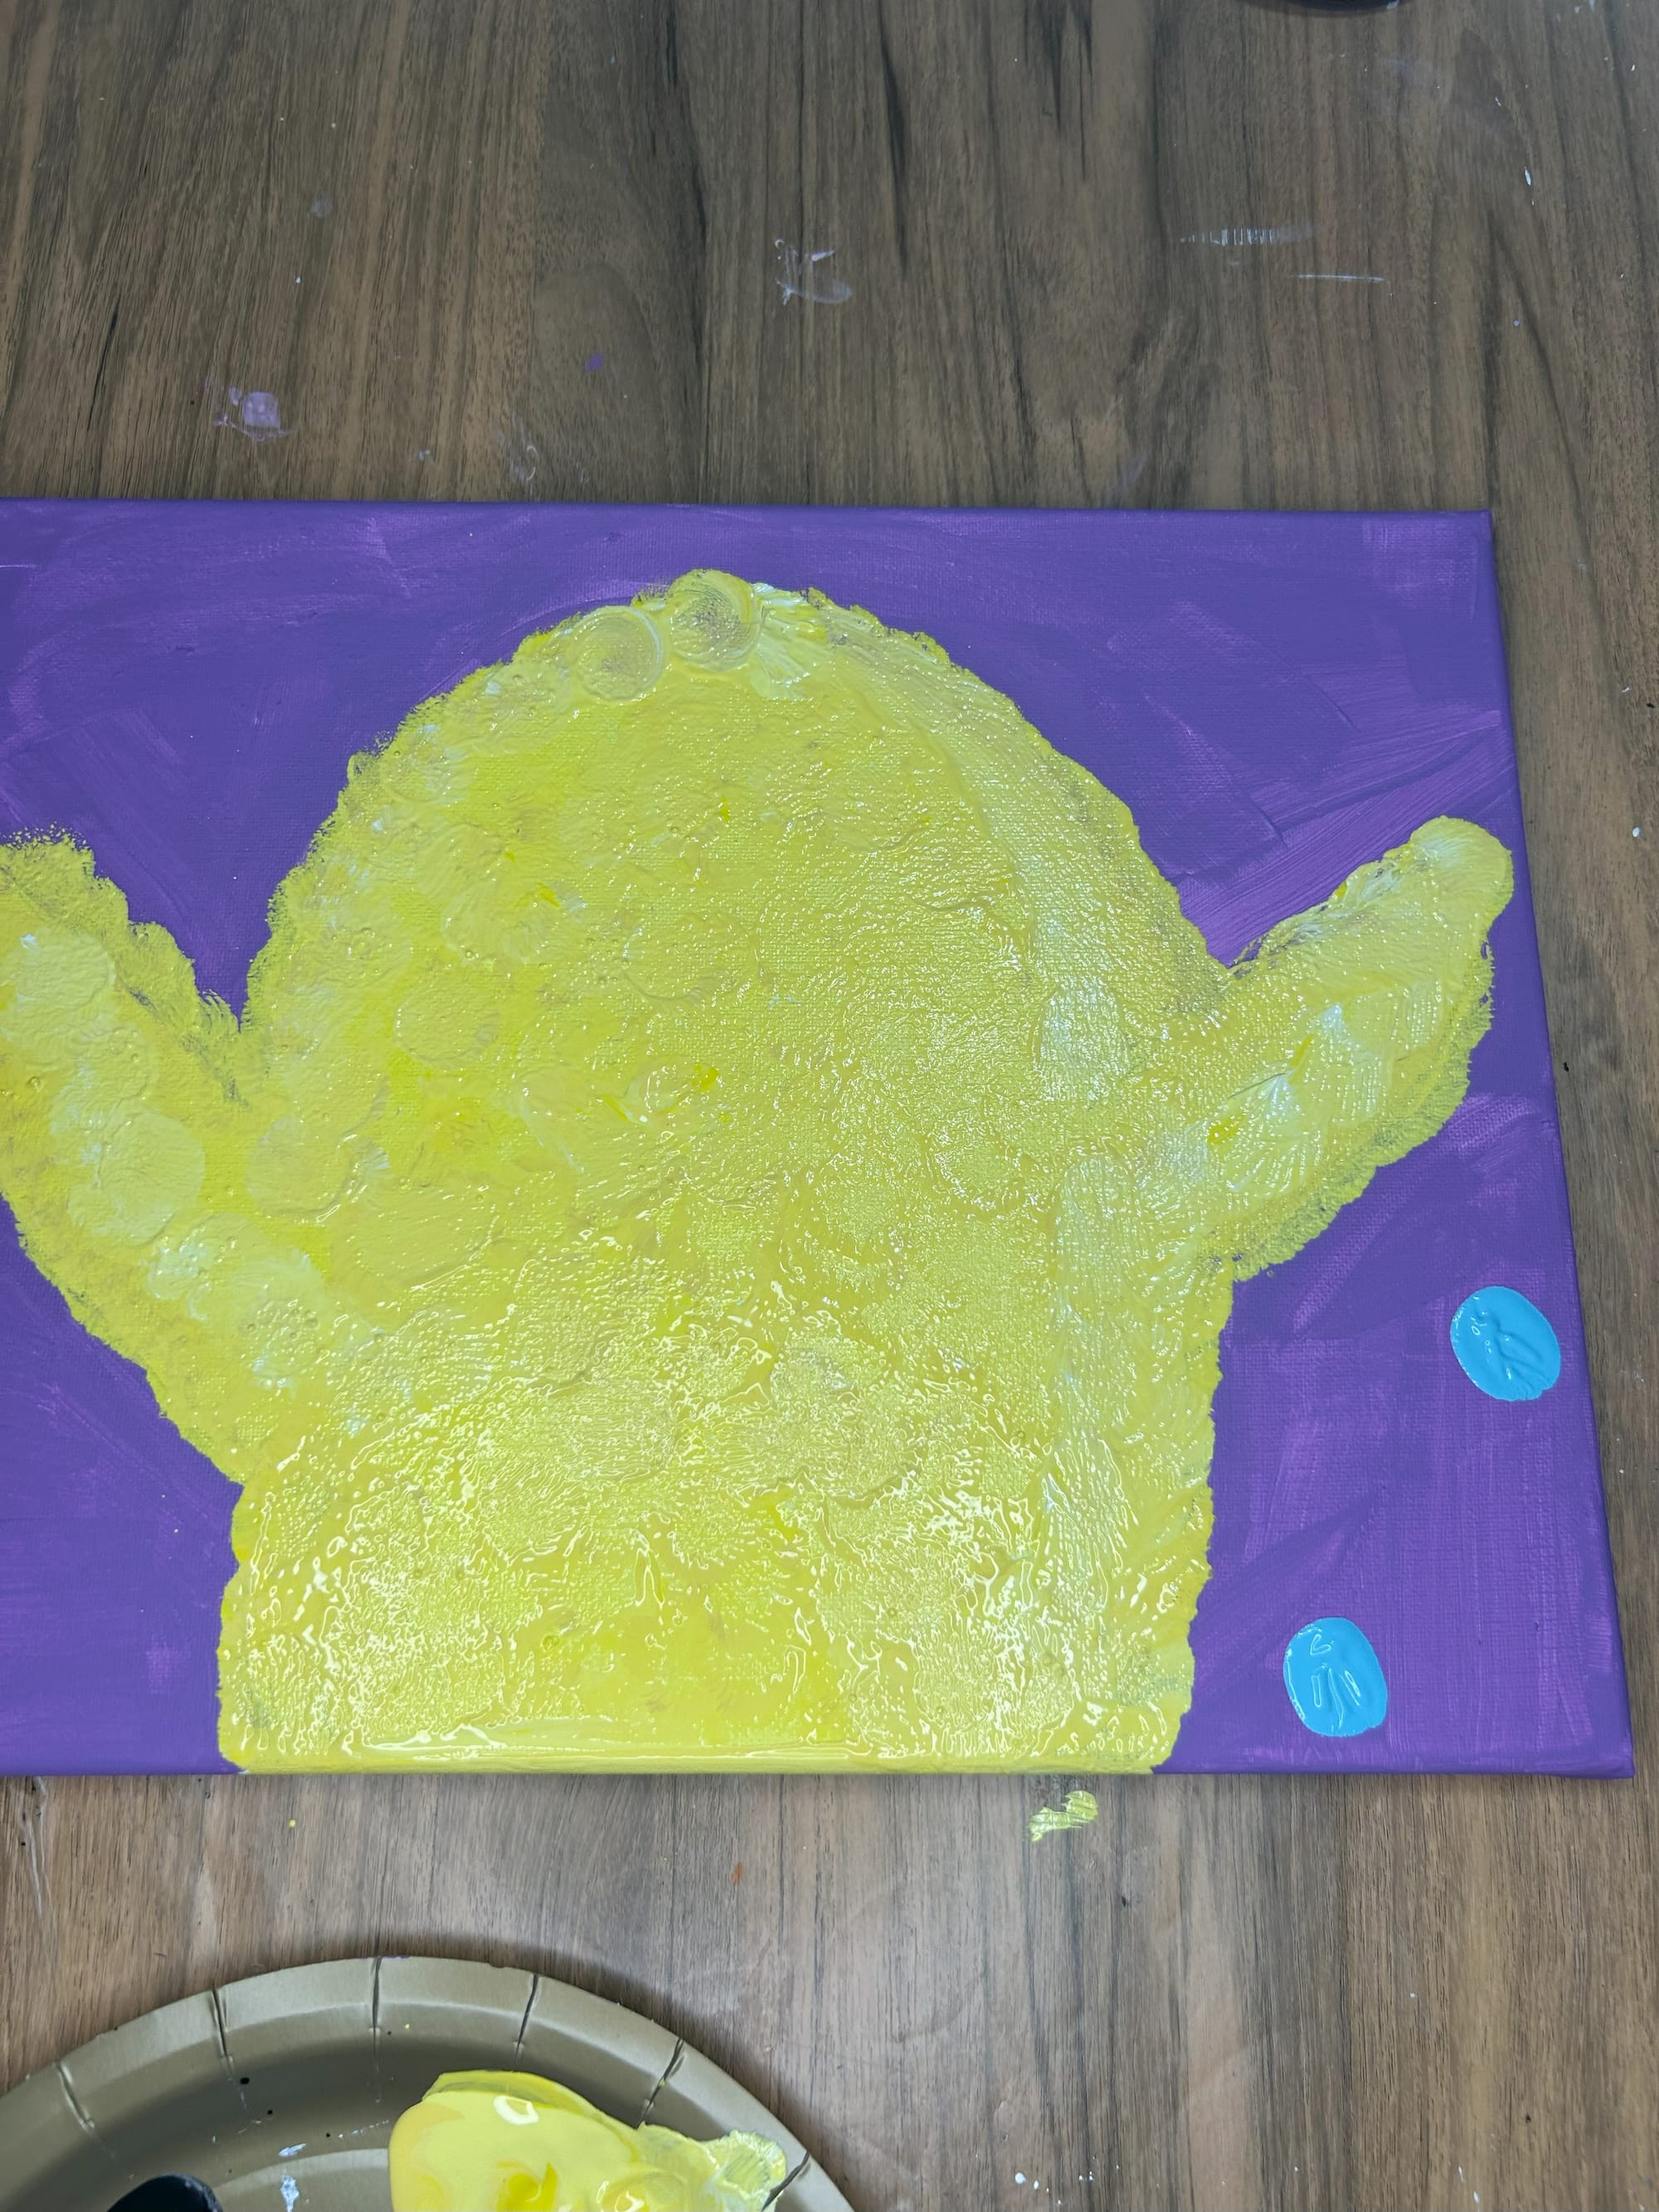
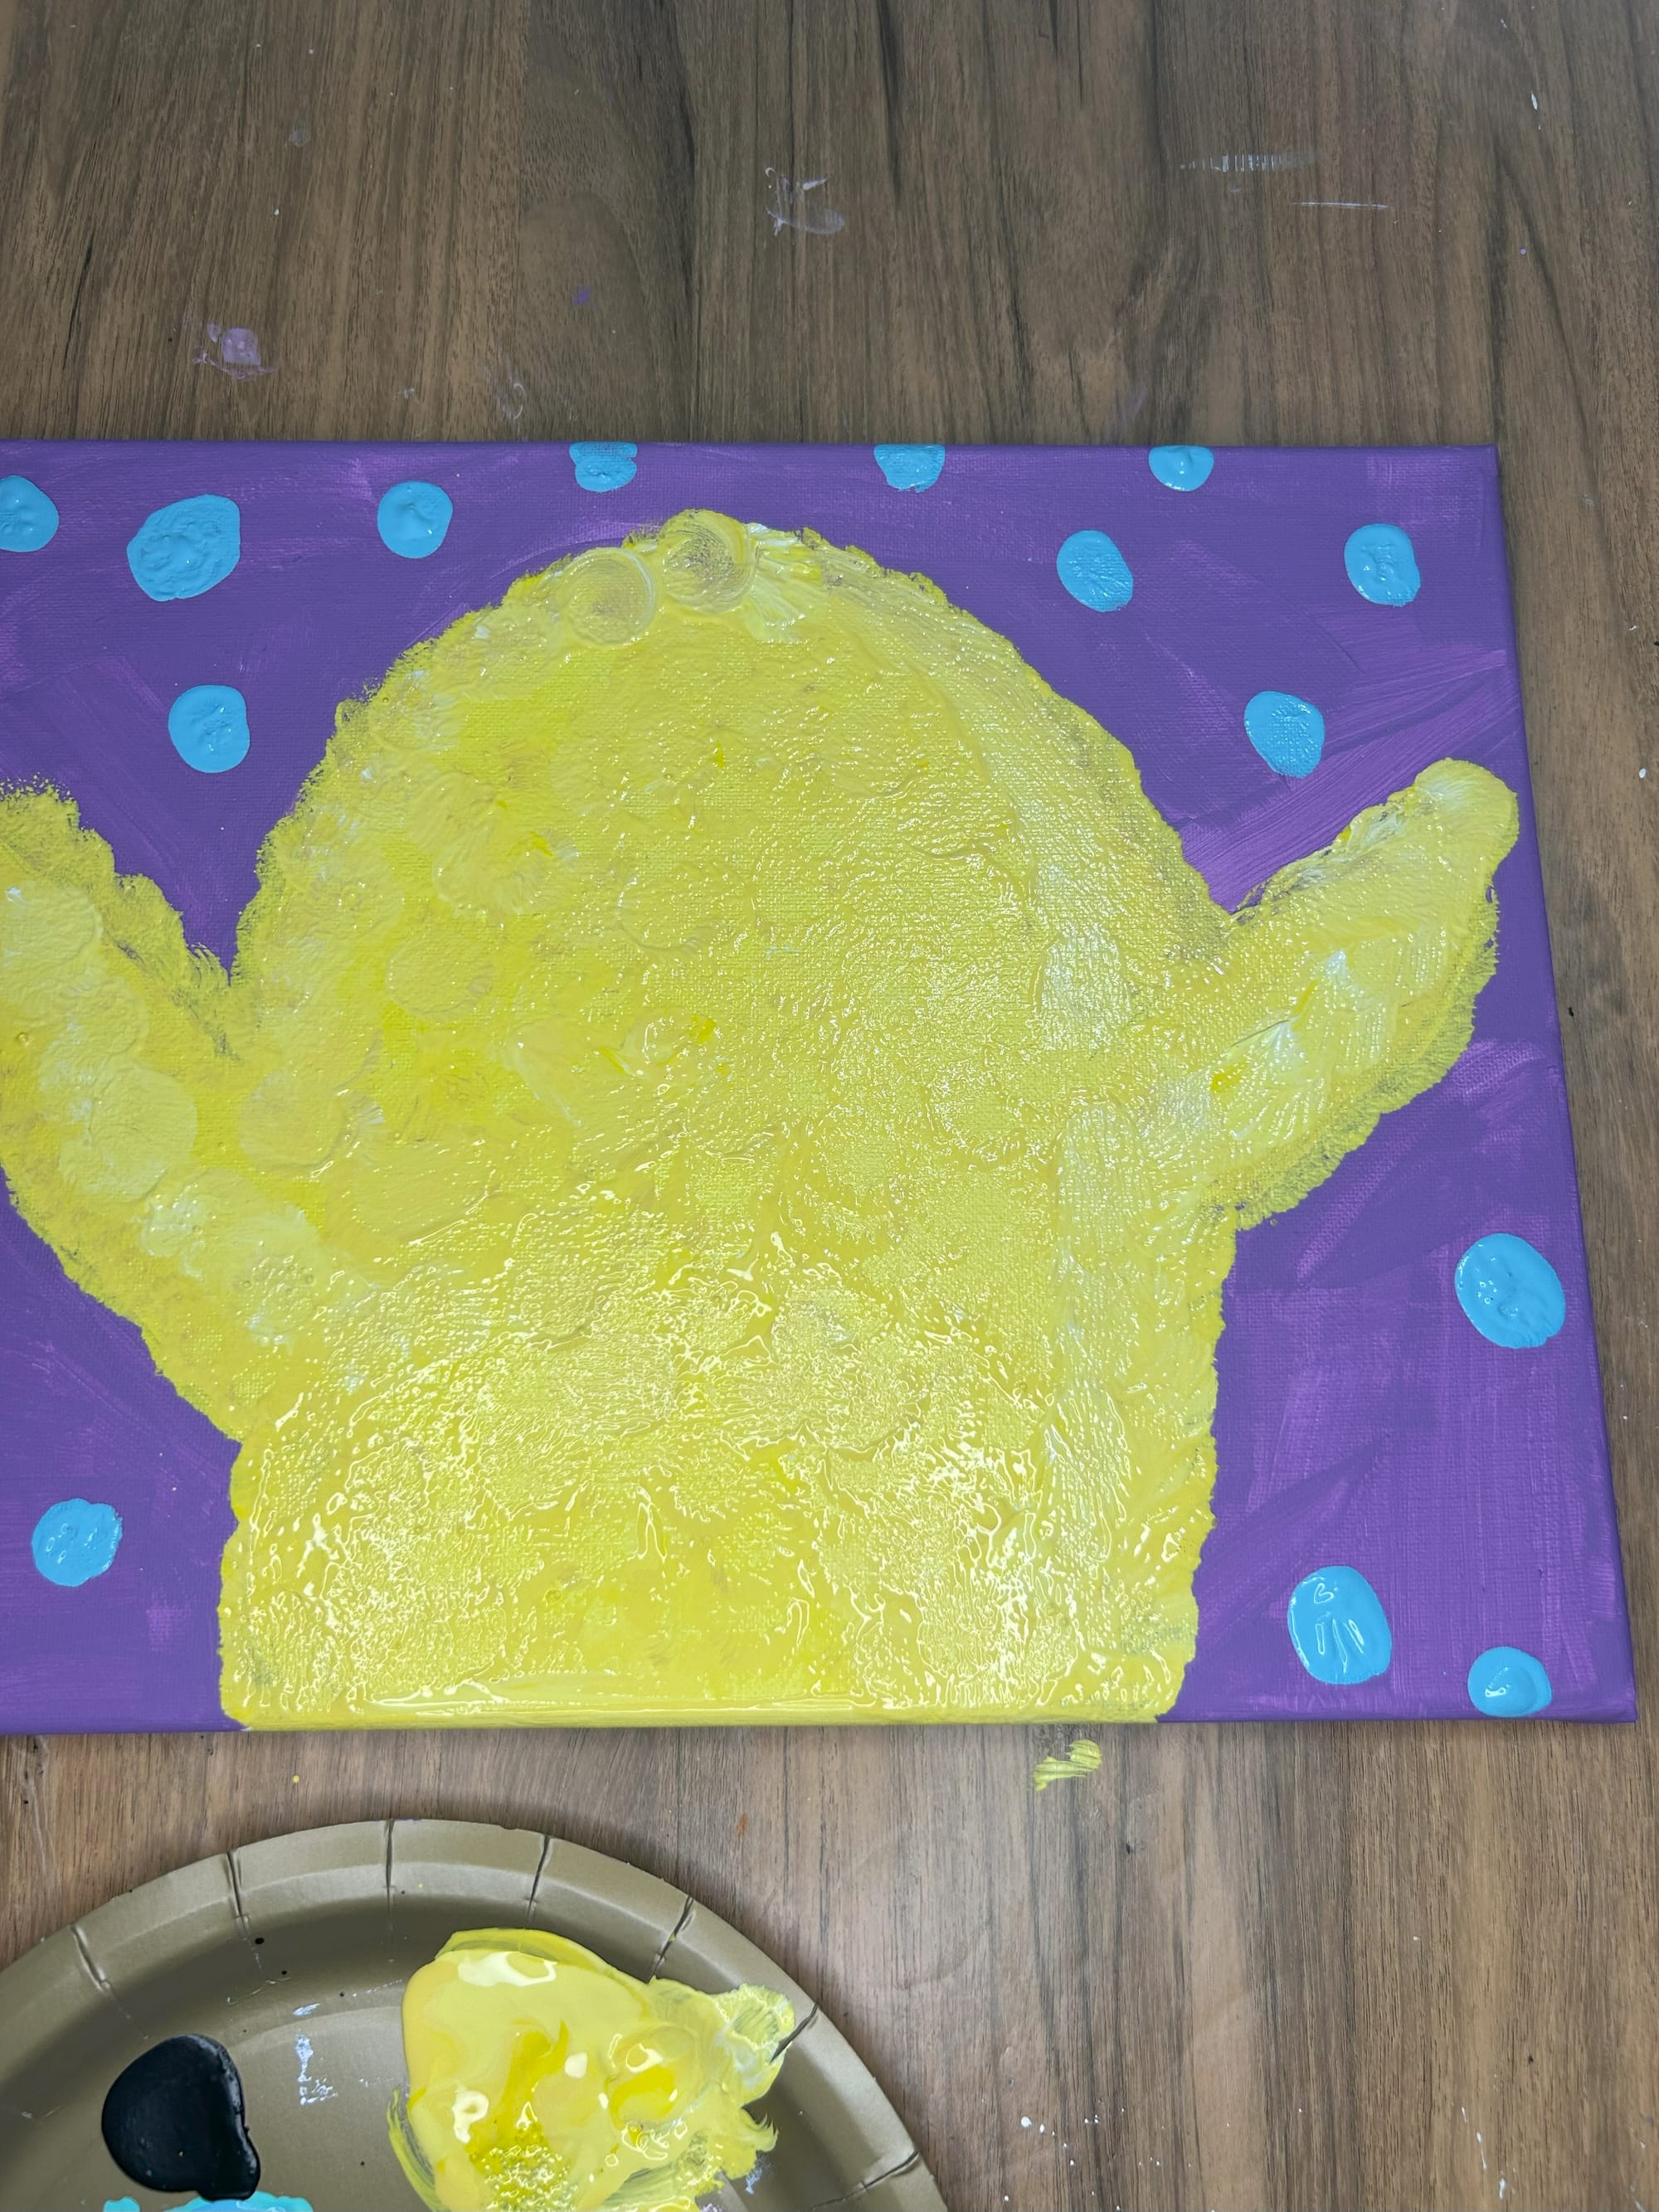
Add dots around your background.
Next, add eyes and a beak. Another suggestion is to cut out eyes and a beak out of paper. Place them where you think you want to paint before you paint. This will help avoid bug mistakes like I made in my bunny picture.

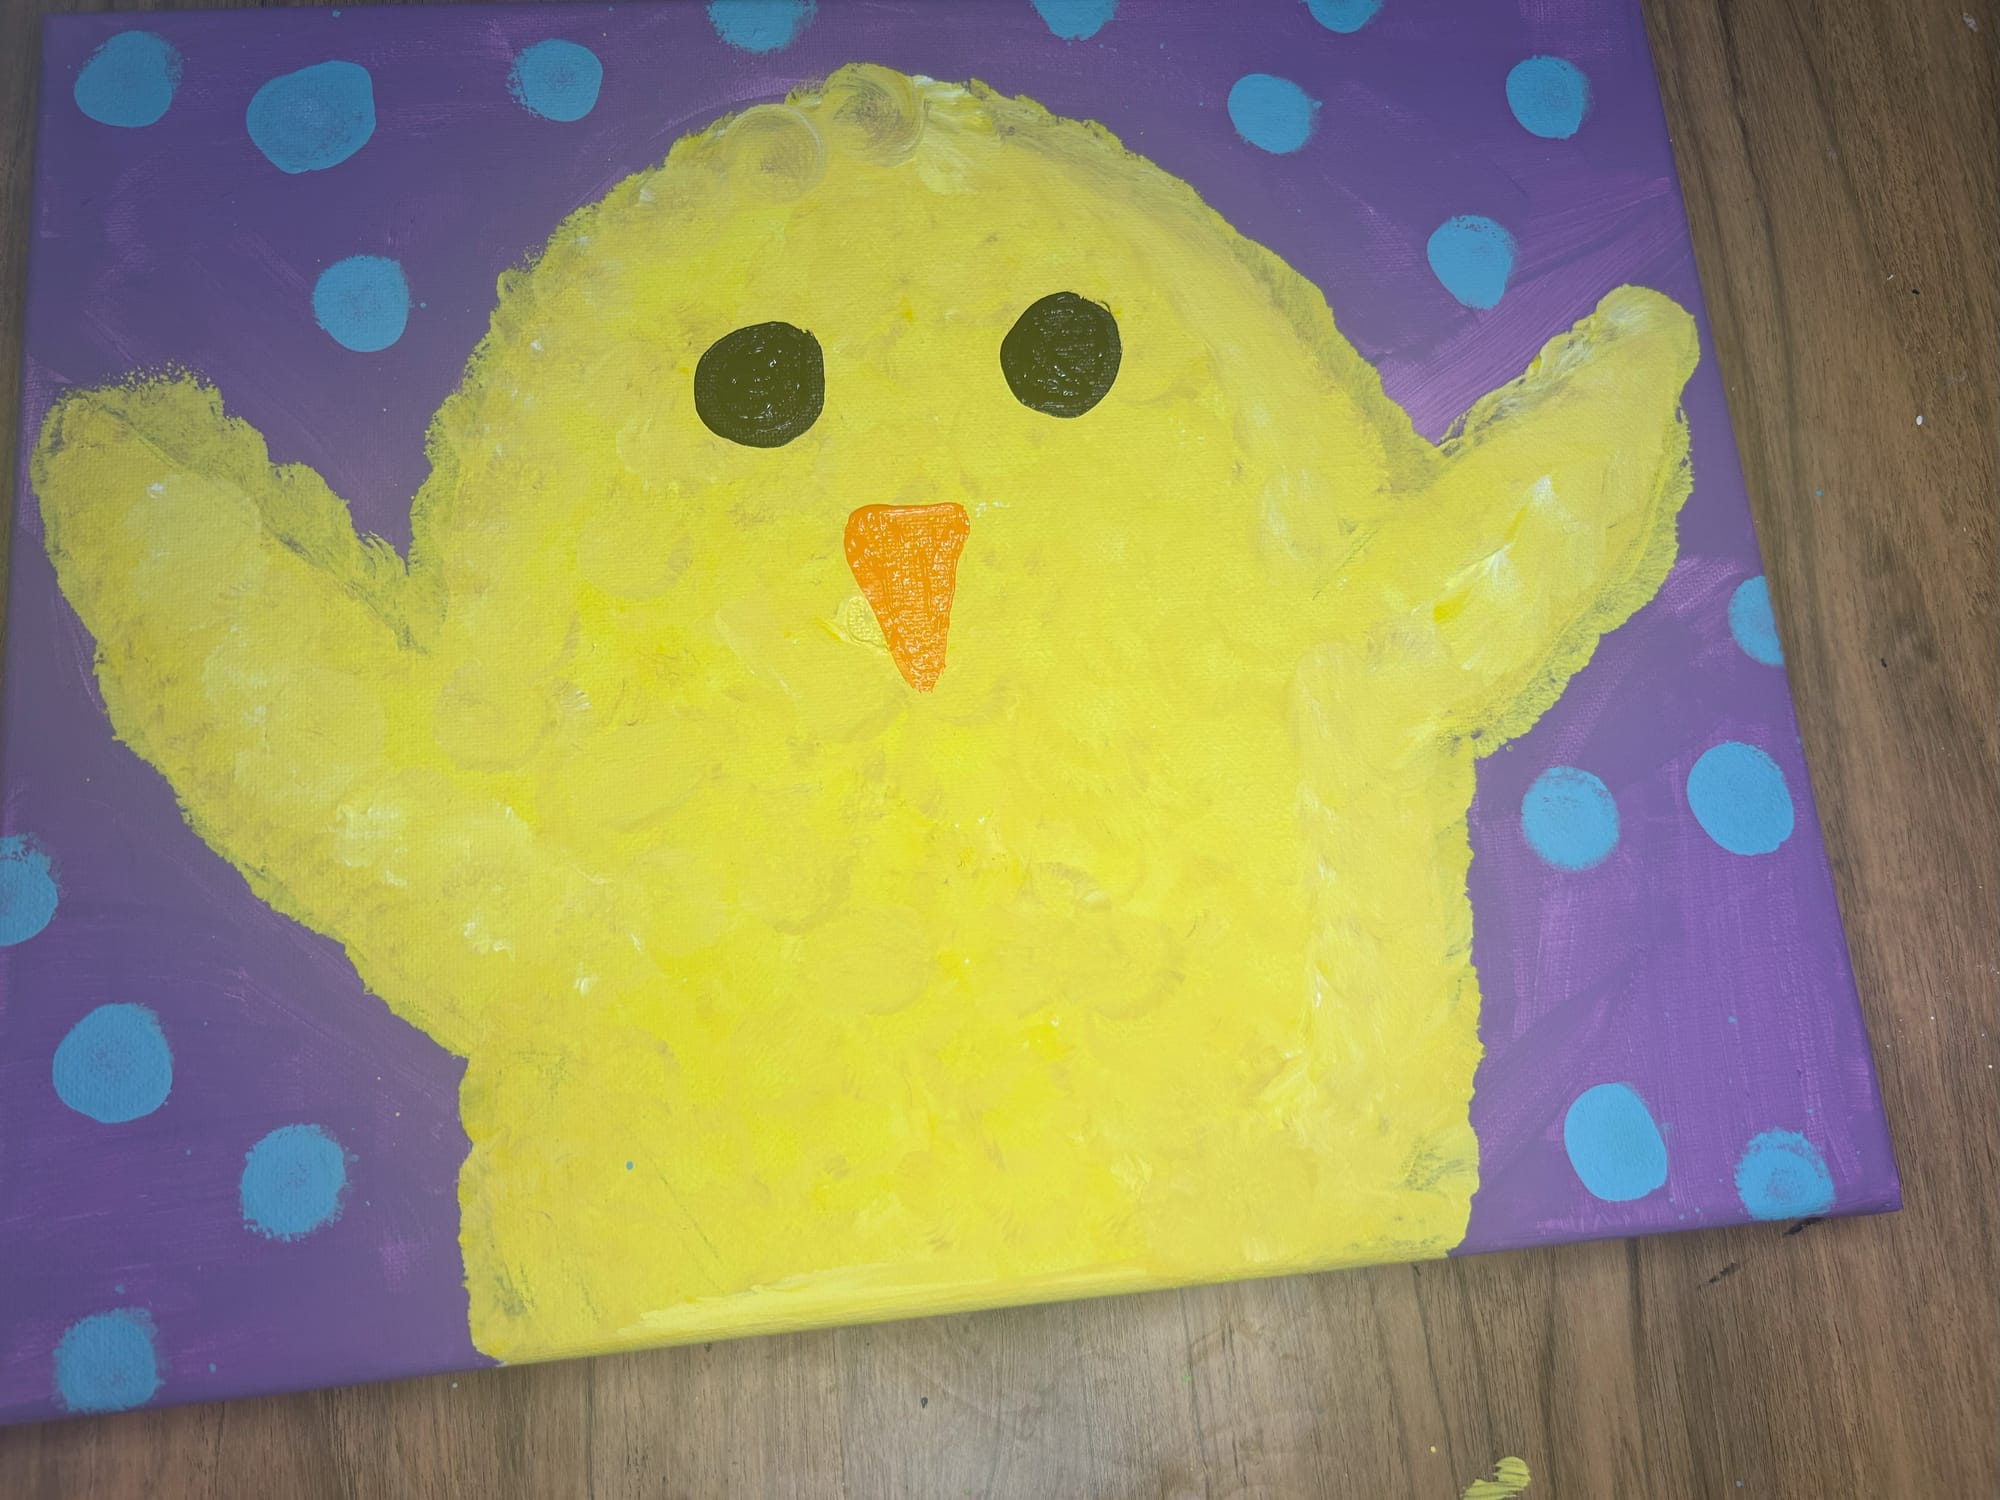
Avoid mistakes by using a template to place your eyes before painting. This will avoid the mistake I made on my bunny painting.
Hang this painting up for cute Spring/Easter decor in your home.