Dollar Tree Heart Craft (McKenzie-Child–Inspired Valentine Decor)
I recently fell in love with a set of black-and-white heart decorations inspired by McKenzie-Child, but the price tag made me pause. Instead of splurging, I decided to create my own version using Dollar Tree wooden hearts—and I’m so glad I did!
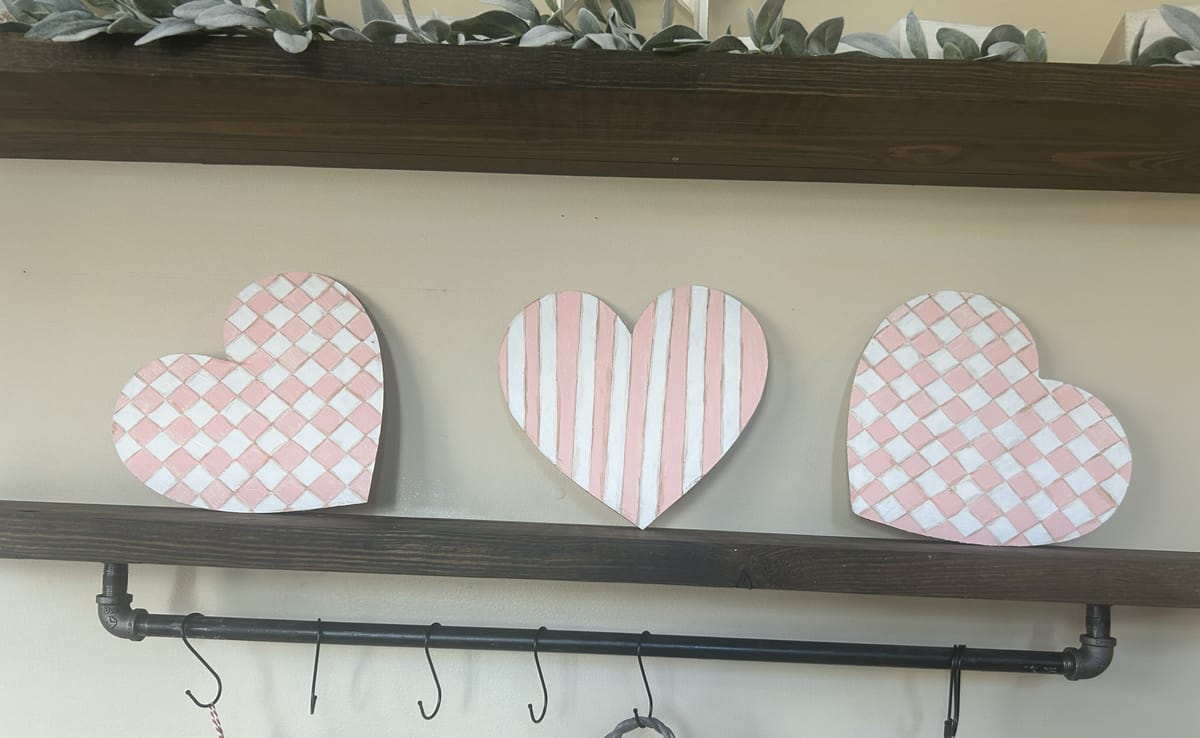
This Dollar Tree heart craft is an easy and budget-friendly way to create charming Valentine’s Day decor that looks high-end without the high cost. With a few simple supplies and some paint, you can make beautiful hearts perfect for shelves, tiered trays, or gift giving.
Why You’ll Love This Dollar Tree Heart Craft
- ❤️ Affordable DIY Valentine decor
- 🎨 Inspired by classic McKenzie-Child patterns
- 🖤 Simple designs with a pop of color
- 🛒 Uses easy-to-find Dollar Tree supplies
- 🖐️ Fun and relaxing craft for adults
Materials You’ll Need
- Dollar Tree wooden hearts
- White acrylic paint
- Pink acrylic paint
- Gold paint (optional, for accents)
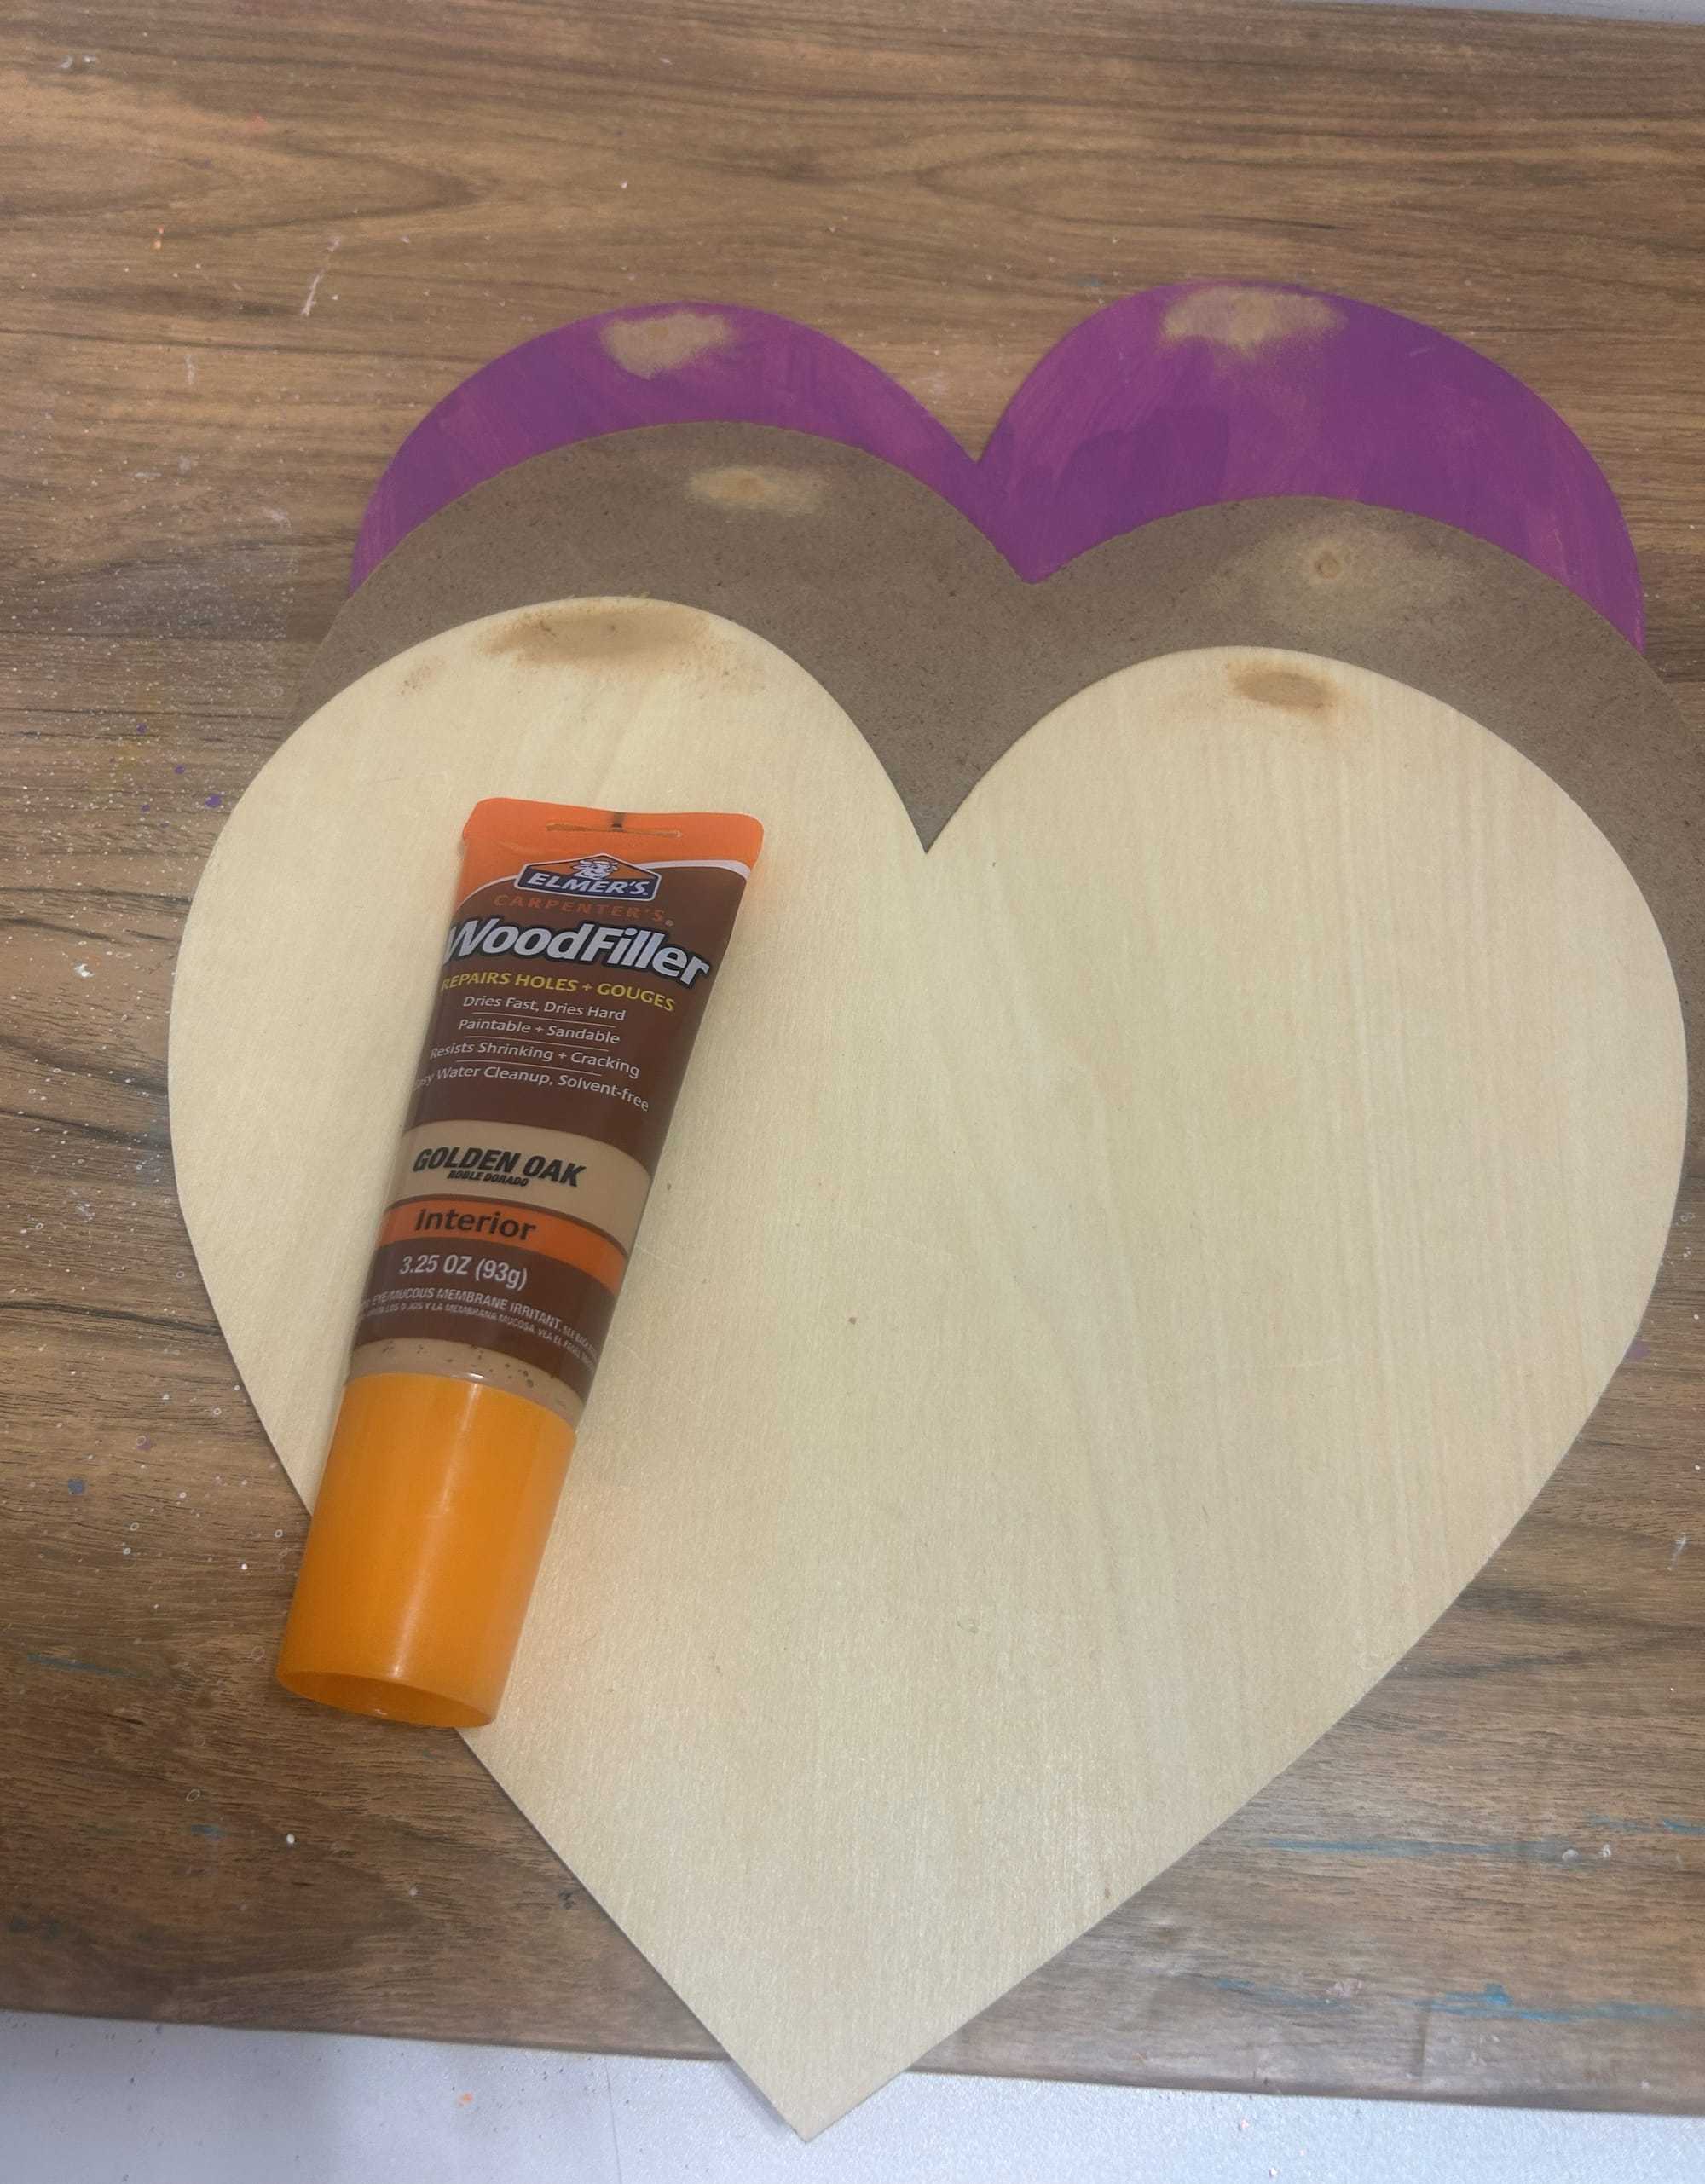
- Wood filler
- Ruler
- Pencil
- Washi tape
- Paintbrushes
- Paper towel or baby wipe
Step 1: Paint the Wooden Hearts
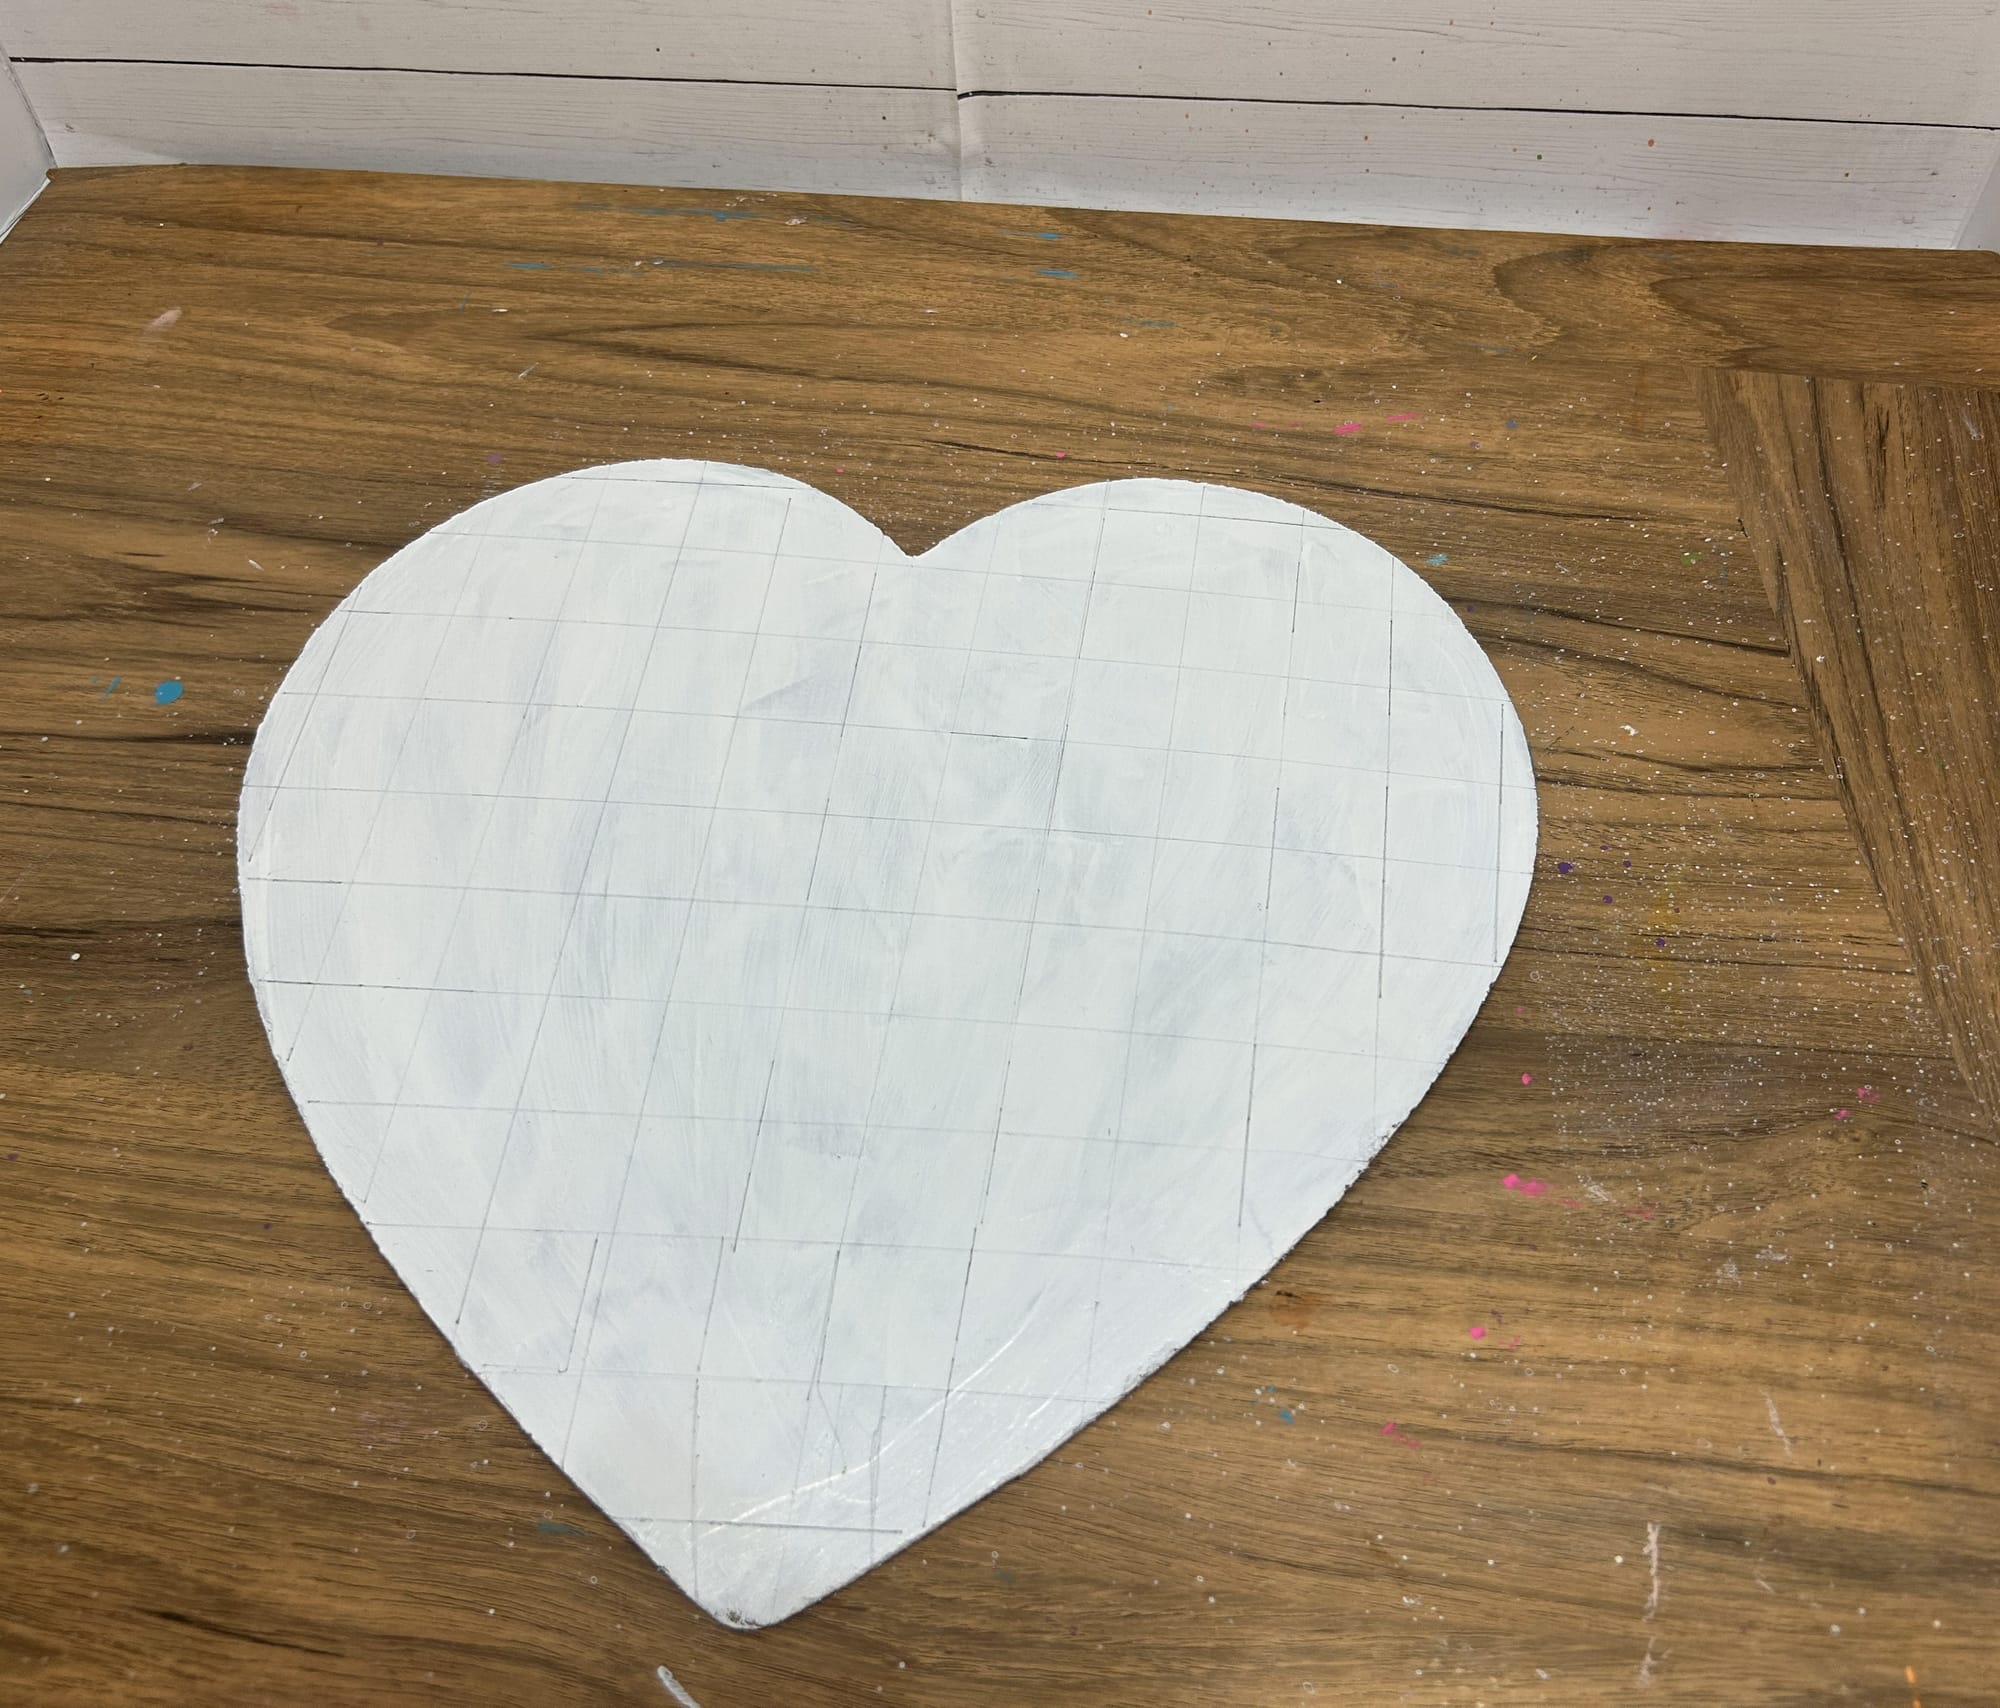
I love using these Dollar tree wooden hearts. They are easy to decorate and change. As you can see from the picture below I had previously painted one of the hearts purple. I decided I did not like what I created, so white paint to the rescue. To begin this craft, I removed the twine that was attached to each heart. I added a wood filler to the holes at the top of the hearts. After, allowing the wood filler to dry I painted each heart with white acrylic paint.
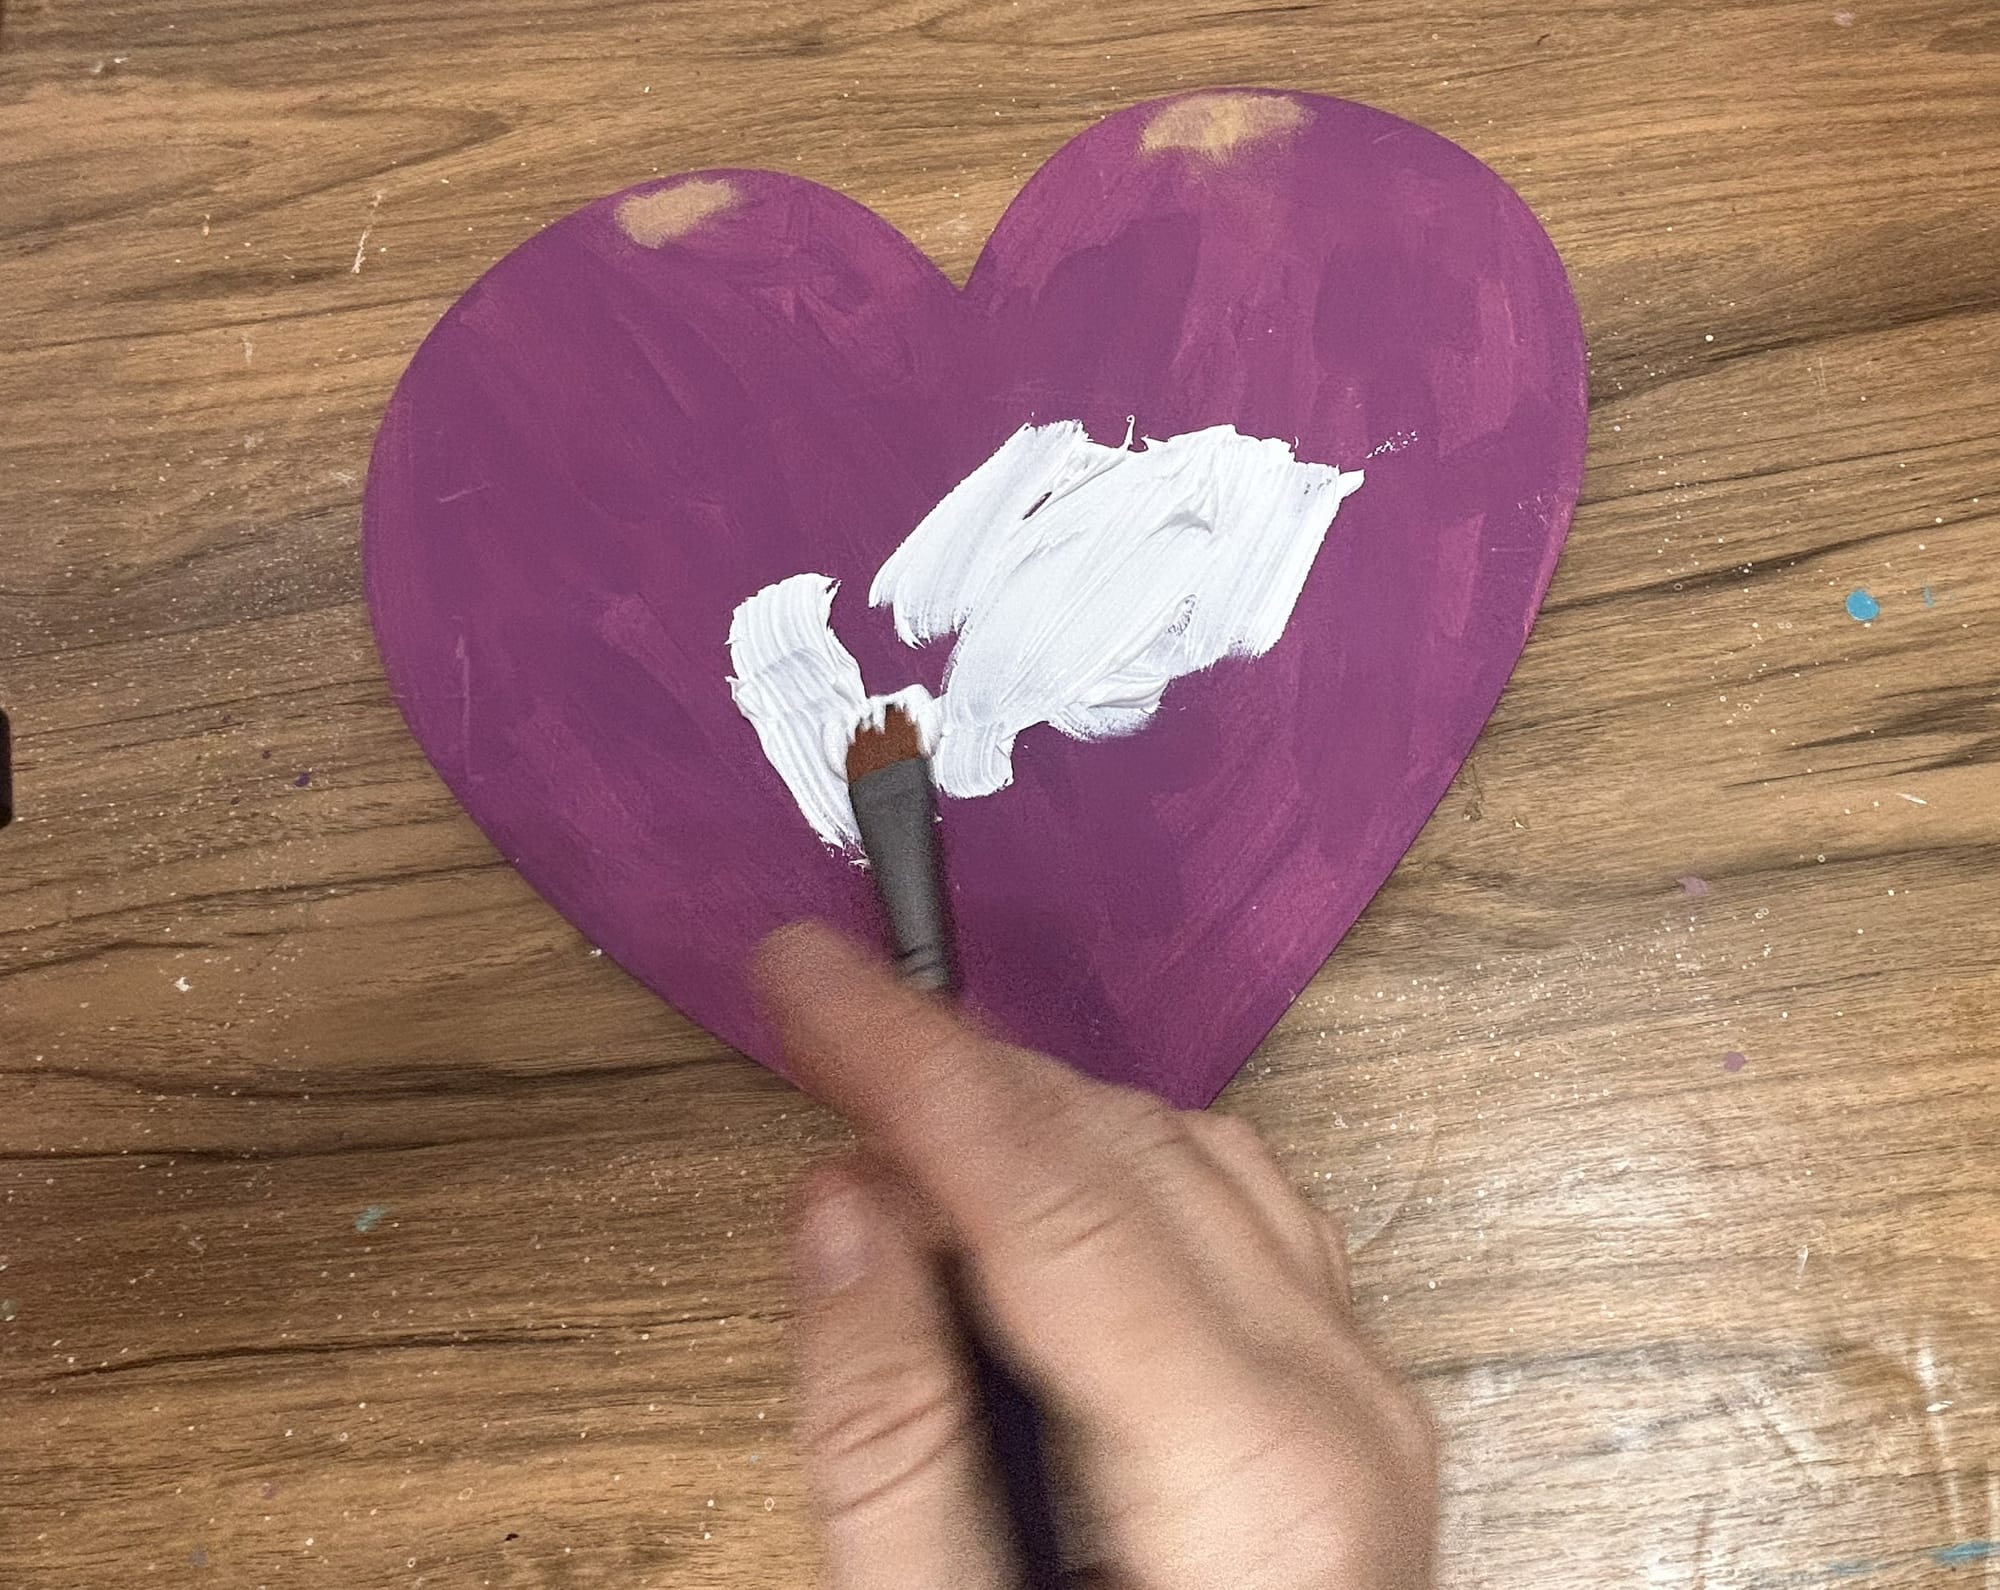
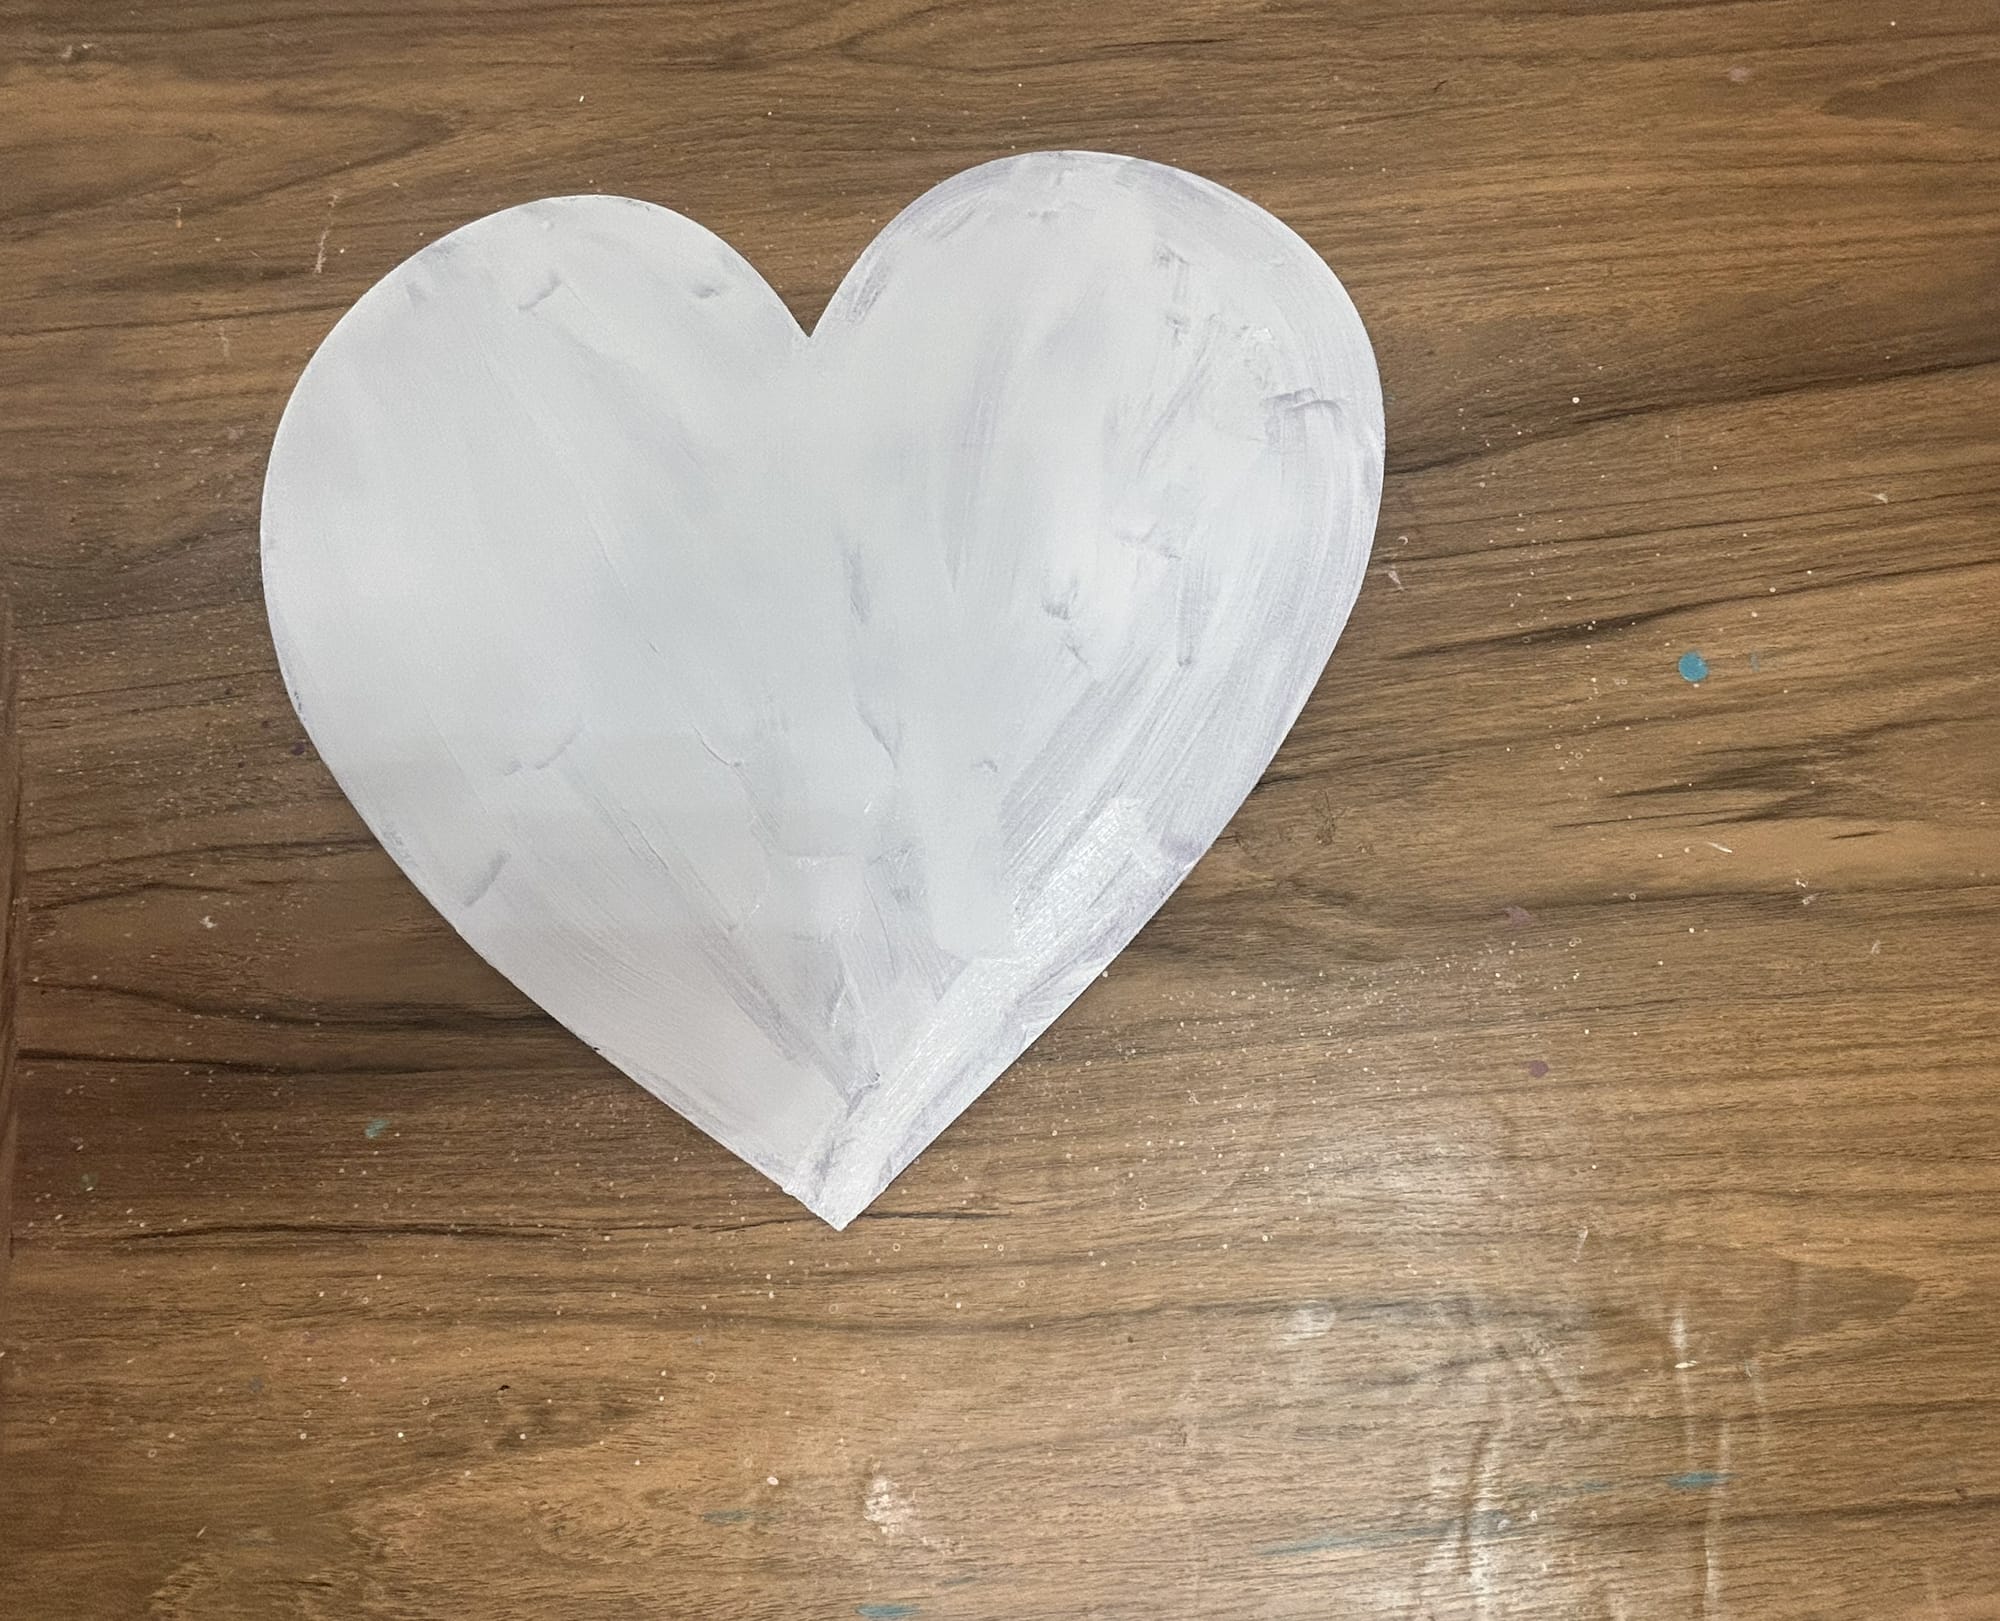
Paint each heart with white acrylic paint, app;;y another coat if necessary.
Step 2: Plan your Design
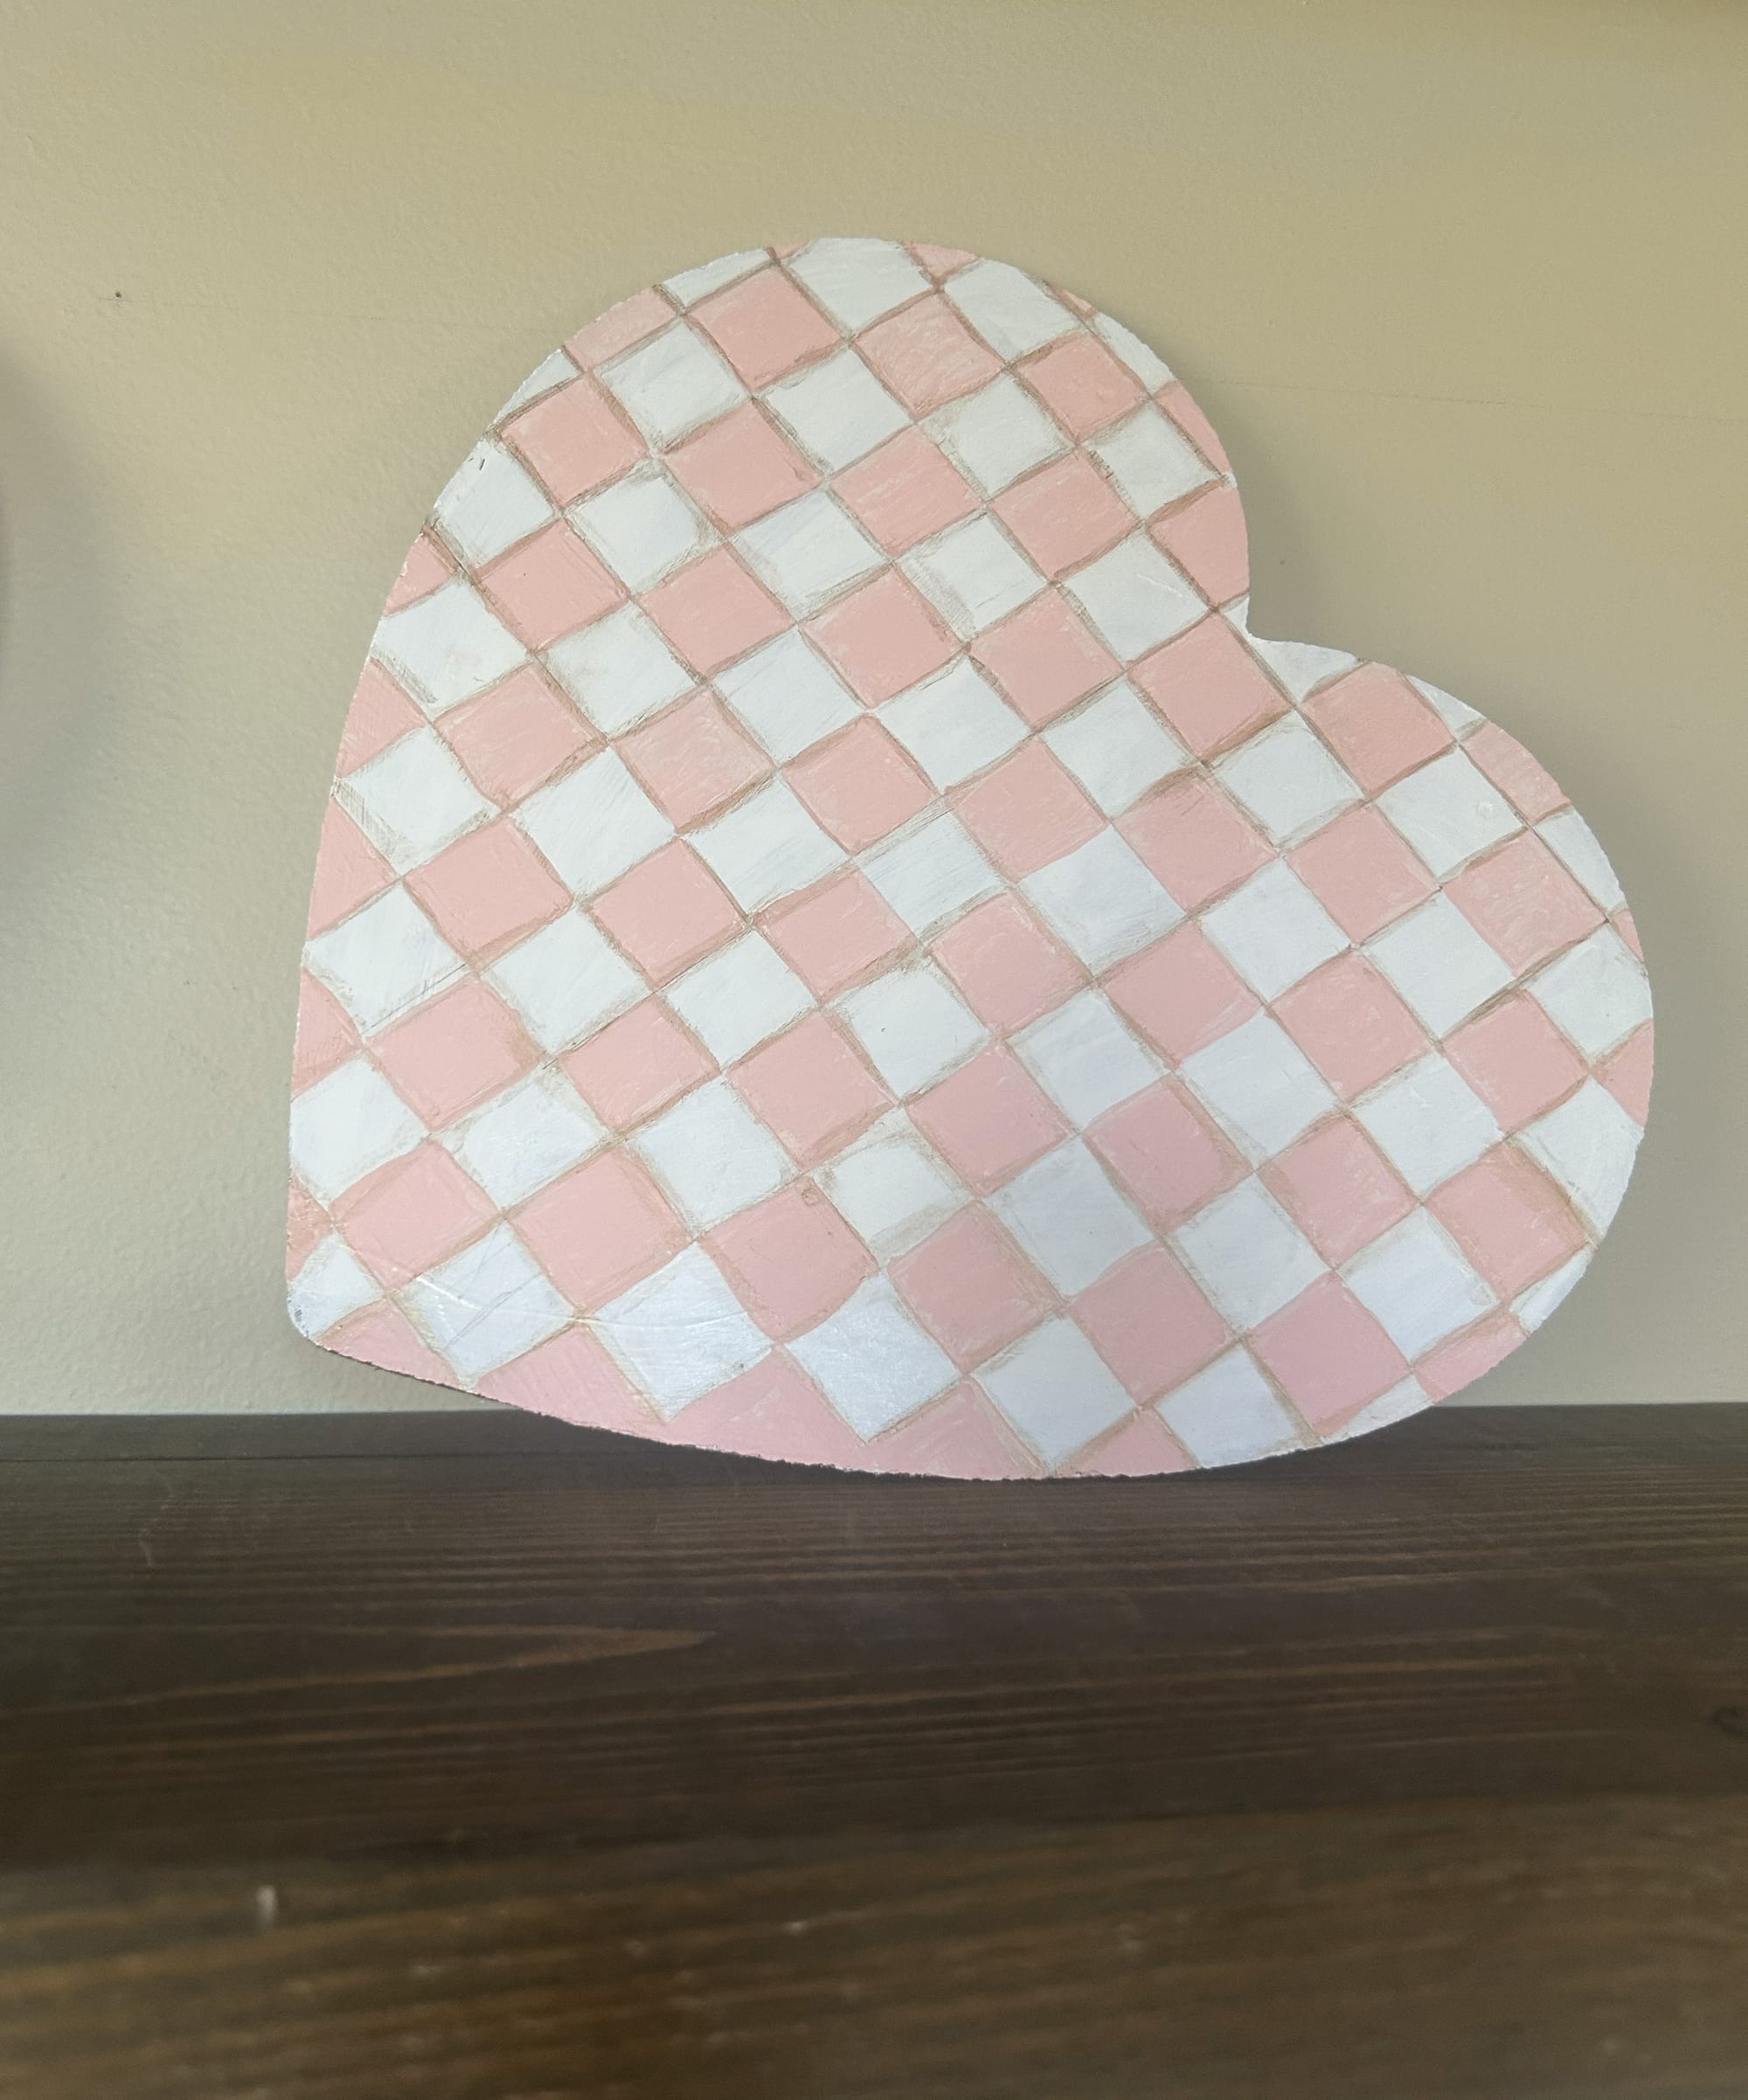
After painting each heart allow the paint to dry. Reapply another coat of paint if necessary. Then prepare each heart for painting. To create the checkered patten use a ruler and pencil to draw the squares. You can choose to make these any size you want. I used my ruler as a guide to create my grid.
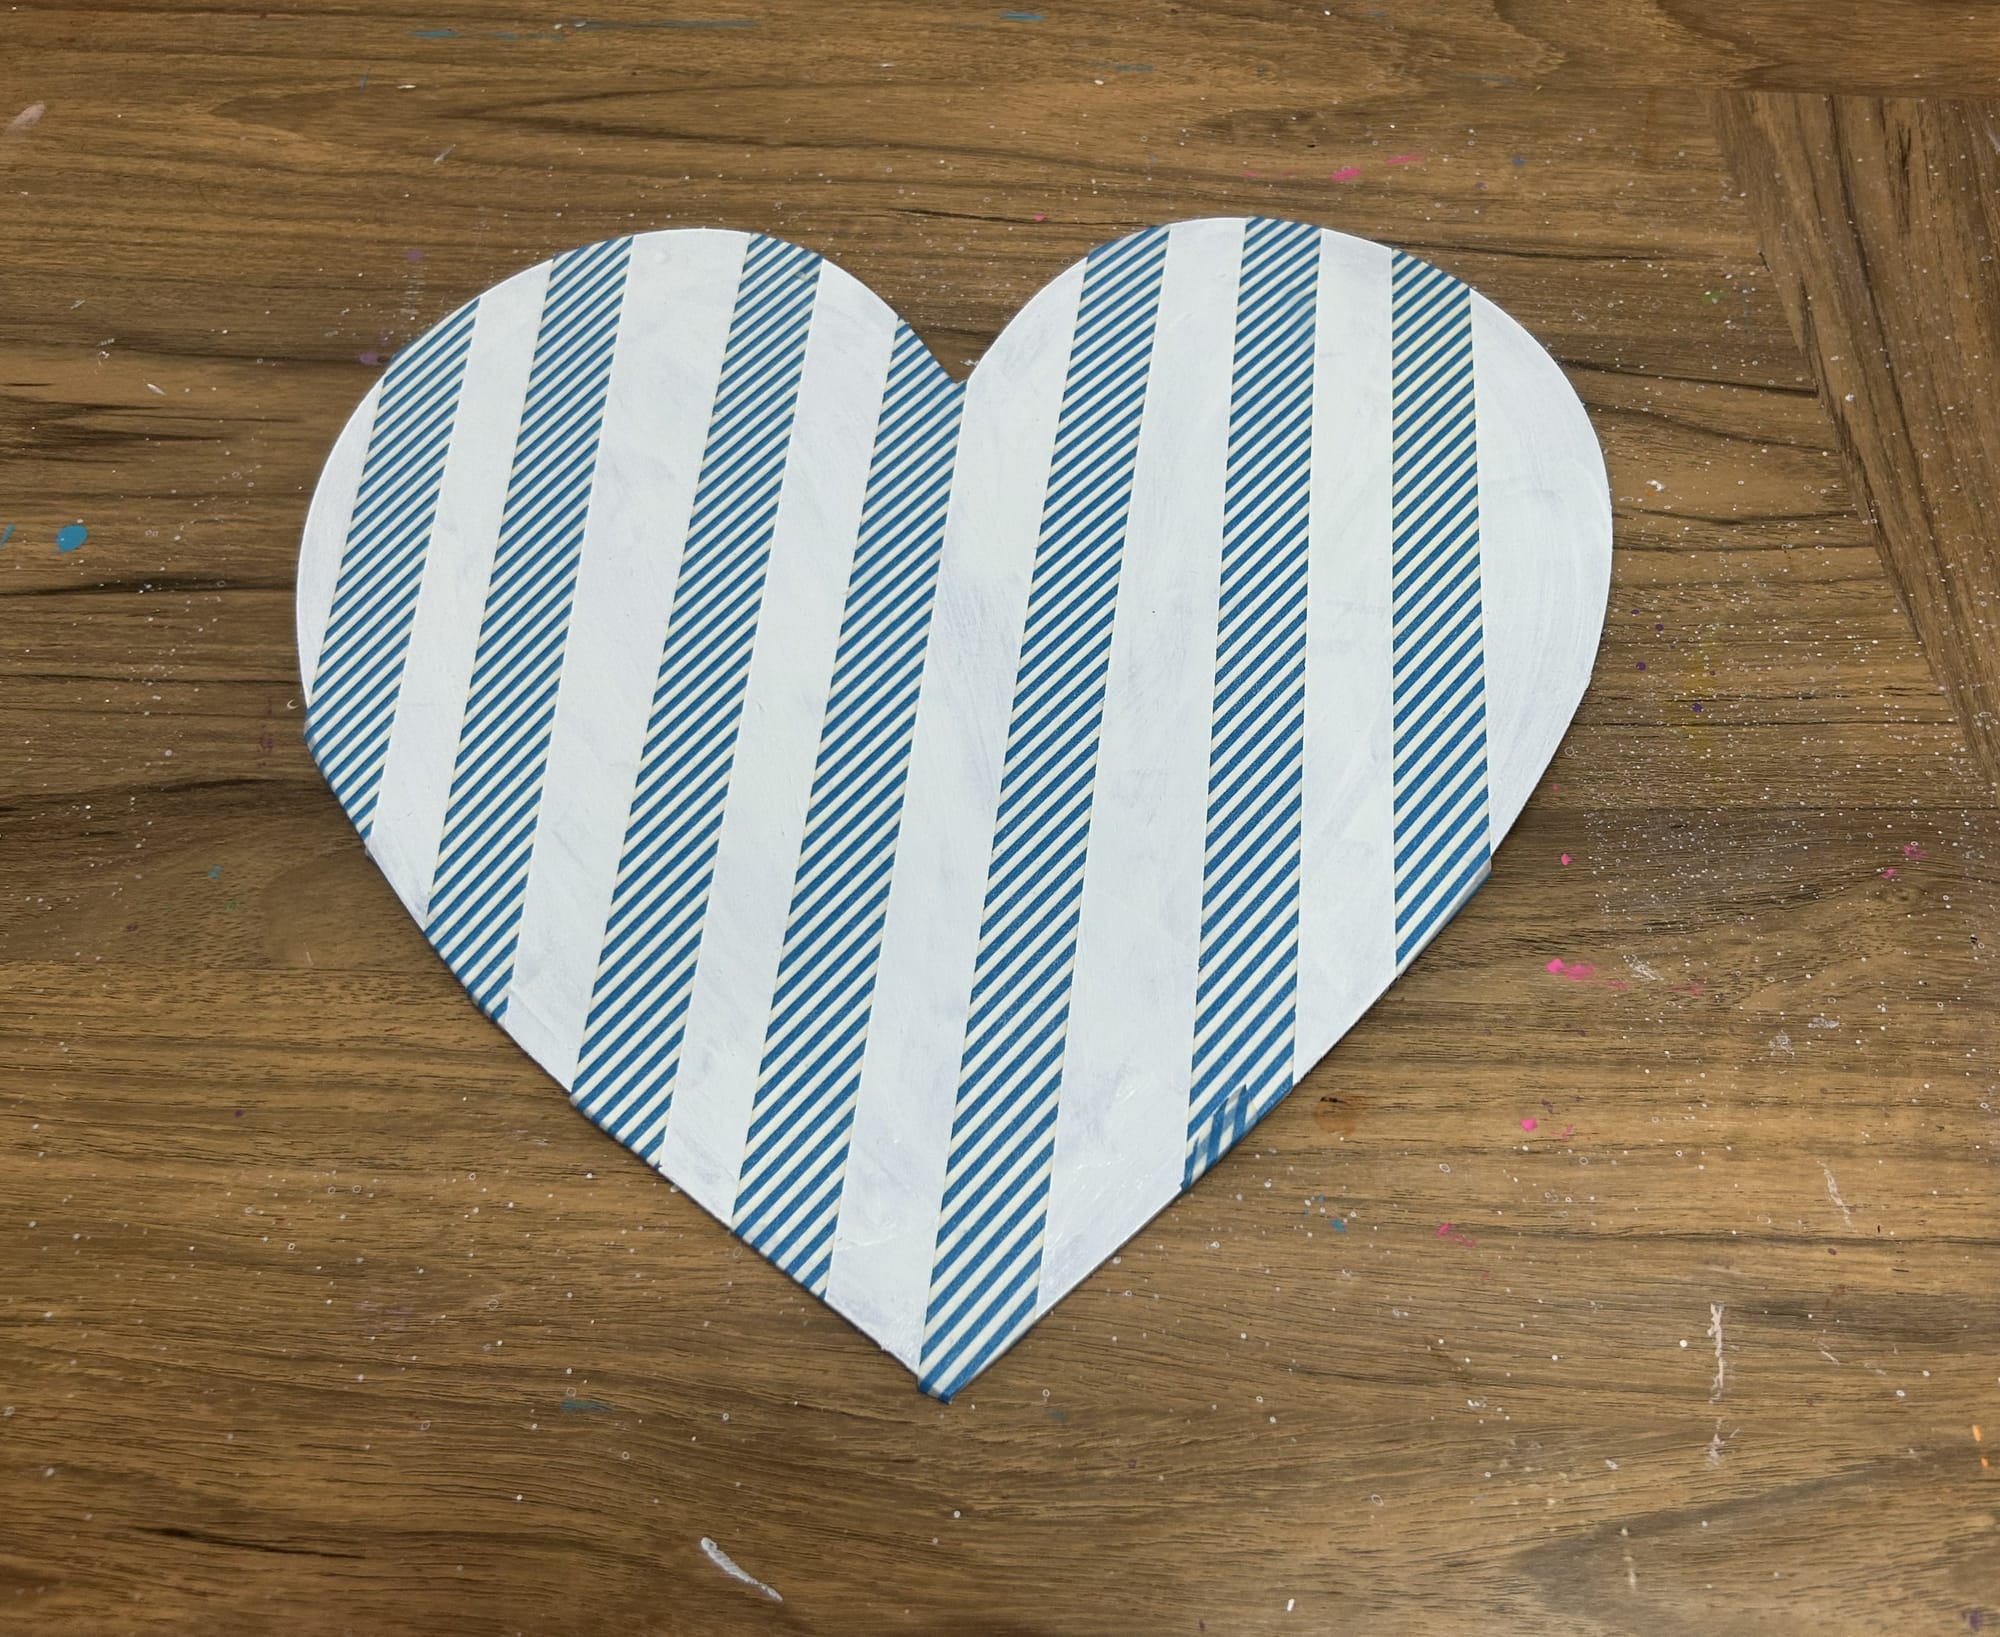
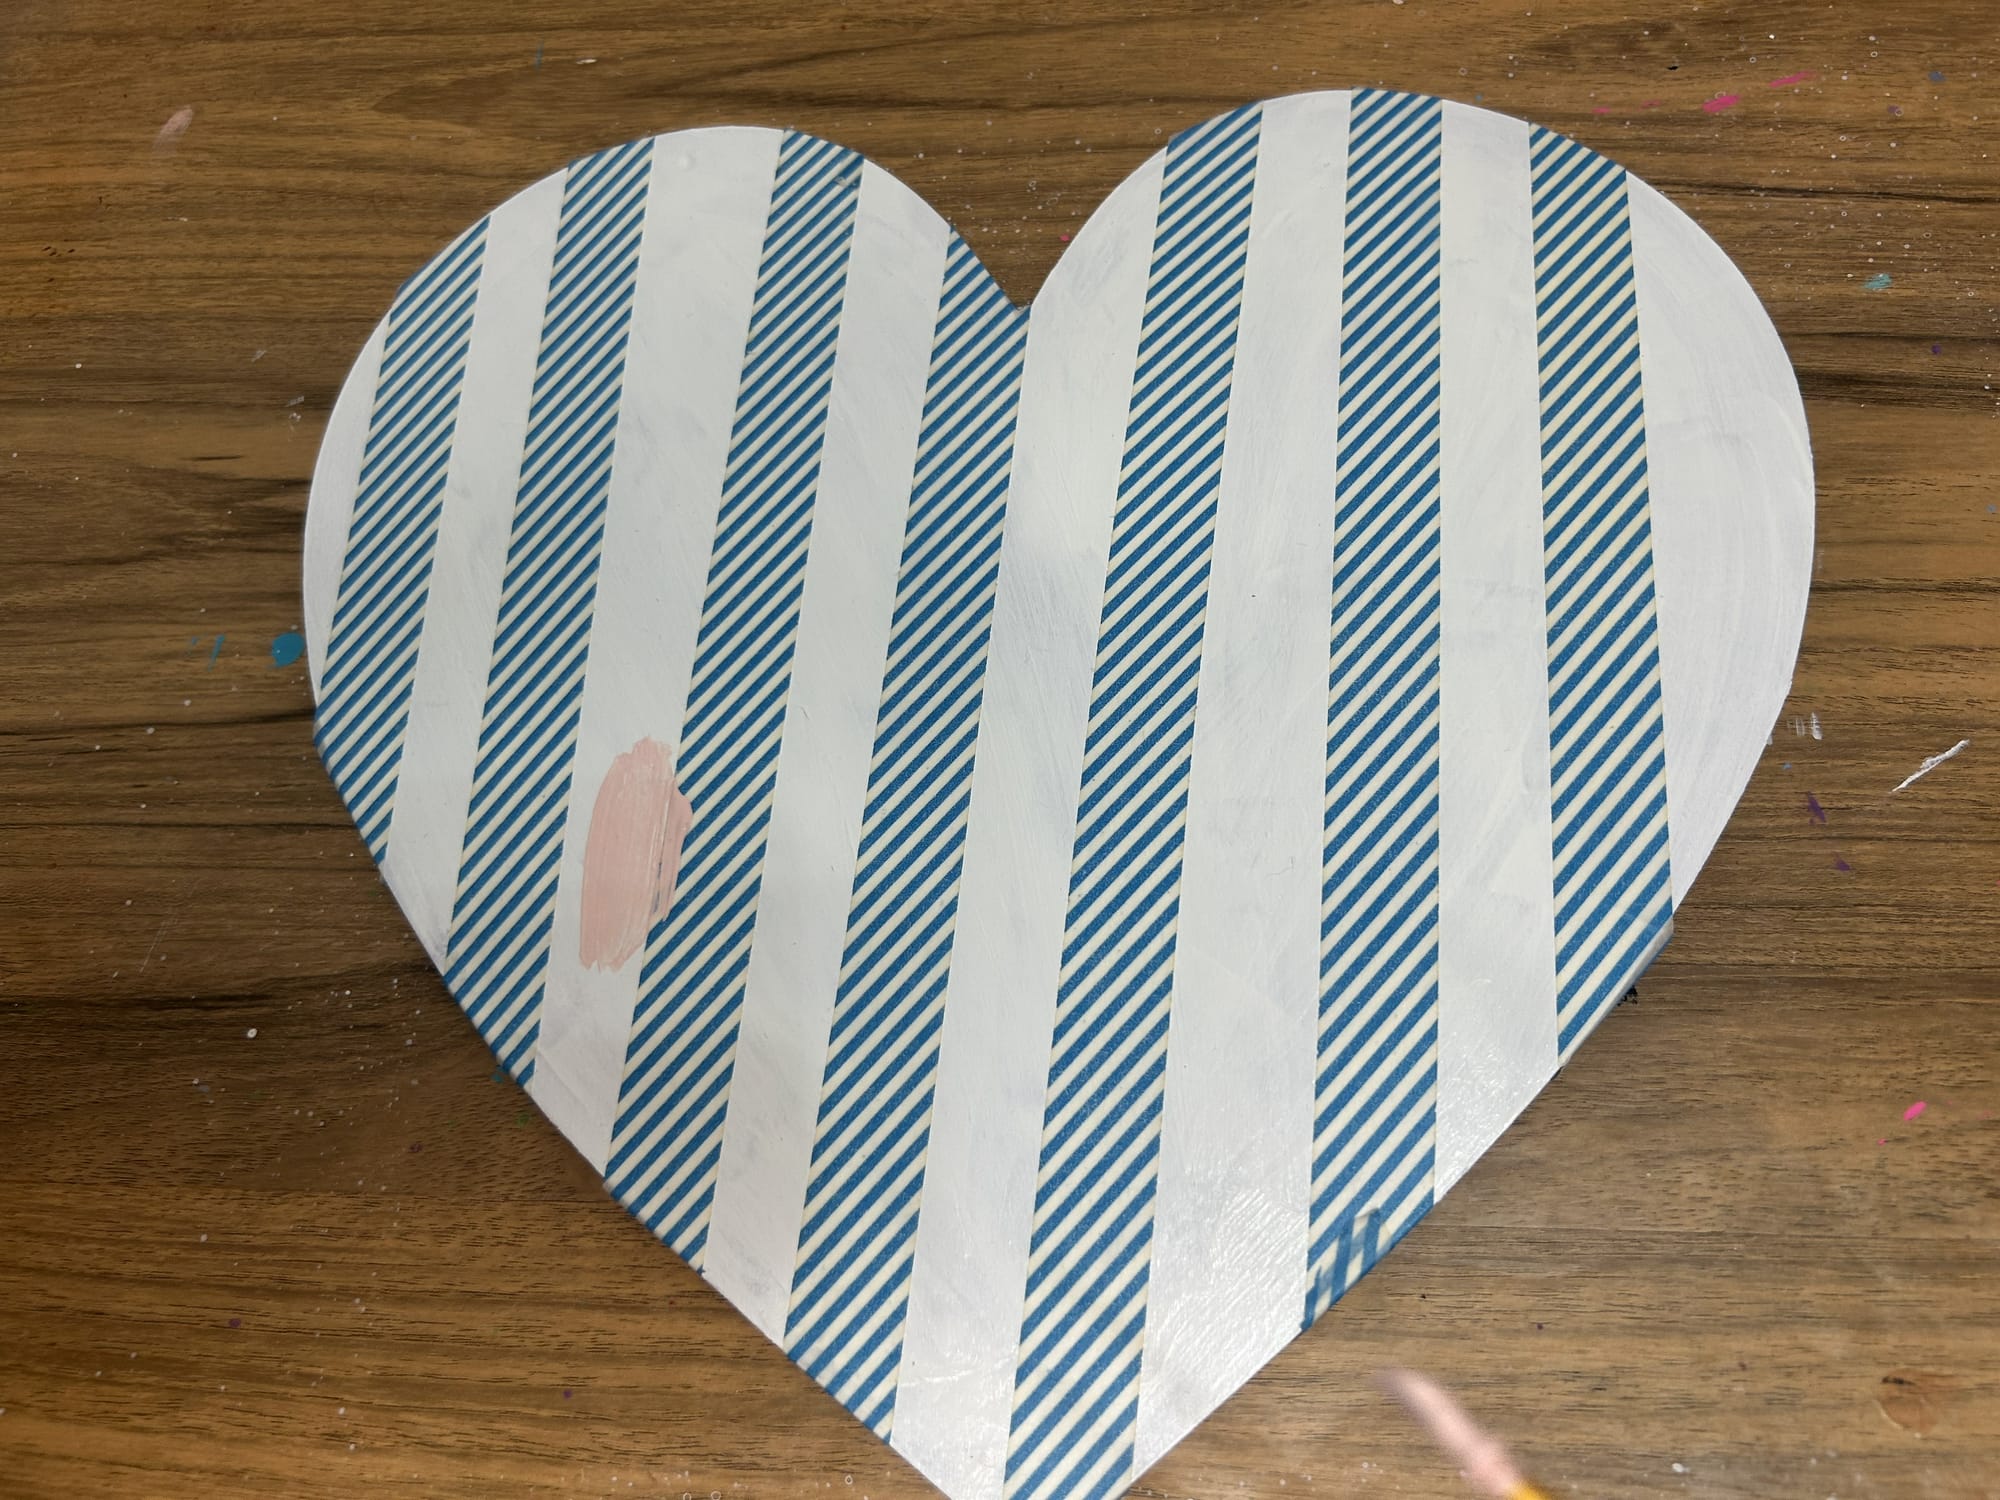
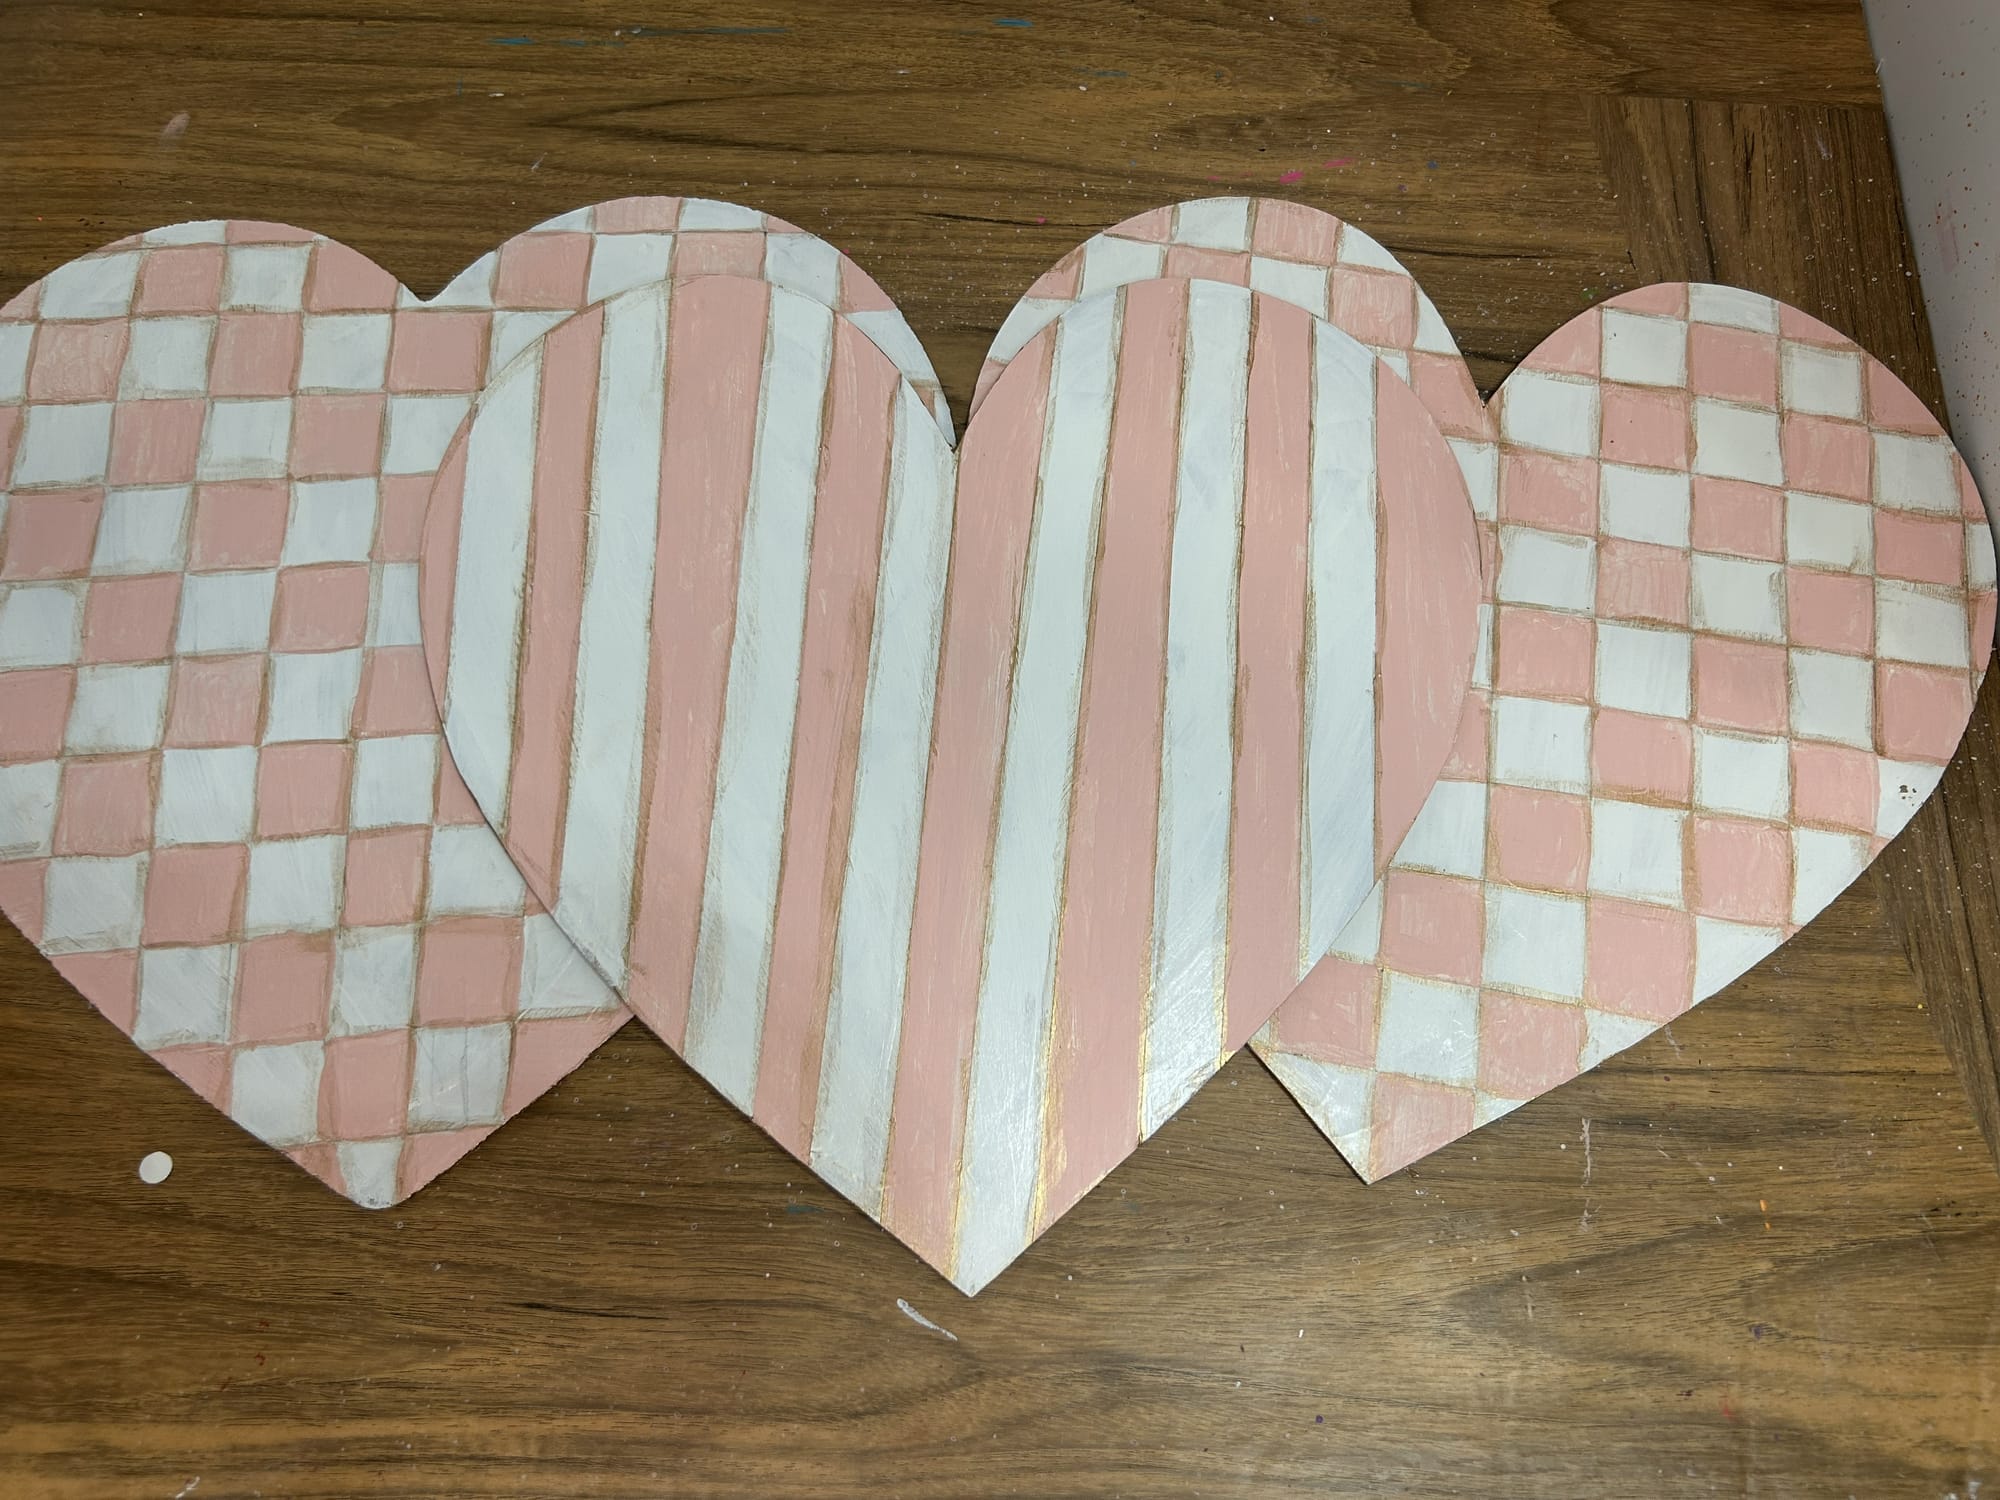
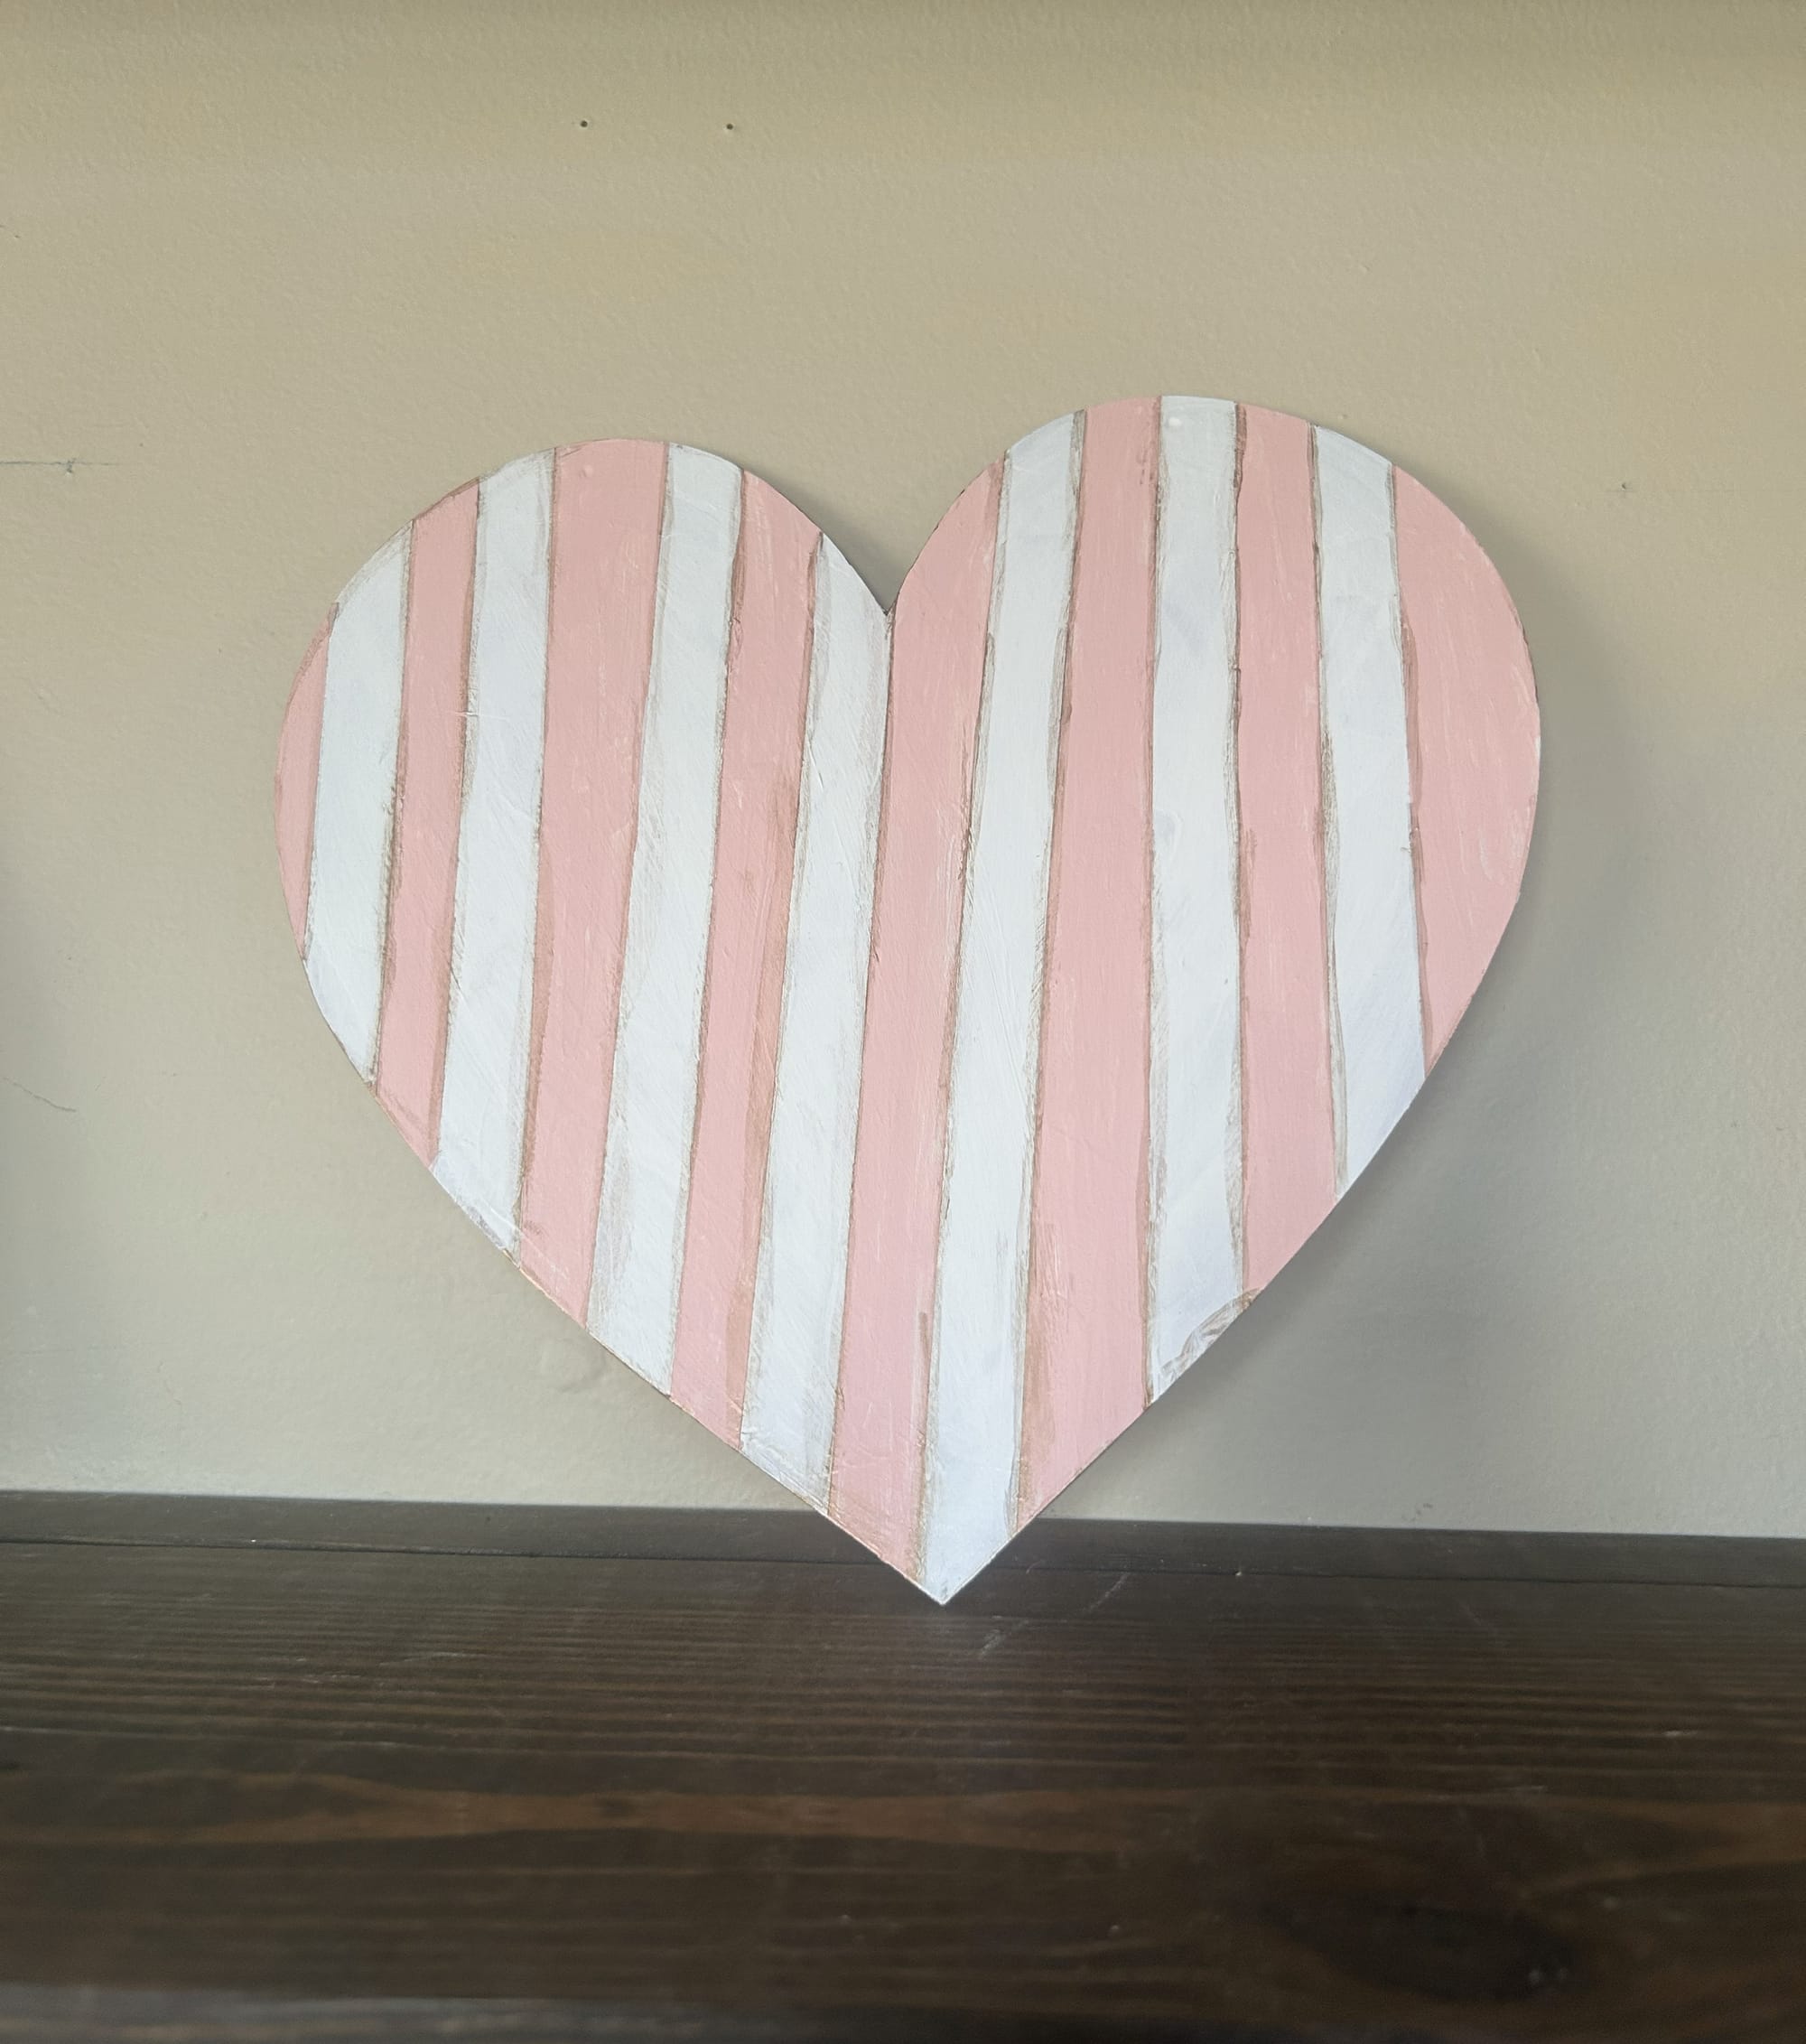
To create a striped pattern I used washi tape to section off and to create stripes.
Create a checkered or striped pattern
Step 3: Paint the Checkered Pattern on your Wooden Heart
Next, select another color for the pattern. Start at one end and begin by painting every other square your color of choice. After completing one row, move up to the next row. Be sure that the next row alternates the pattern begin sure to paint small portions of squares you may have created when making the pattern.
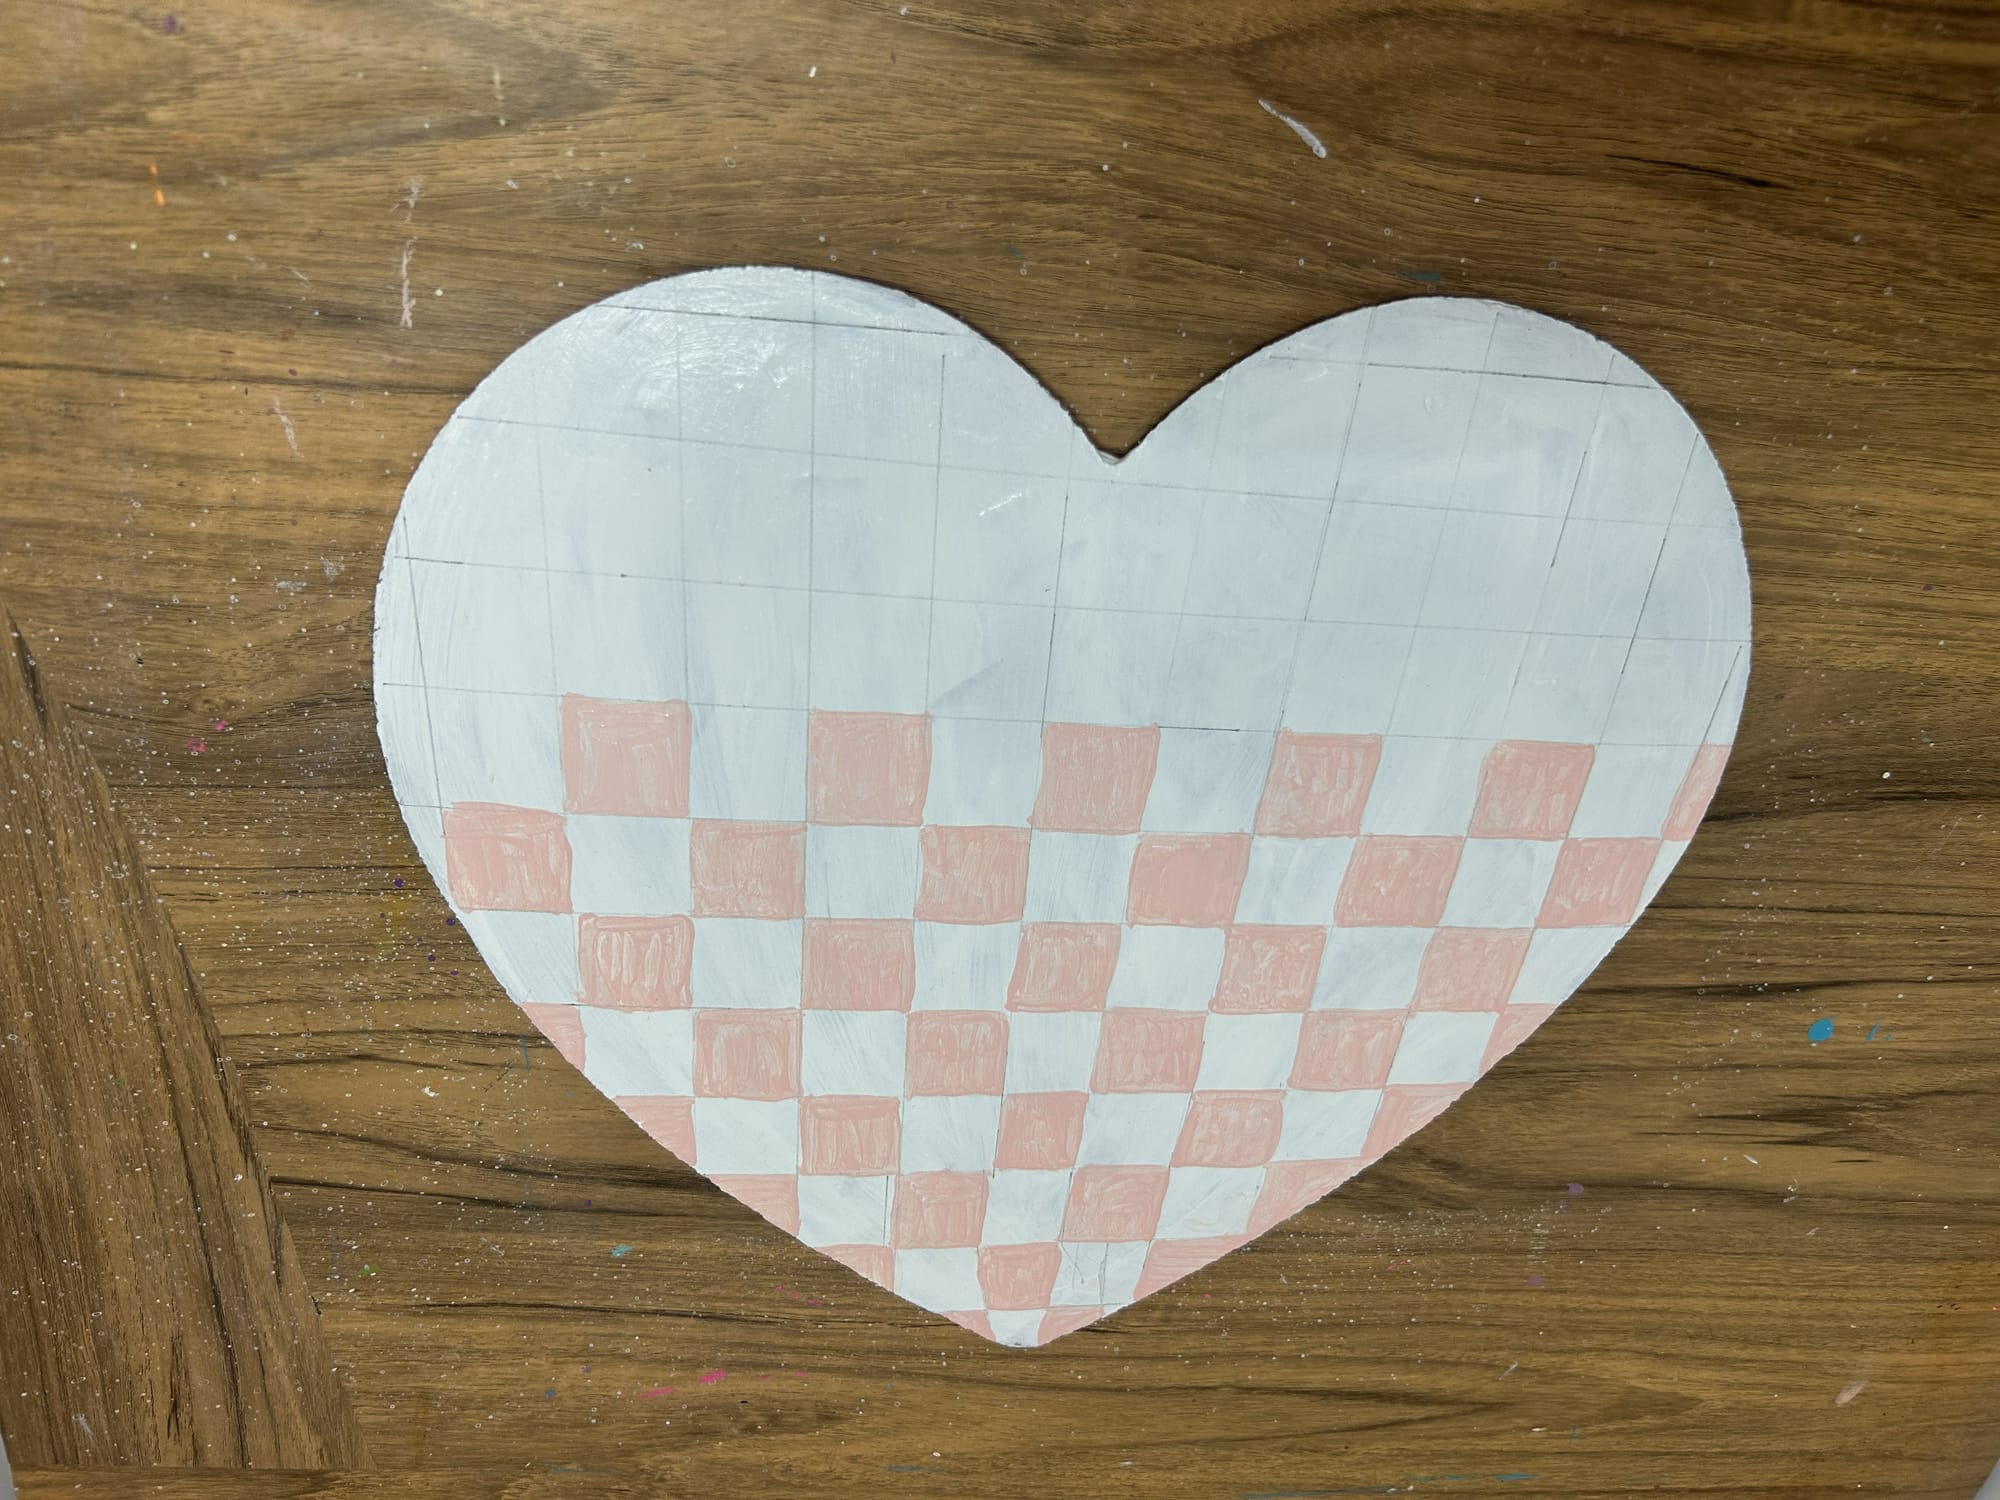
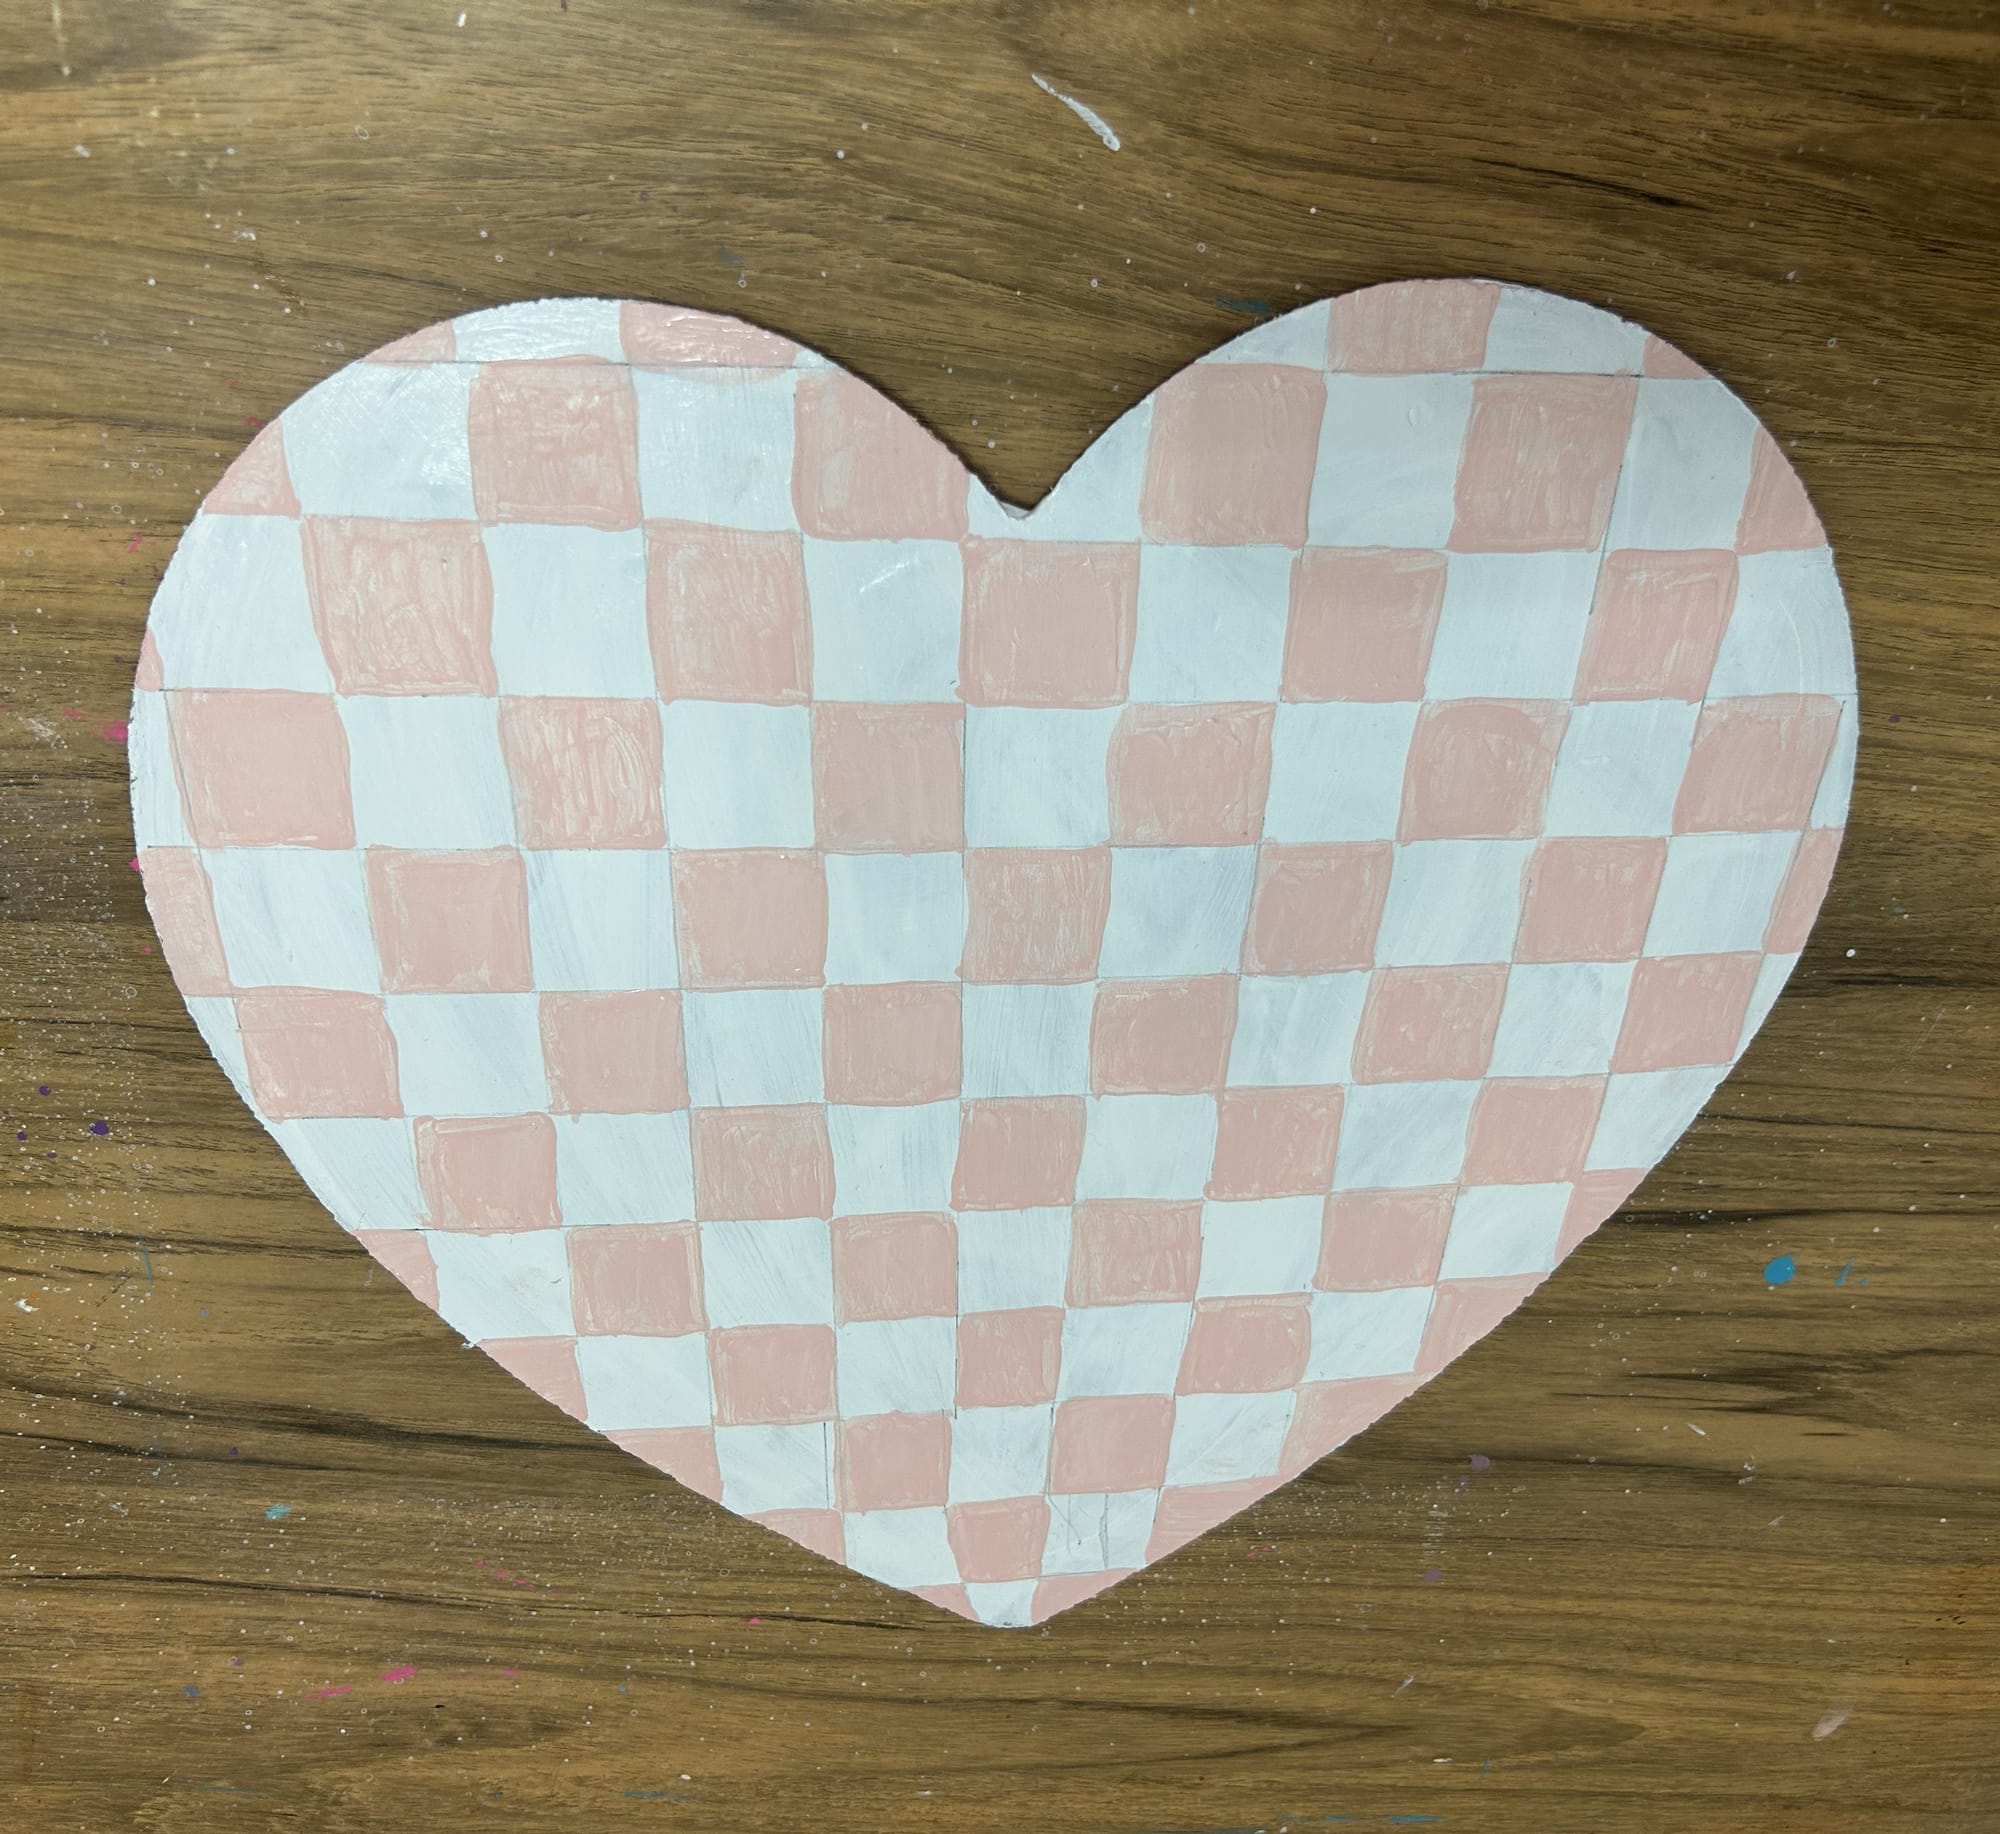
Paint every other square to create a checkered pattern.
Step 4: Paint the Striped Pattern on the Wooden Heart
After taping, simply paint the entire heart again. Allow the paint to dry fully before removing the tape.

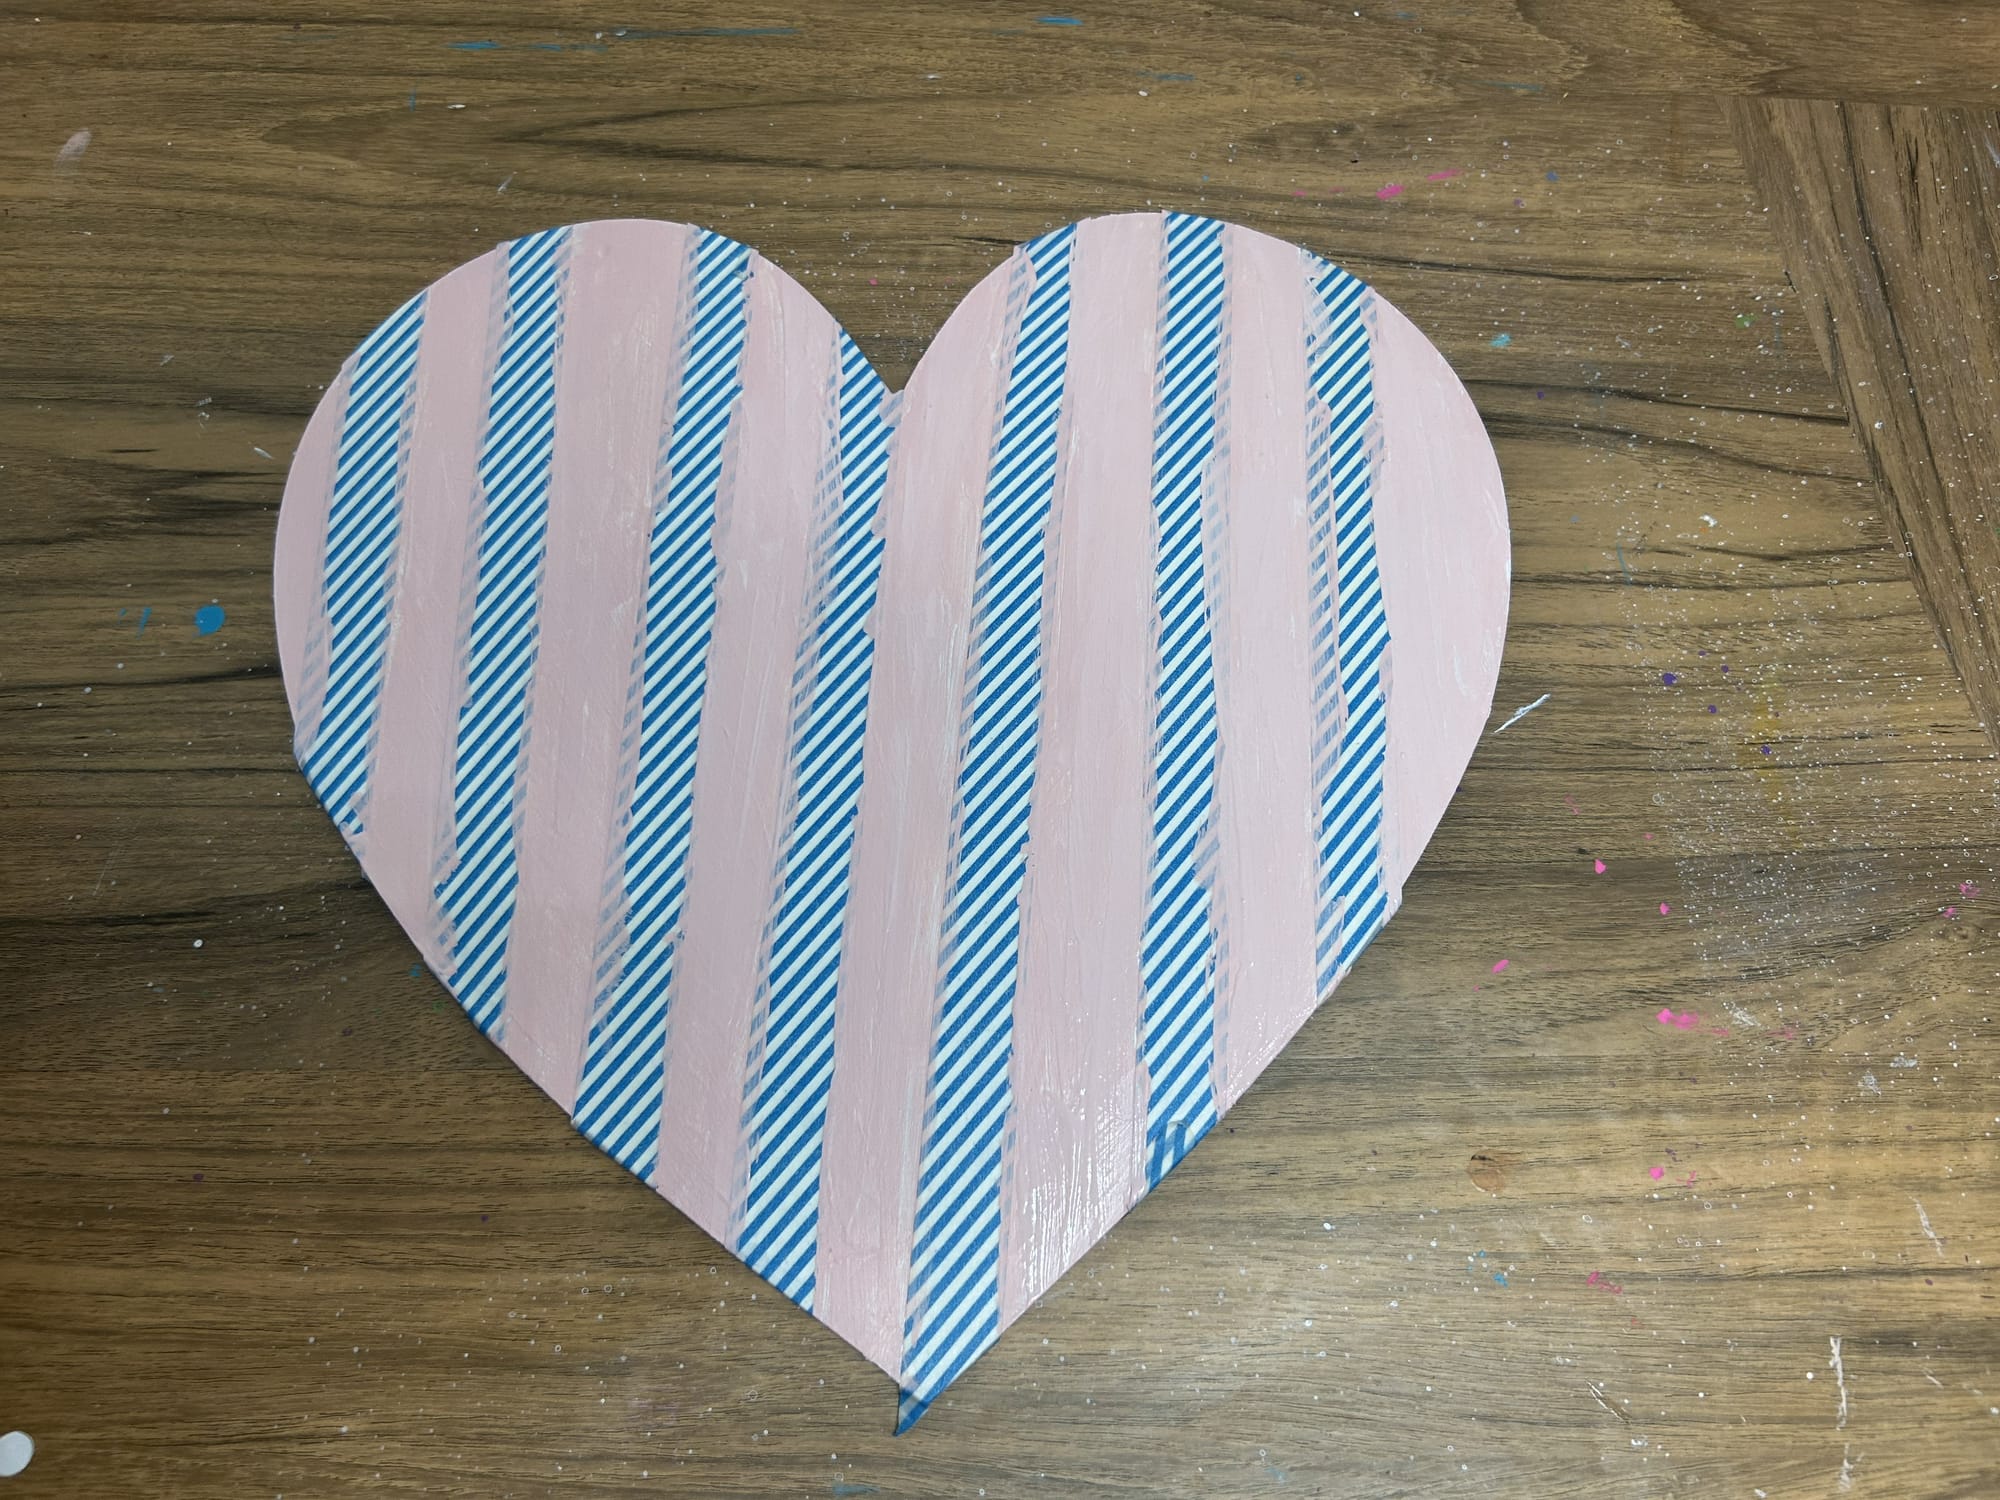
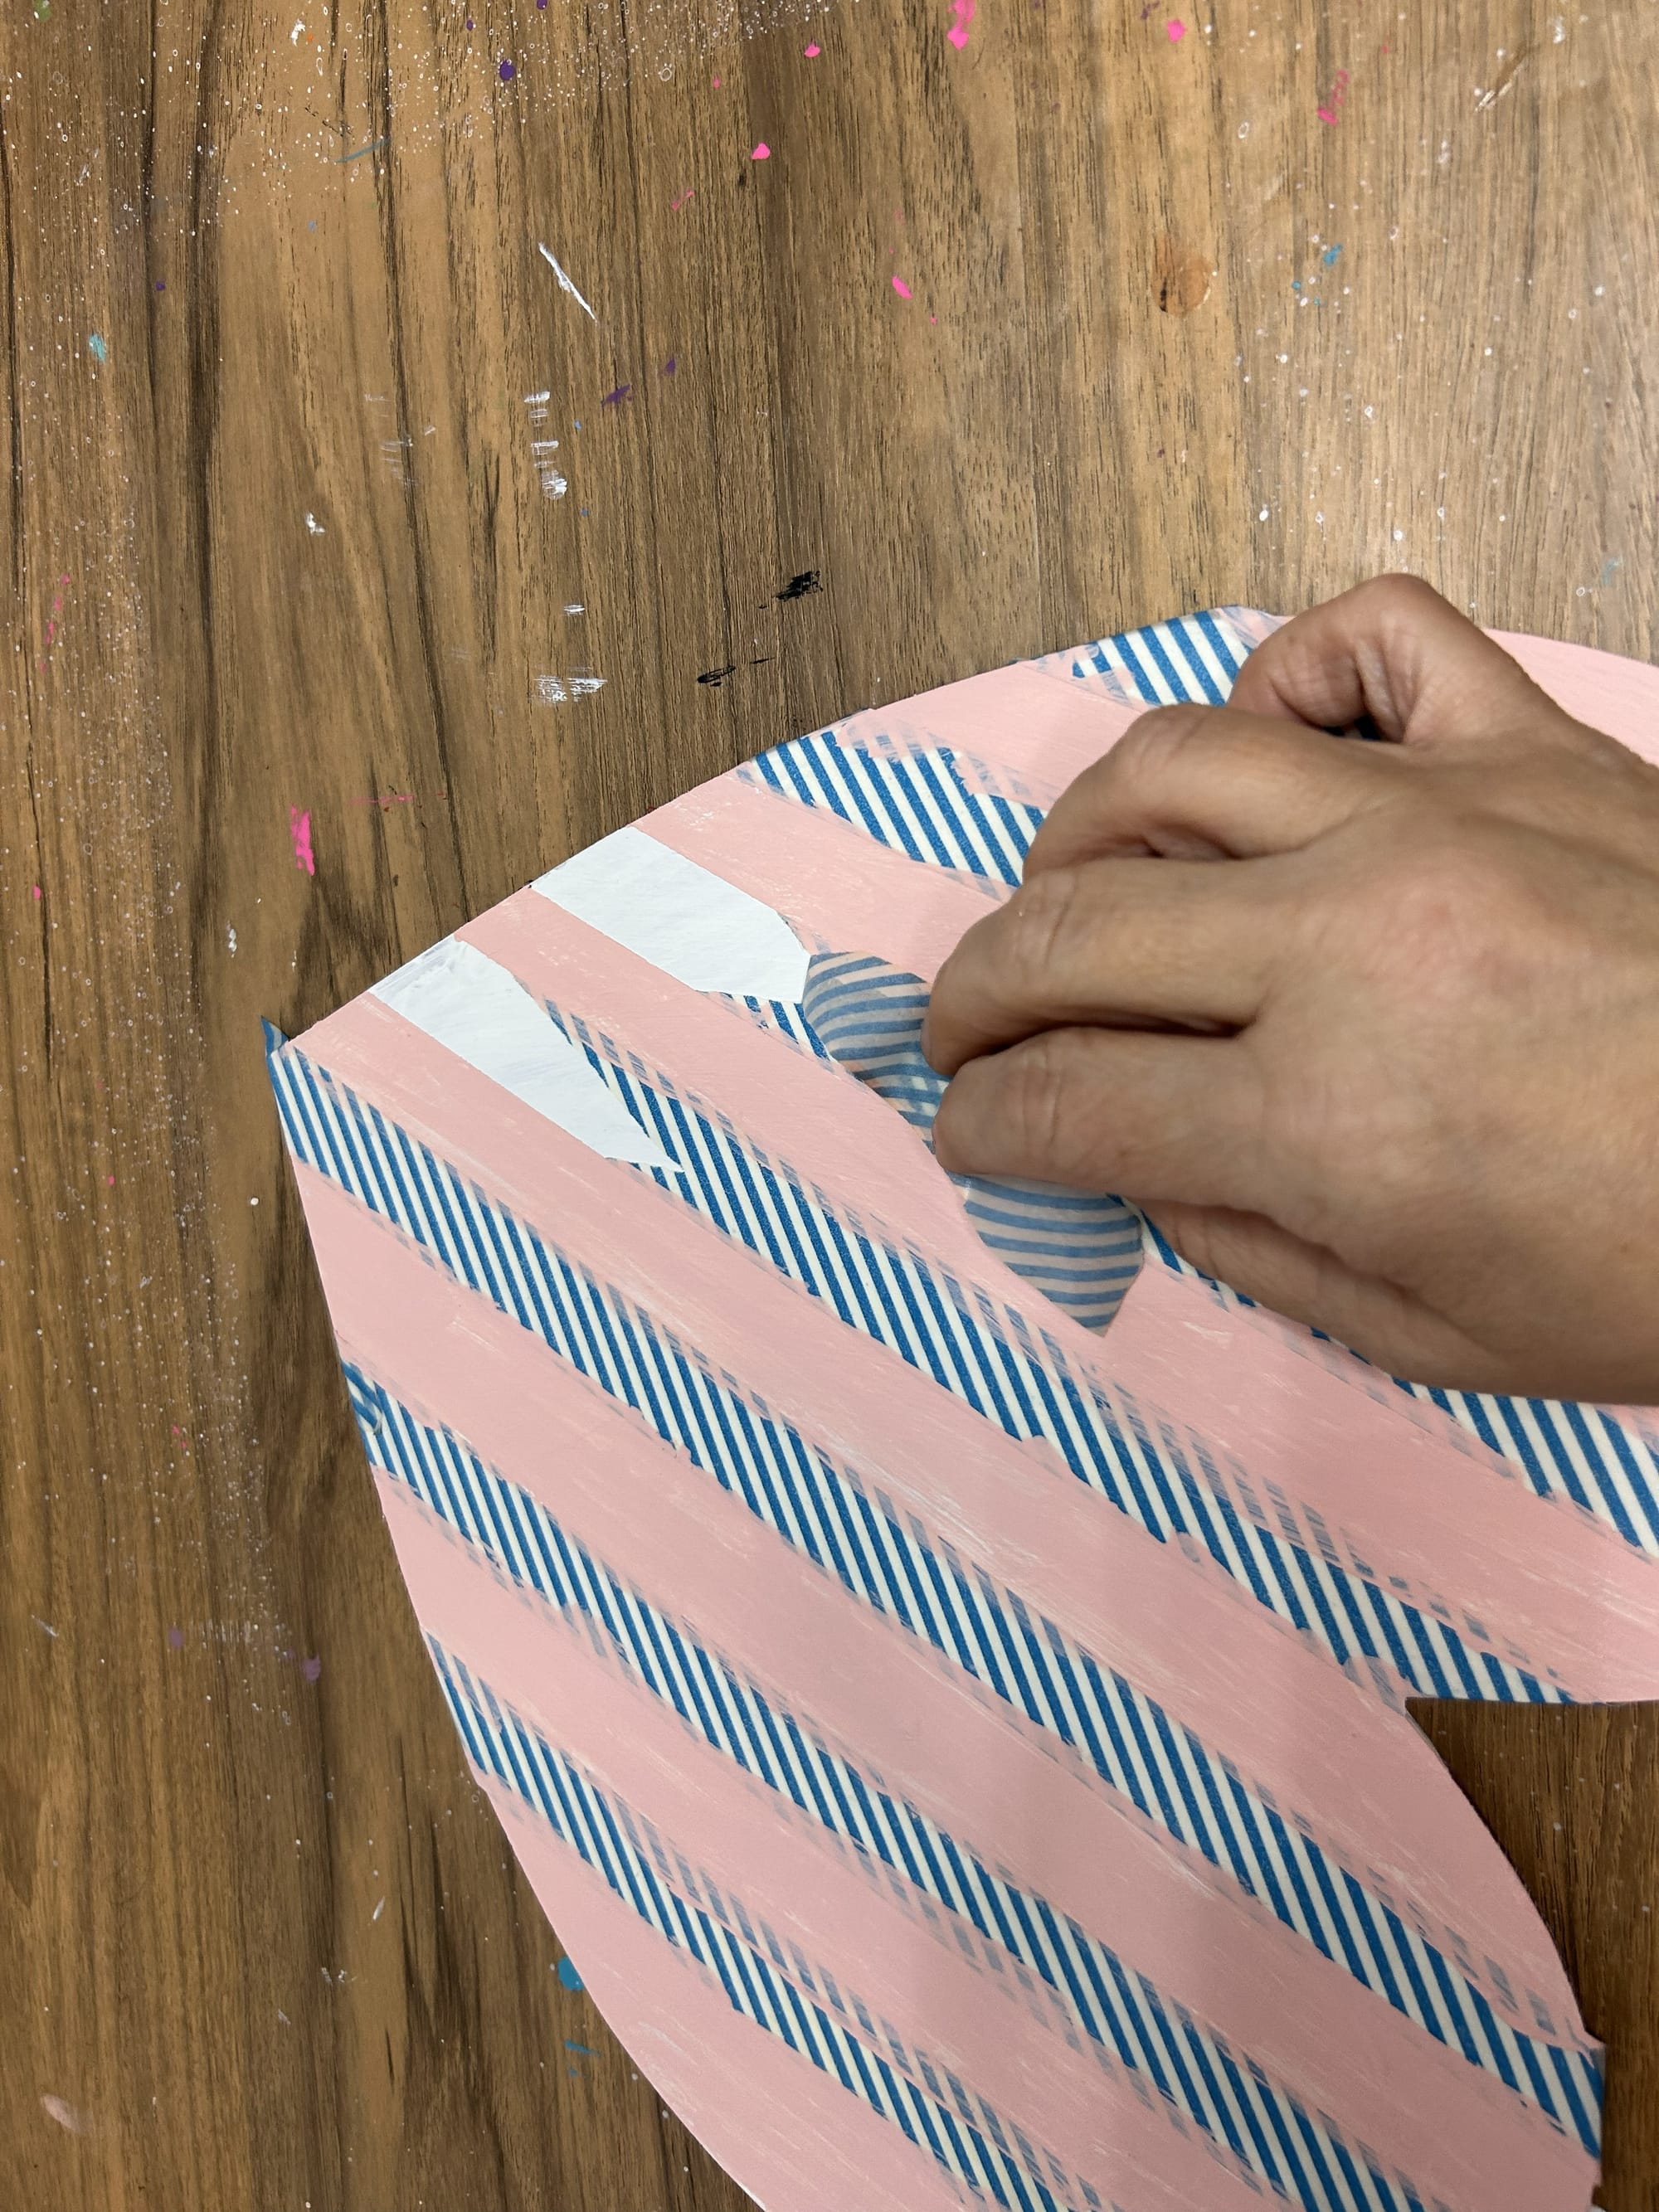
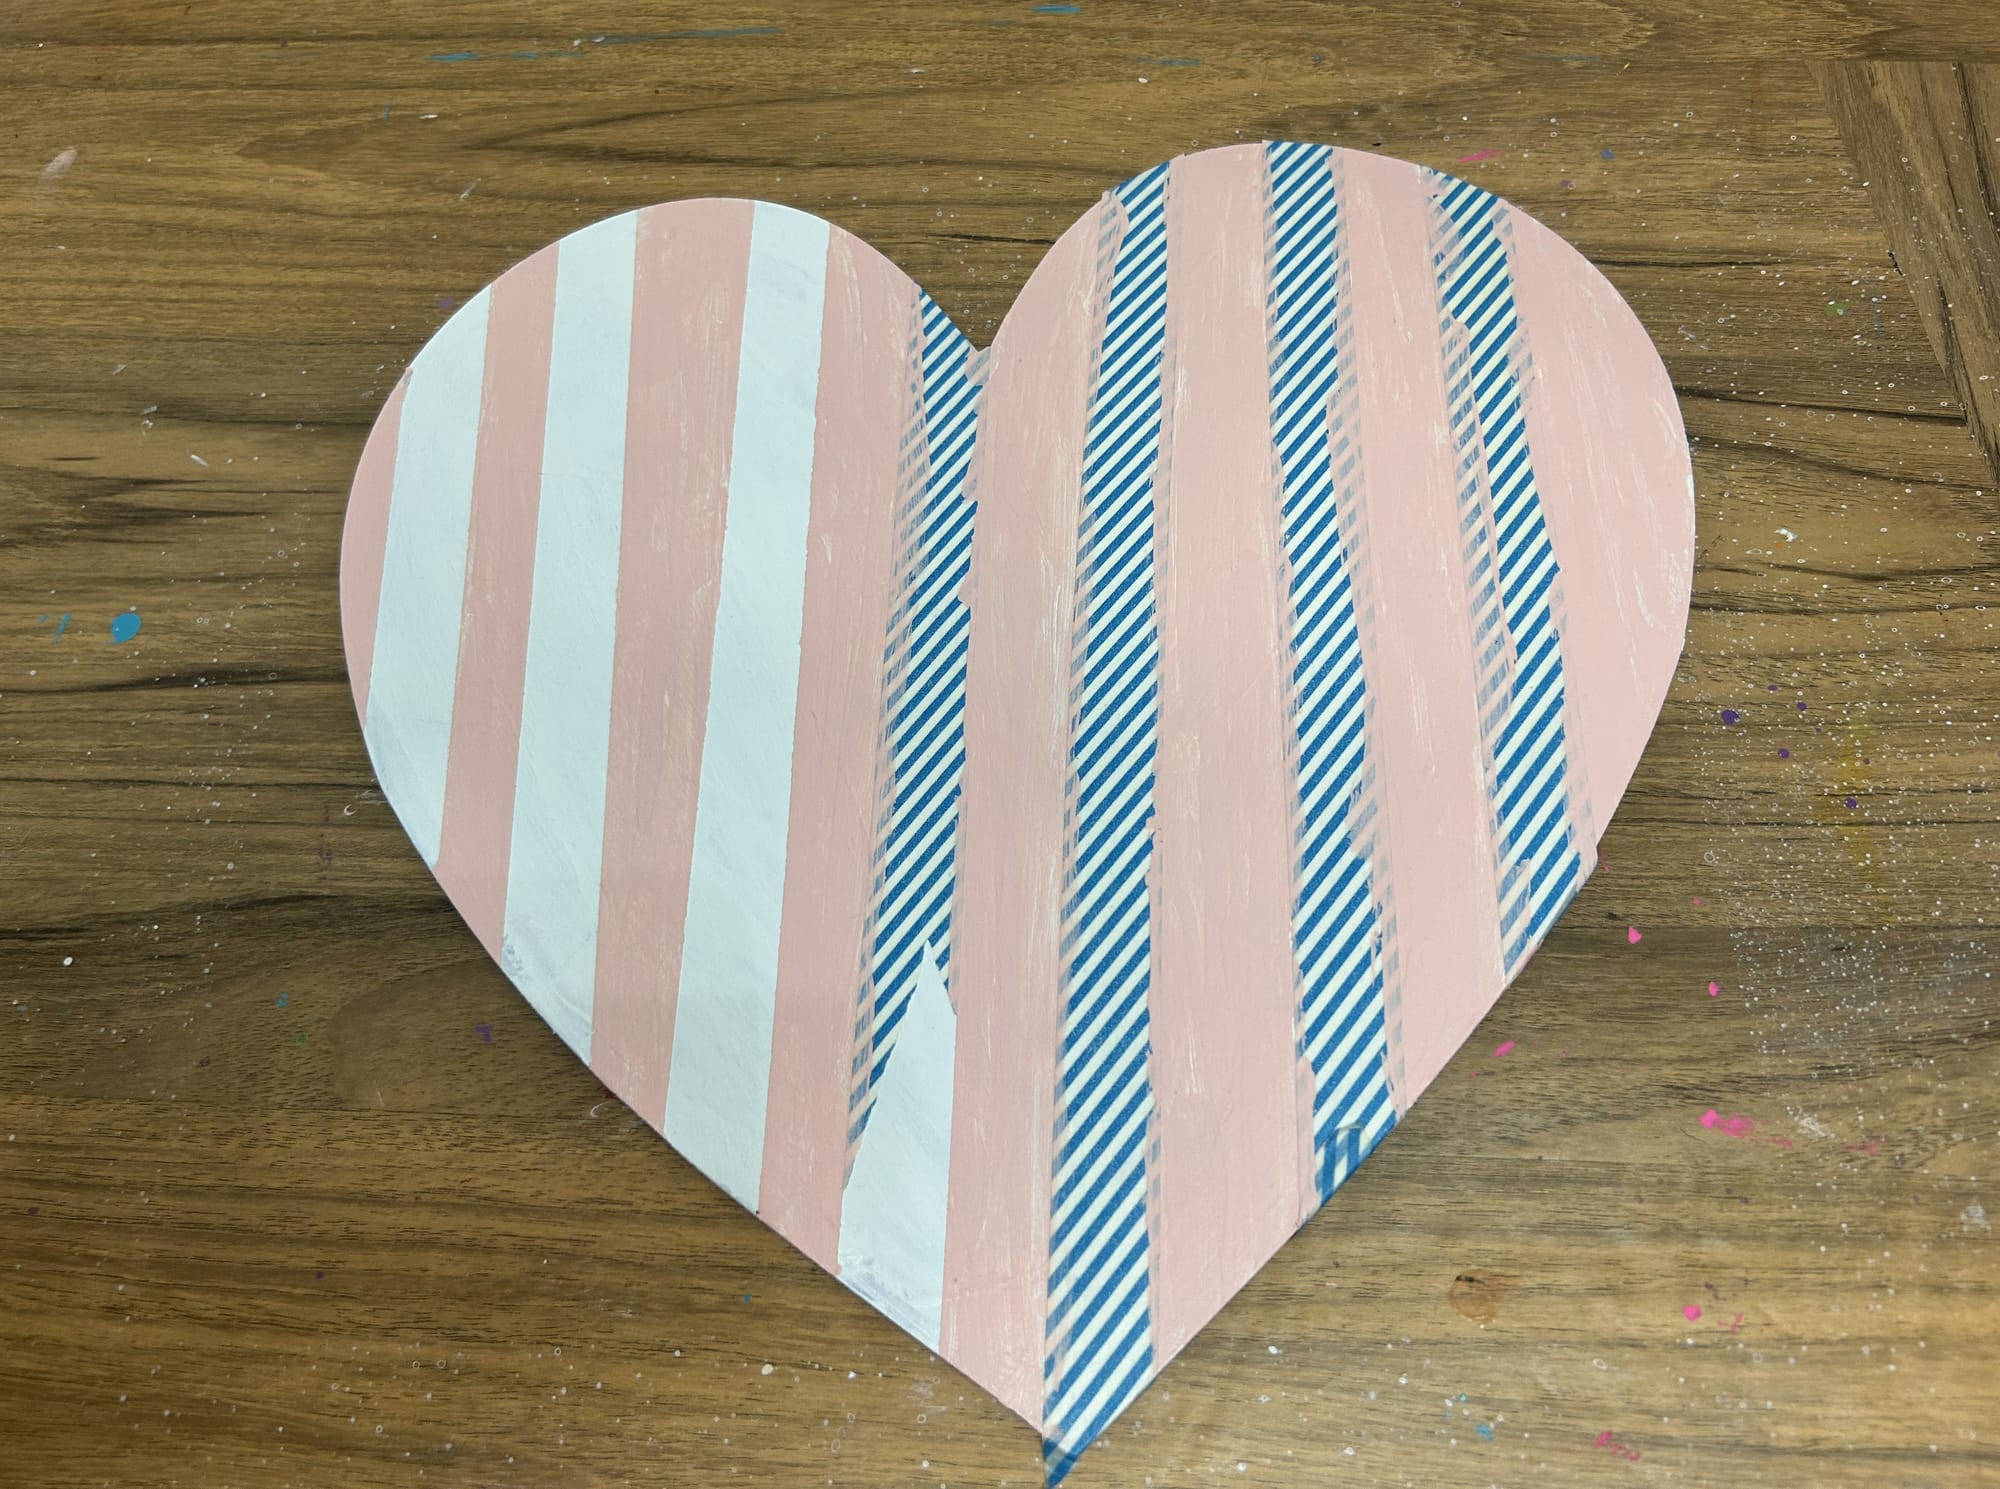
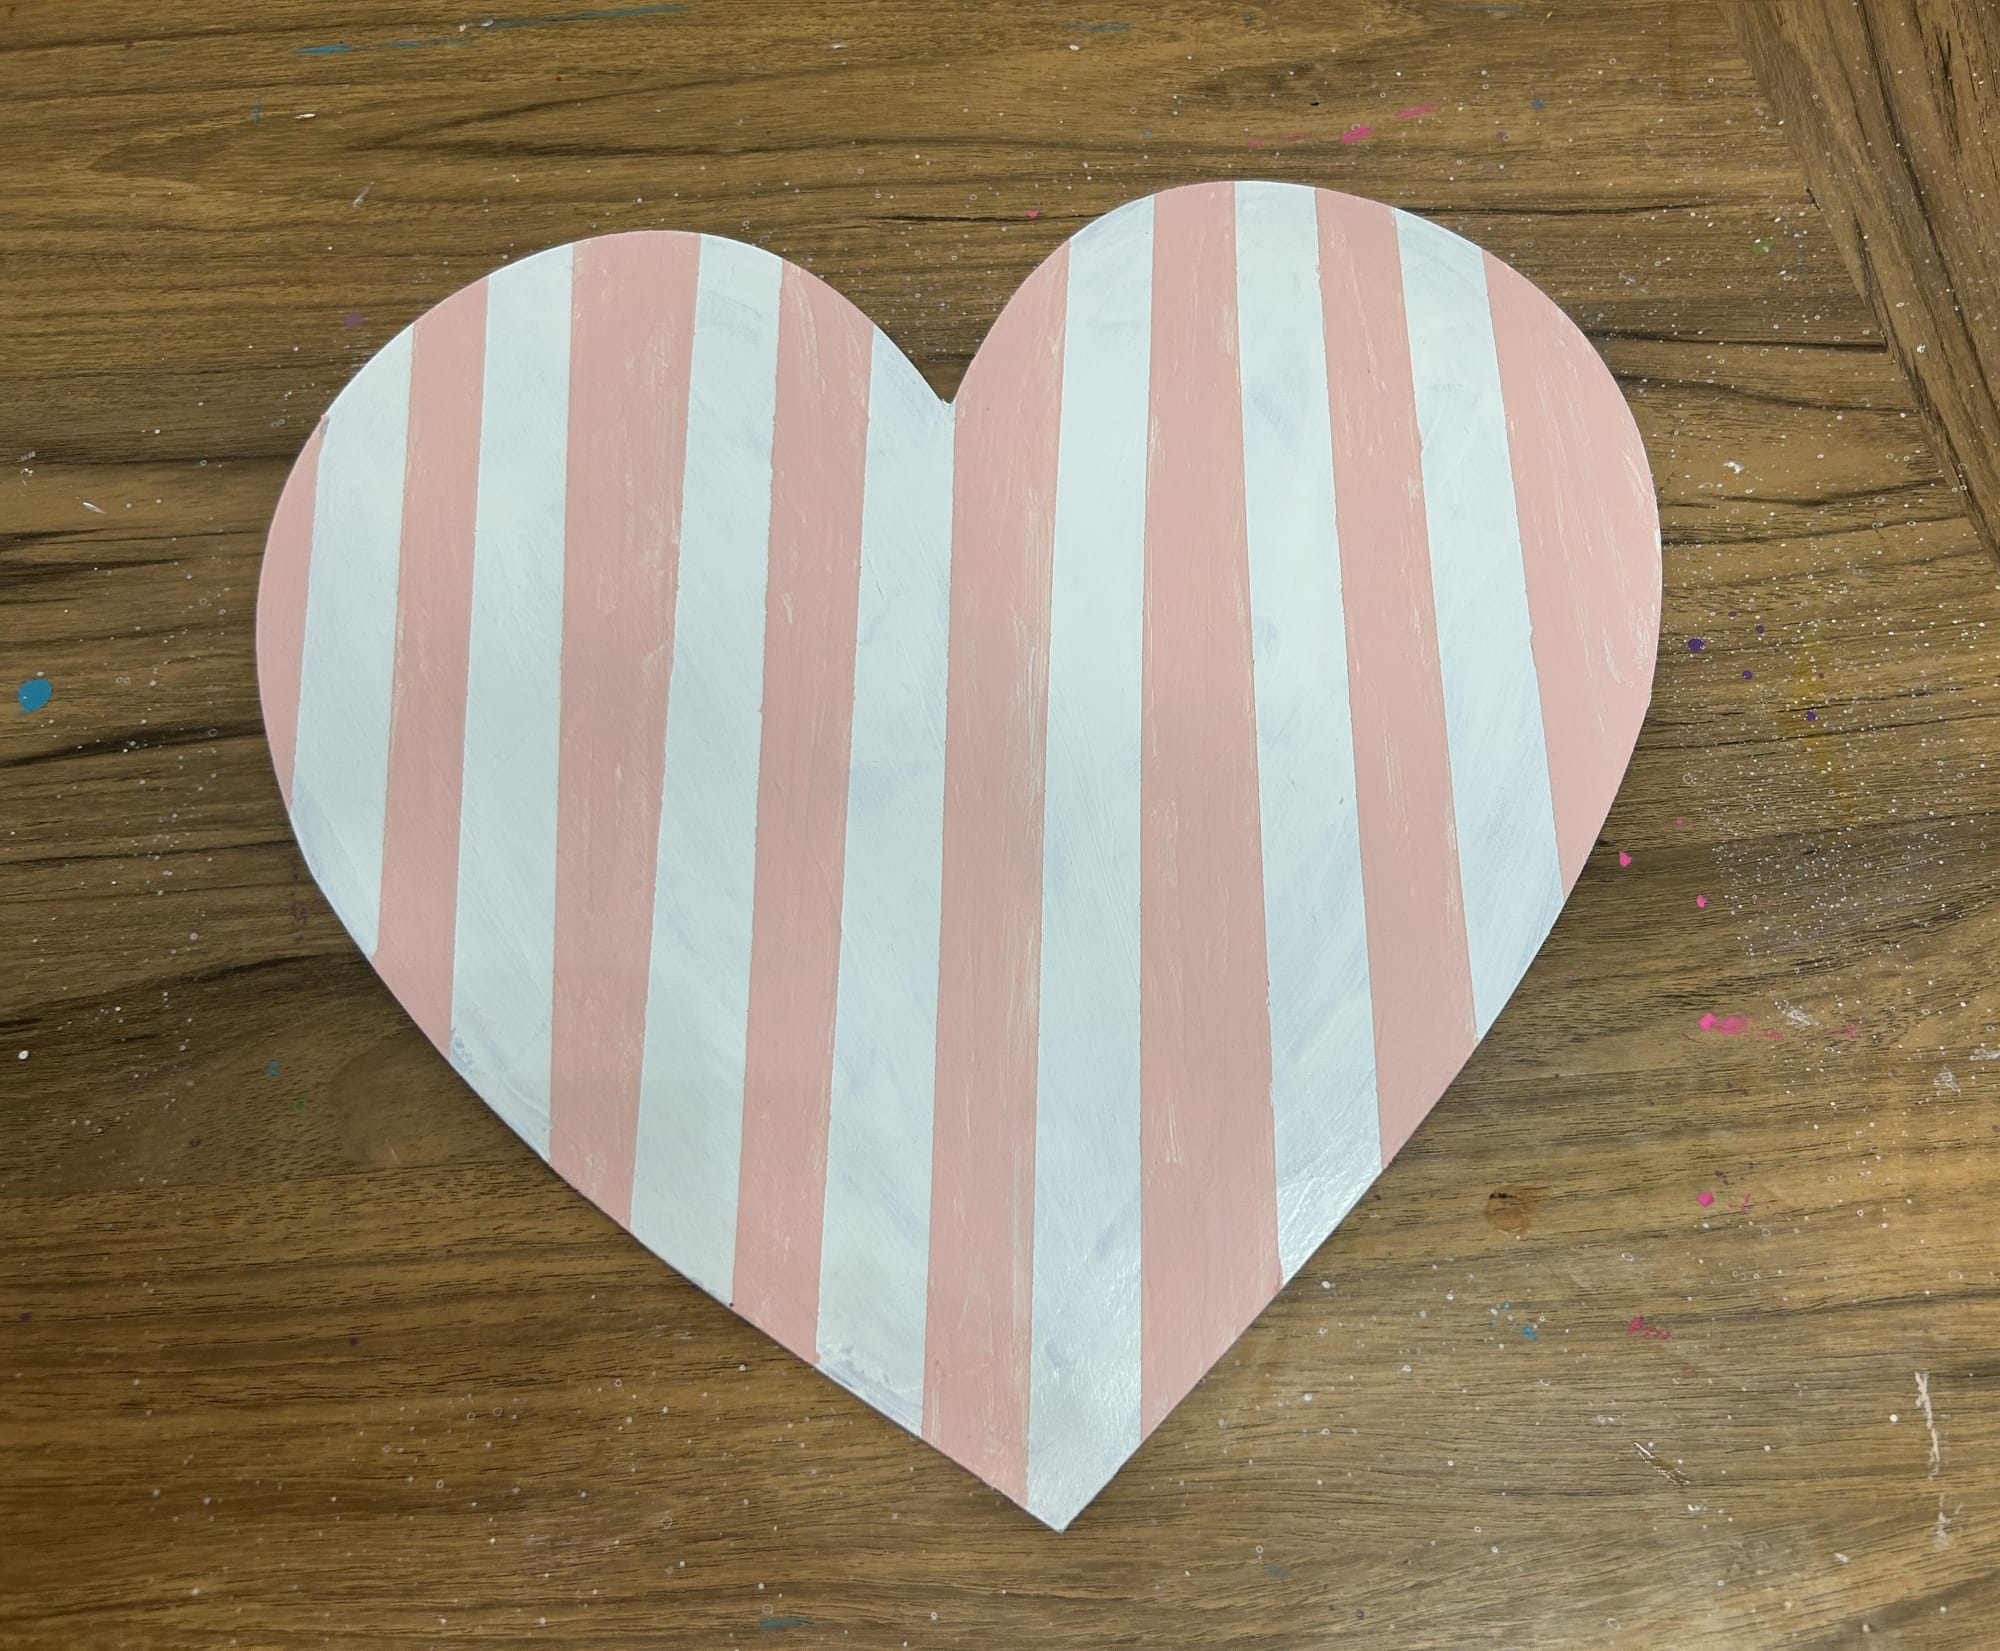
Tape off stripes and add paint to create pink and white stripes on the heart.
Step 5: Add Details with Gold Paint
To add an extra detail to the hearts, add gold to the lines on the hearts. After lightly adding gold paint to the line, use your finger to remove any excess. You want a faint, blurred line.


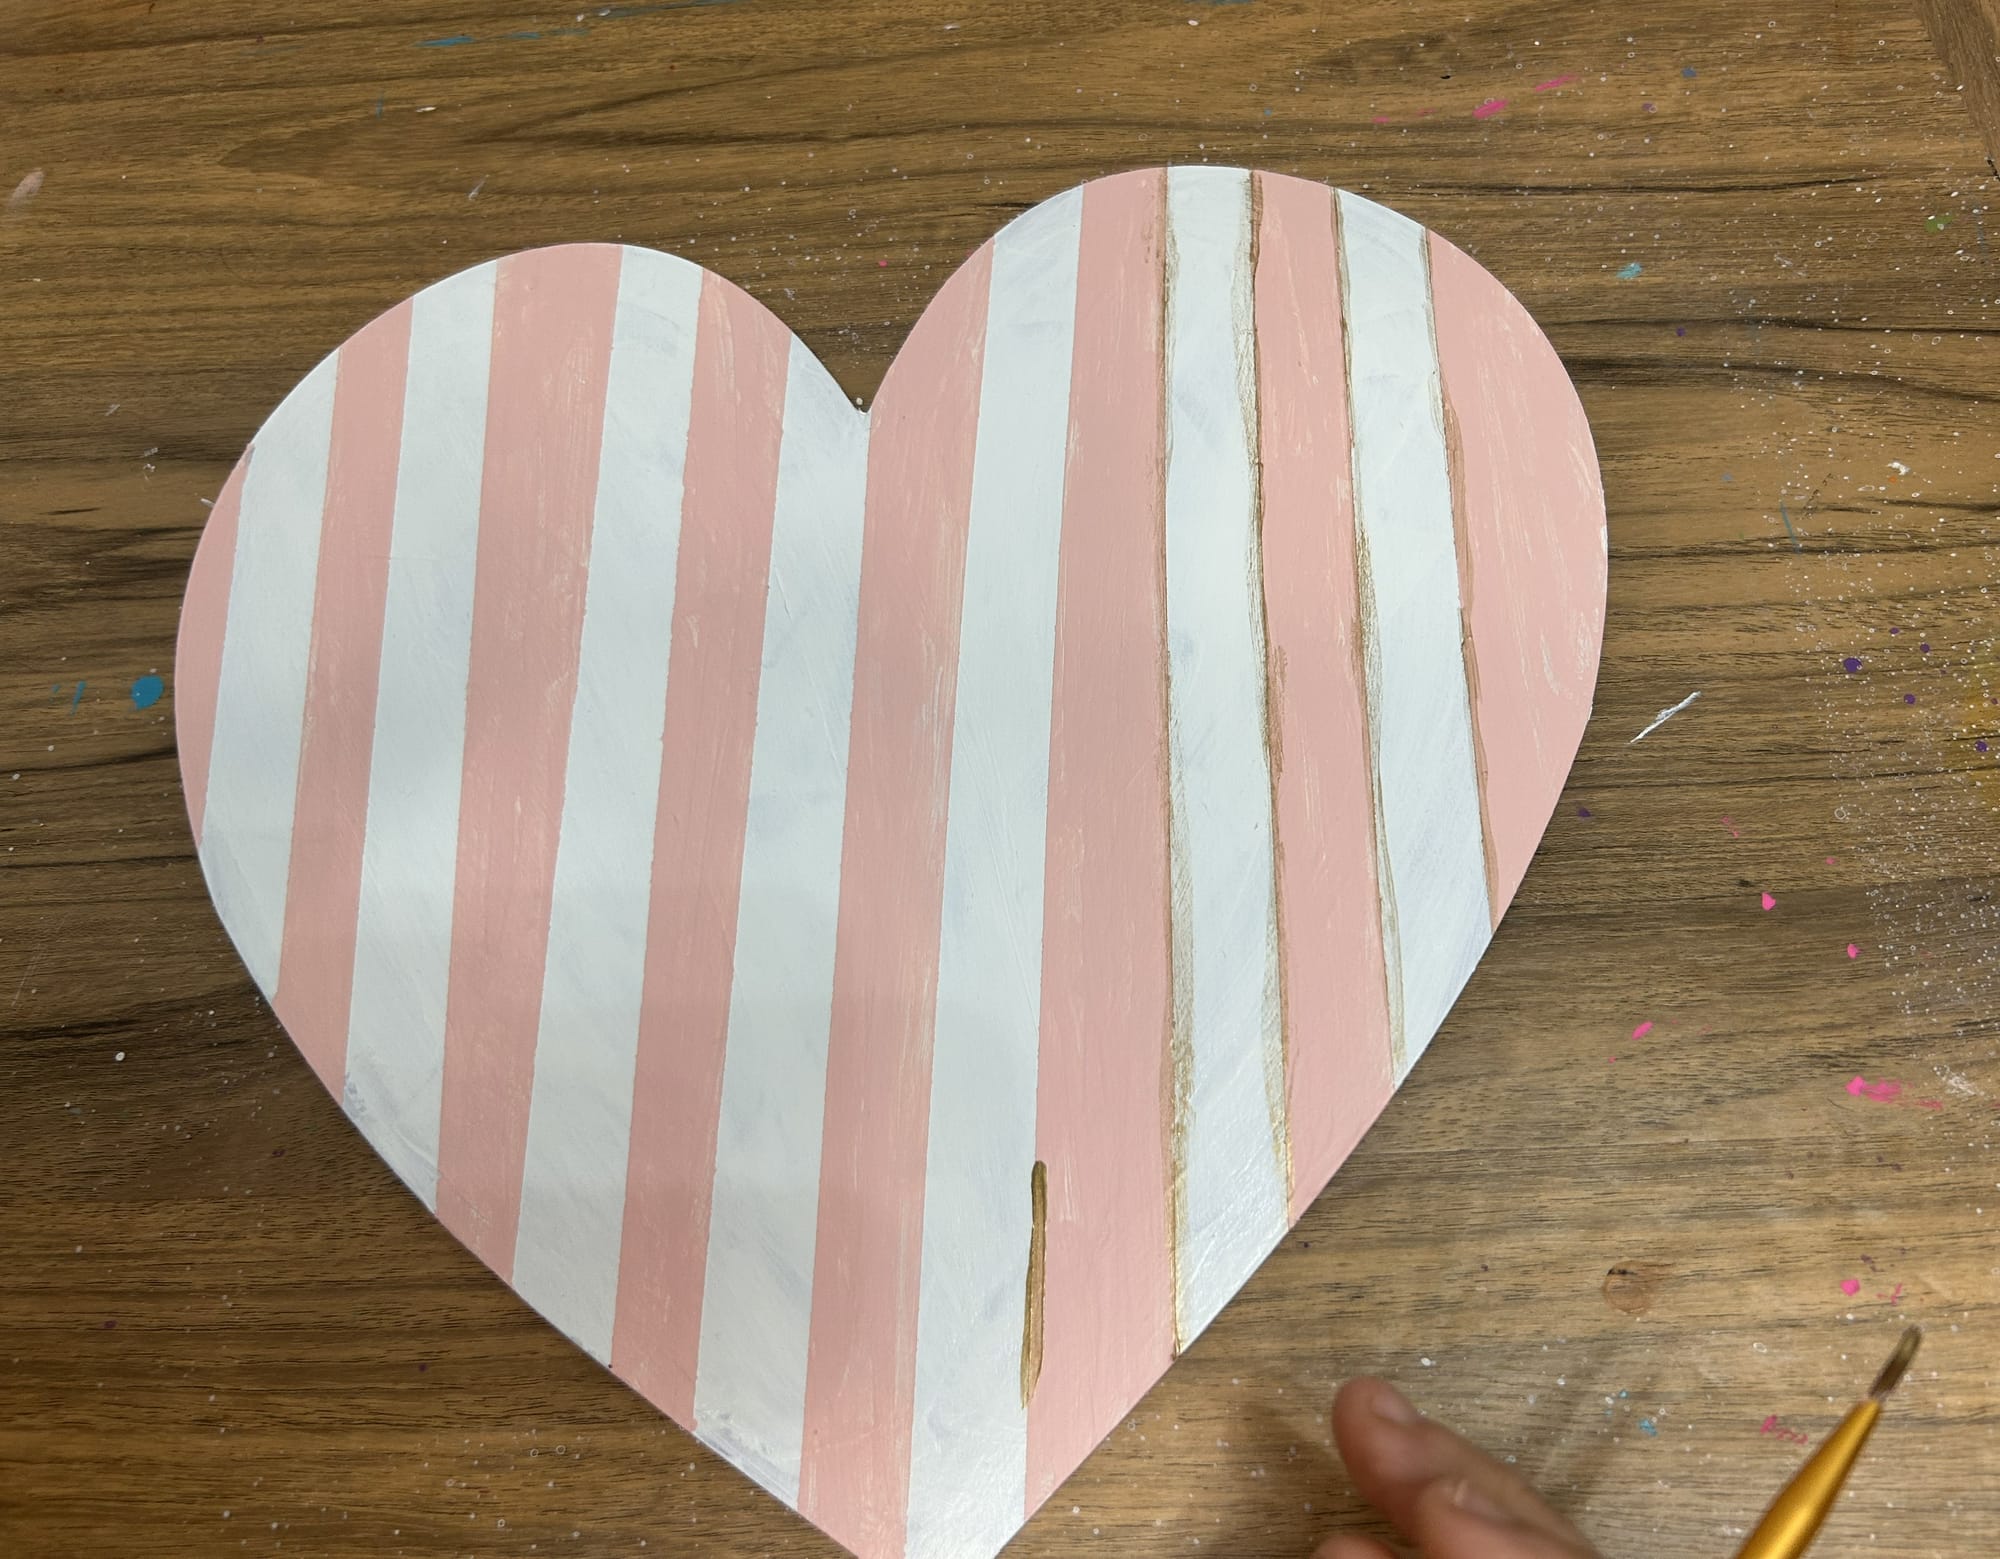
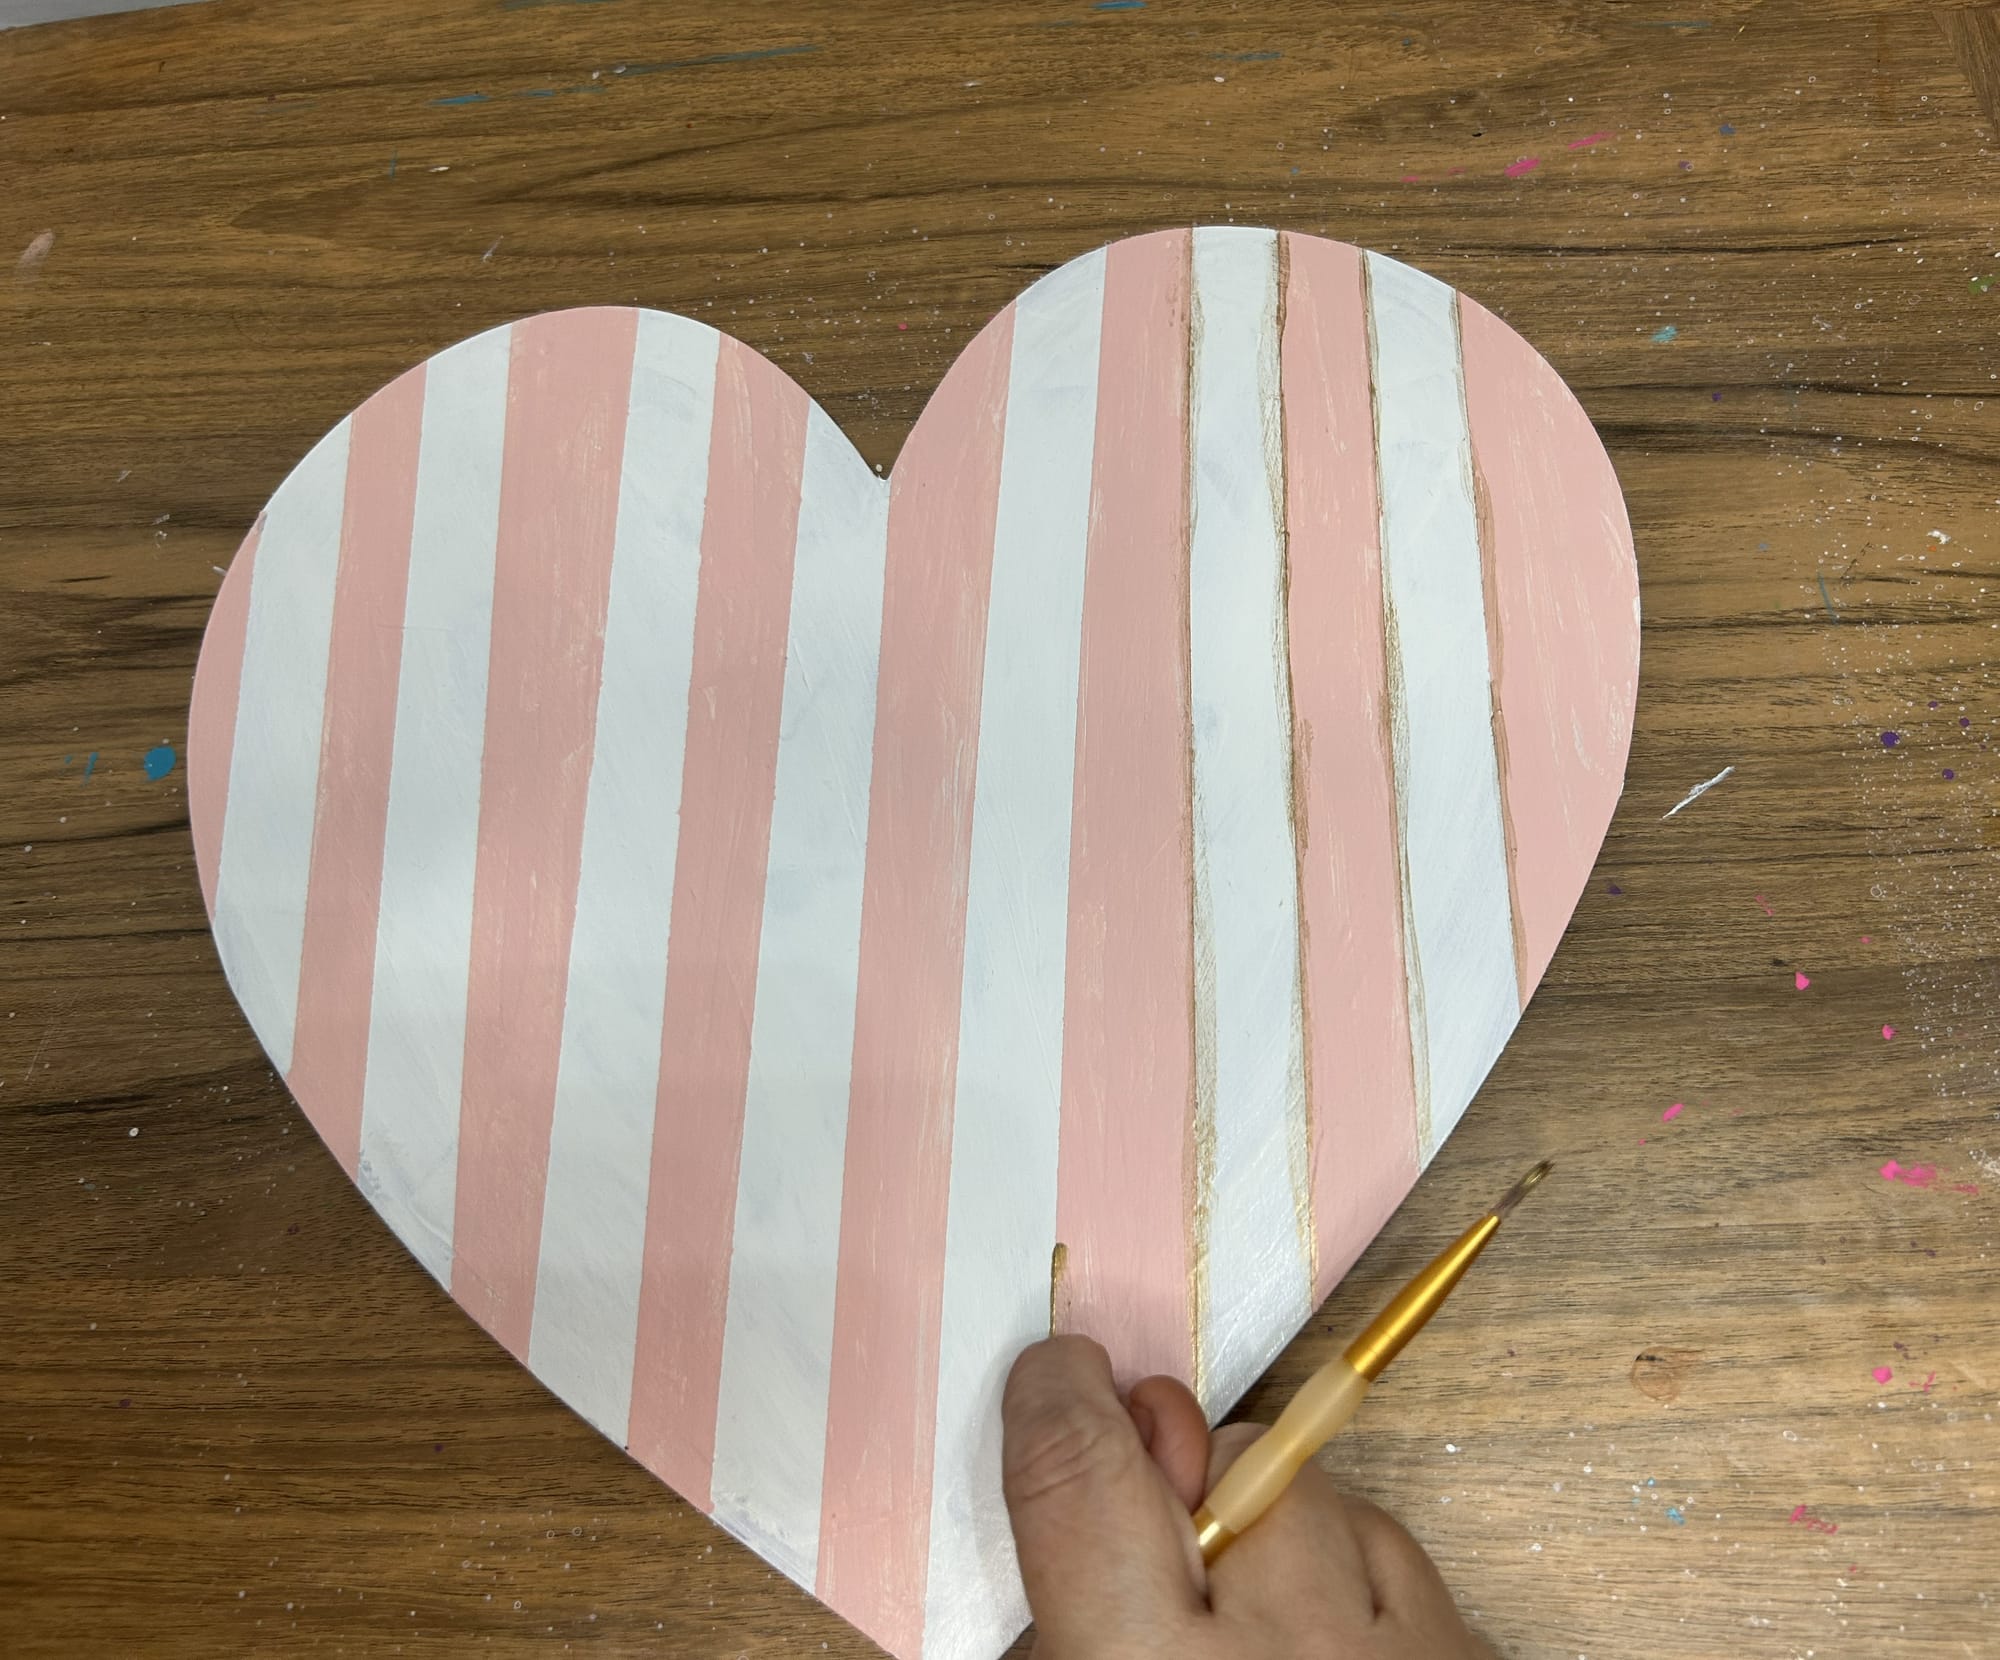
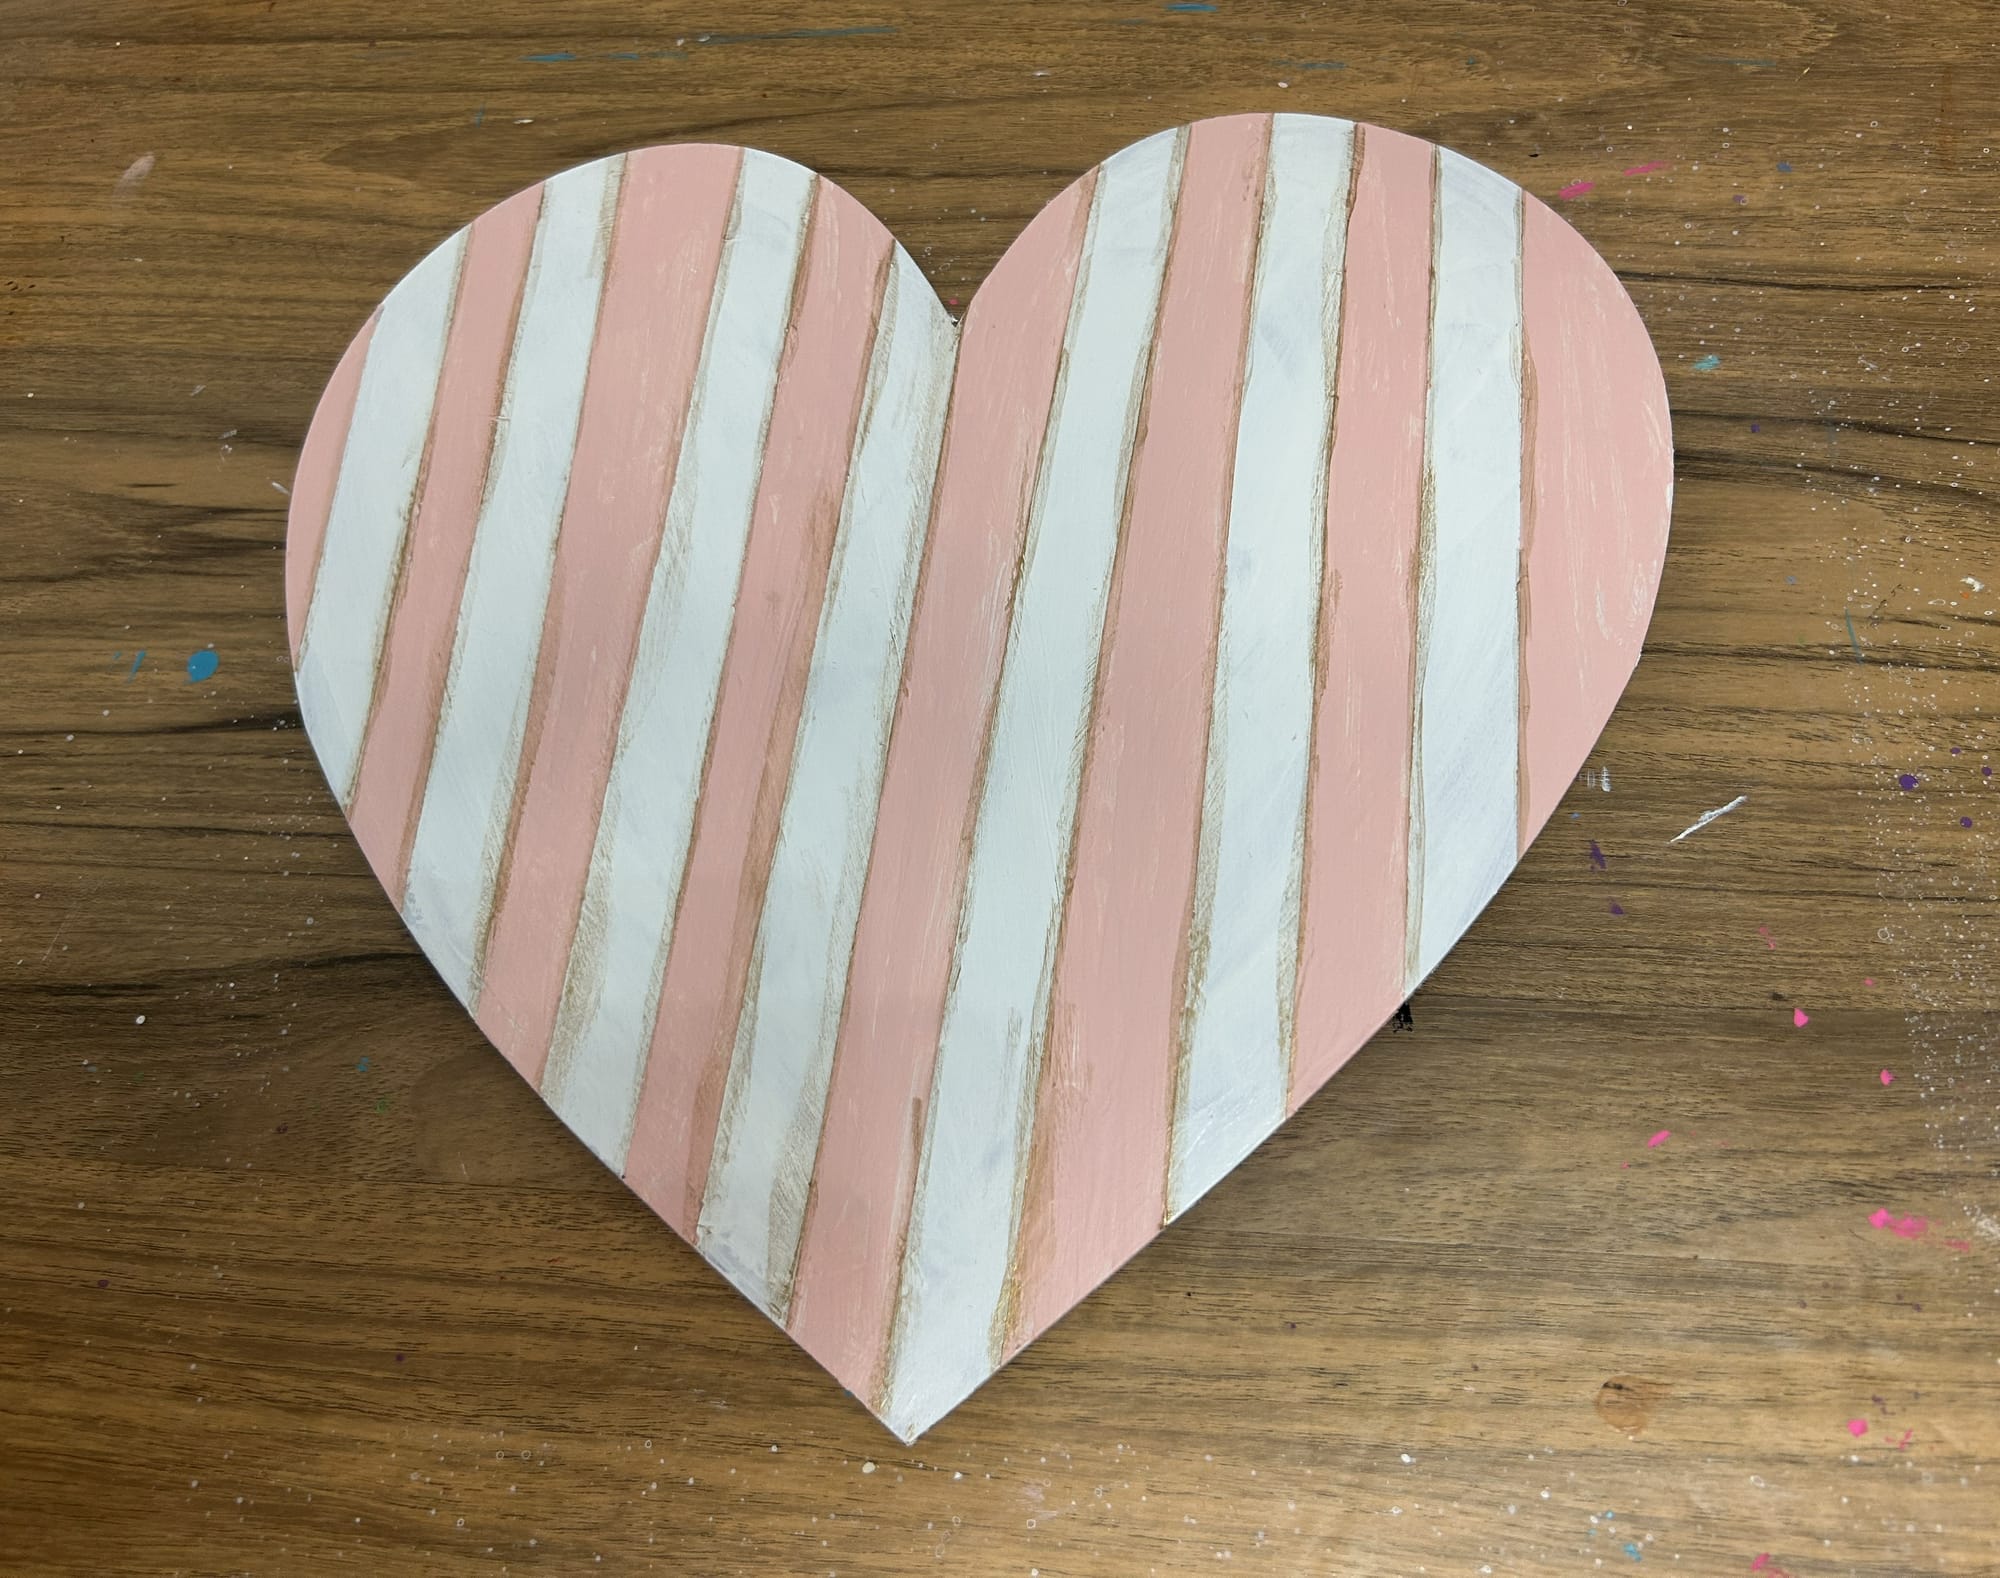
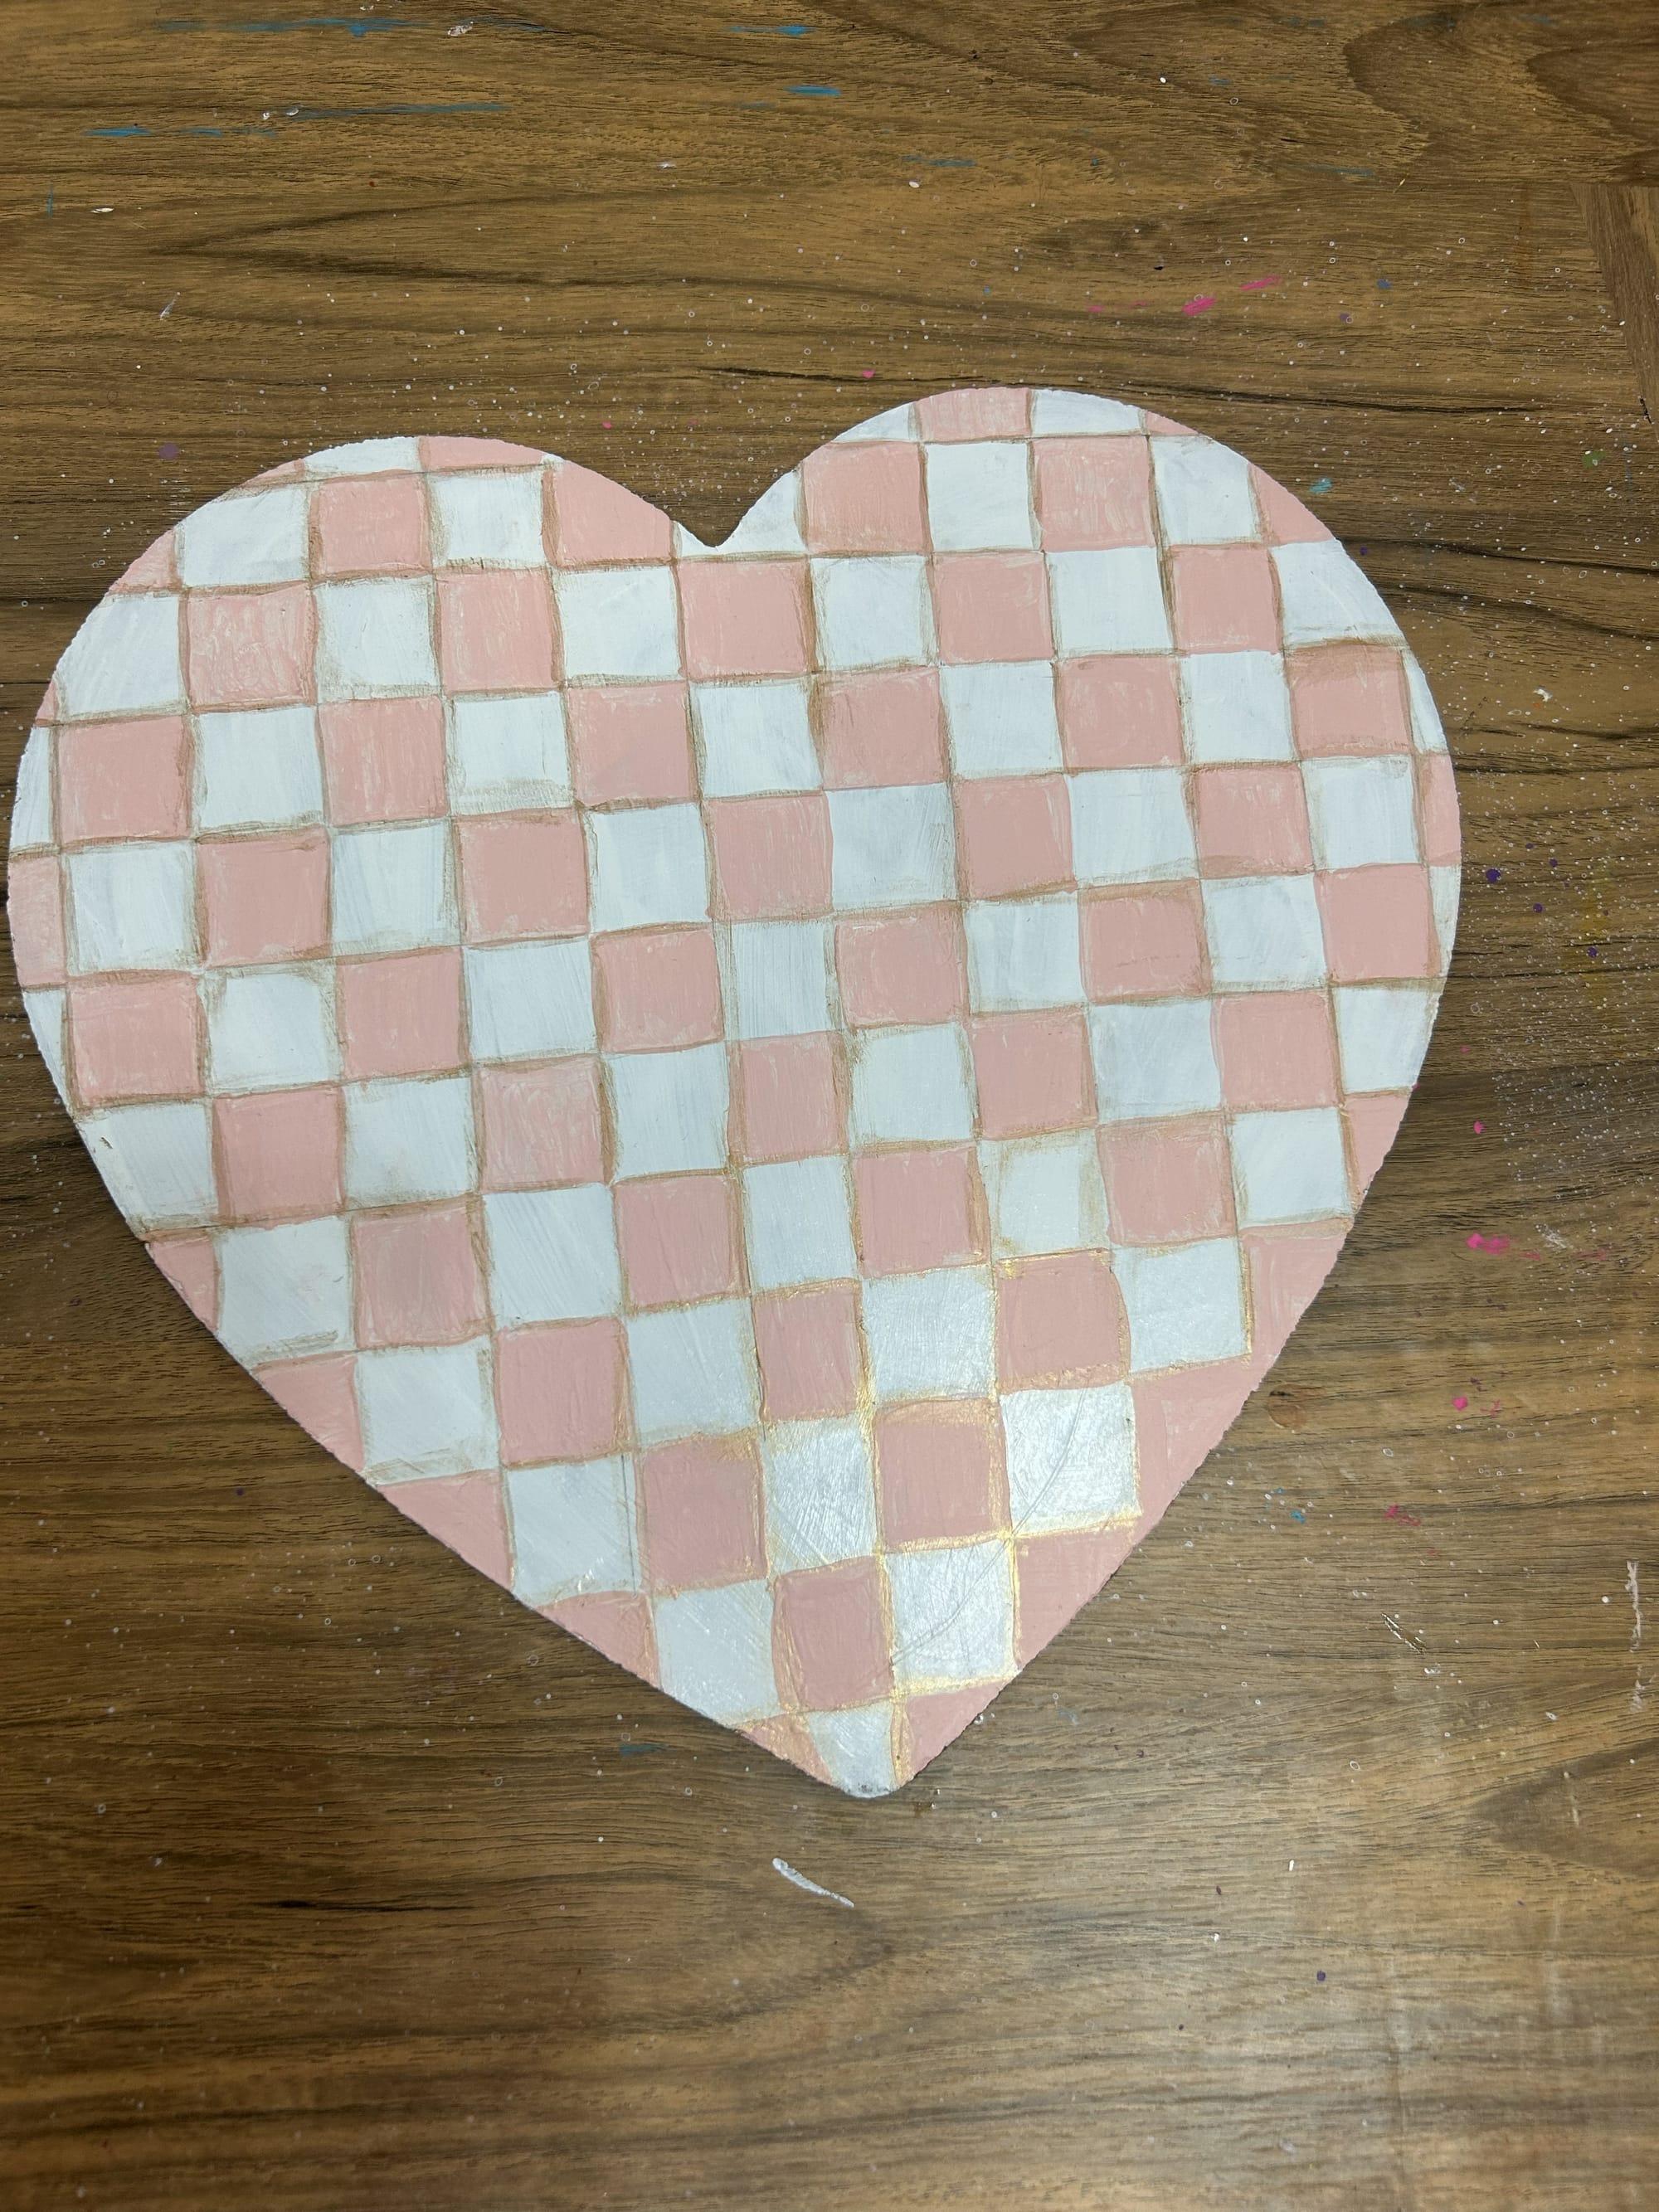
Add gold detail to the hearts with acrylic paint.
Step 7: Let Dry and Display
Allow the hearts to dry completely before displaying or gifting.
Tips & Variations
- Use red, green, or pastel colors to adapt this craft for other seasons
- Add ribbon or twine to hang the hearts
- Create a matching set of hearts with different patterns
- Seal with a clear spray for extra durability
Perfect For
- Valentine’s Day home decor
- Tiered trays and shelves
- DIY gifts
- Budget-friendly seasonal decorating
- Adult craft nights
Final Thoughts
This Dollar Tree heart craft is proof that you don’t need expensive supplies to create beautiful, inspired decor. With just a little paint and creativity, you can make Valentine’s decorations that feel elegant, personal, and fun.
If you make these hearts, I’d love to see them! Be sure to save this project for later and share your creations.
- “Leave a comment with your favorite color combo!”
- “Tag #craftymamabirdnc on Instagram so I can see your penguins!”