Apple Basket Stamping
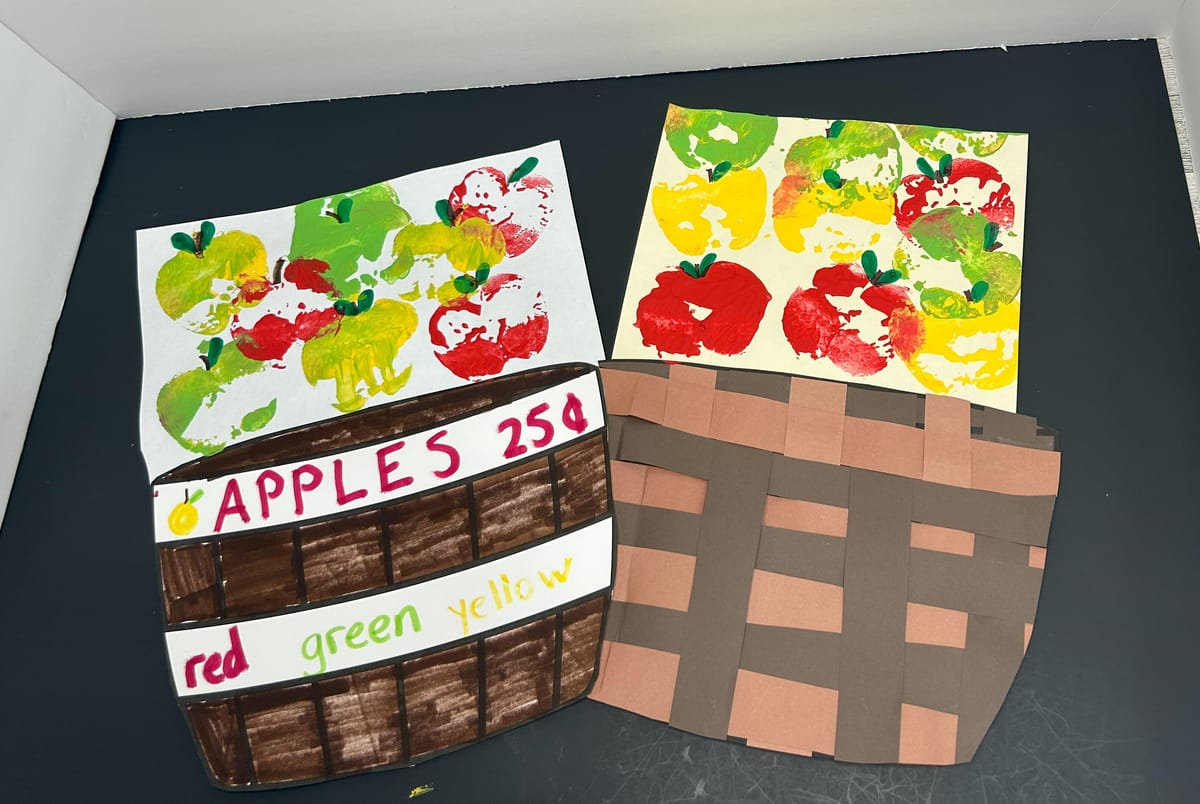
Apples are a big part of fall time. Have you even been apple picking? My family has and it is tons of fun. Walking around an apple orchard full of a variety of apples and choosing the kind you want. As you pick apples you place them in your basket. Even if you are not able to go apple picking fall always reminds us of yummy apples and all the things we can create with them. Apples can even be used to create art. Cutting an apple in half gives children a chance to see the inside of an apple, including the core and seed. You can then use the apple half for apple stamping to create your own apple basket.
I have created 2 different varieties of this activity. You can simply print and color the apple basket or do some weaving to create your own apple basket. I don't know about you but, when I was a child I remember doing a lot of weaving. It really does take a lot of thinking and patience. I suggest splitting this activity into 2 days worth of work if you are in a classroom. Otherwise, I would create the basket with my child and allow it to dry and then move on to stamping the apples.
Supplies:
- White construction paper
- Markers
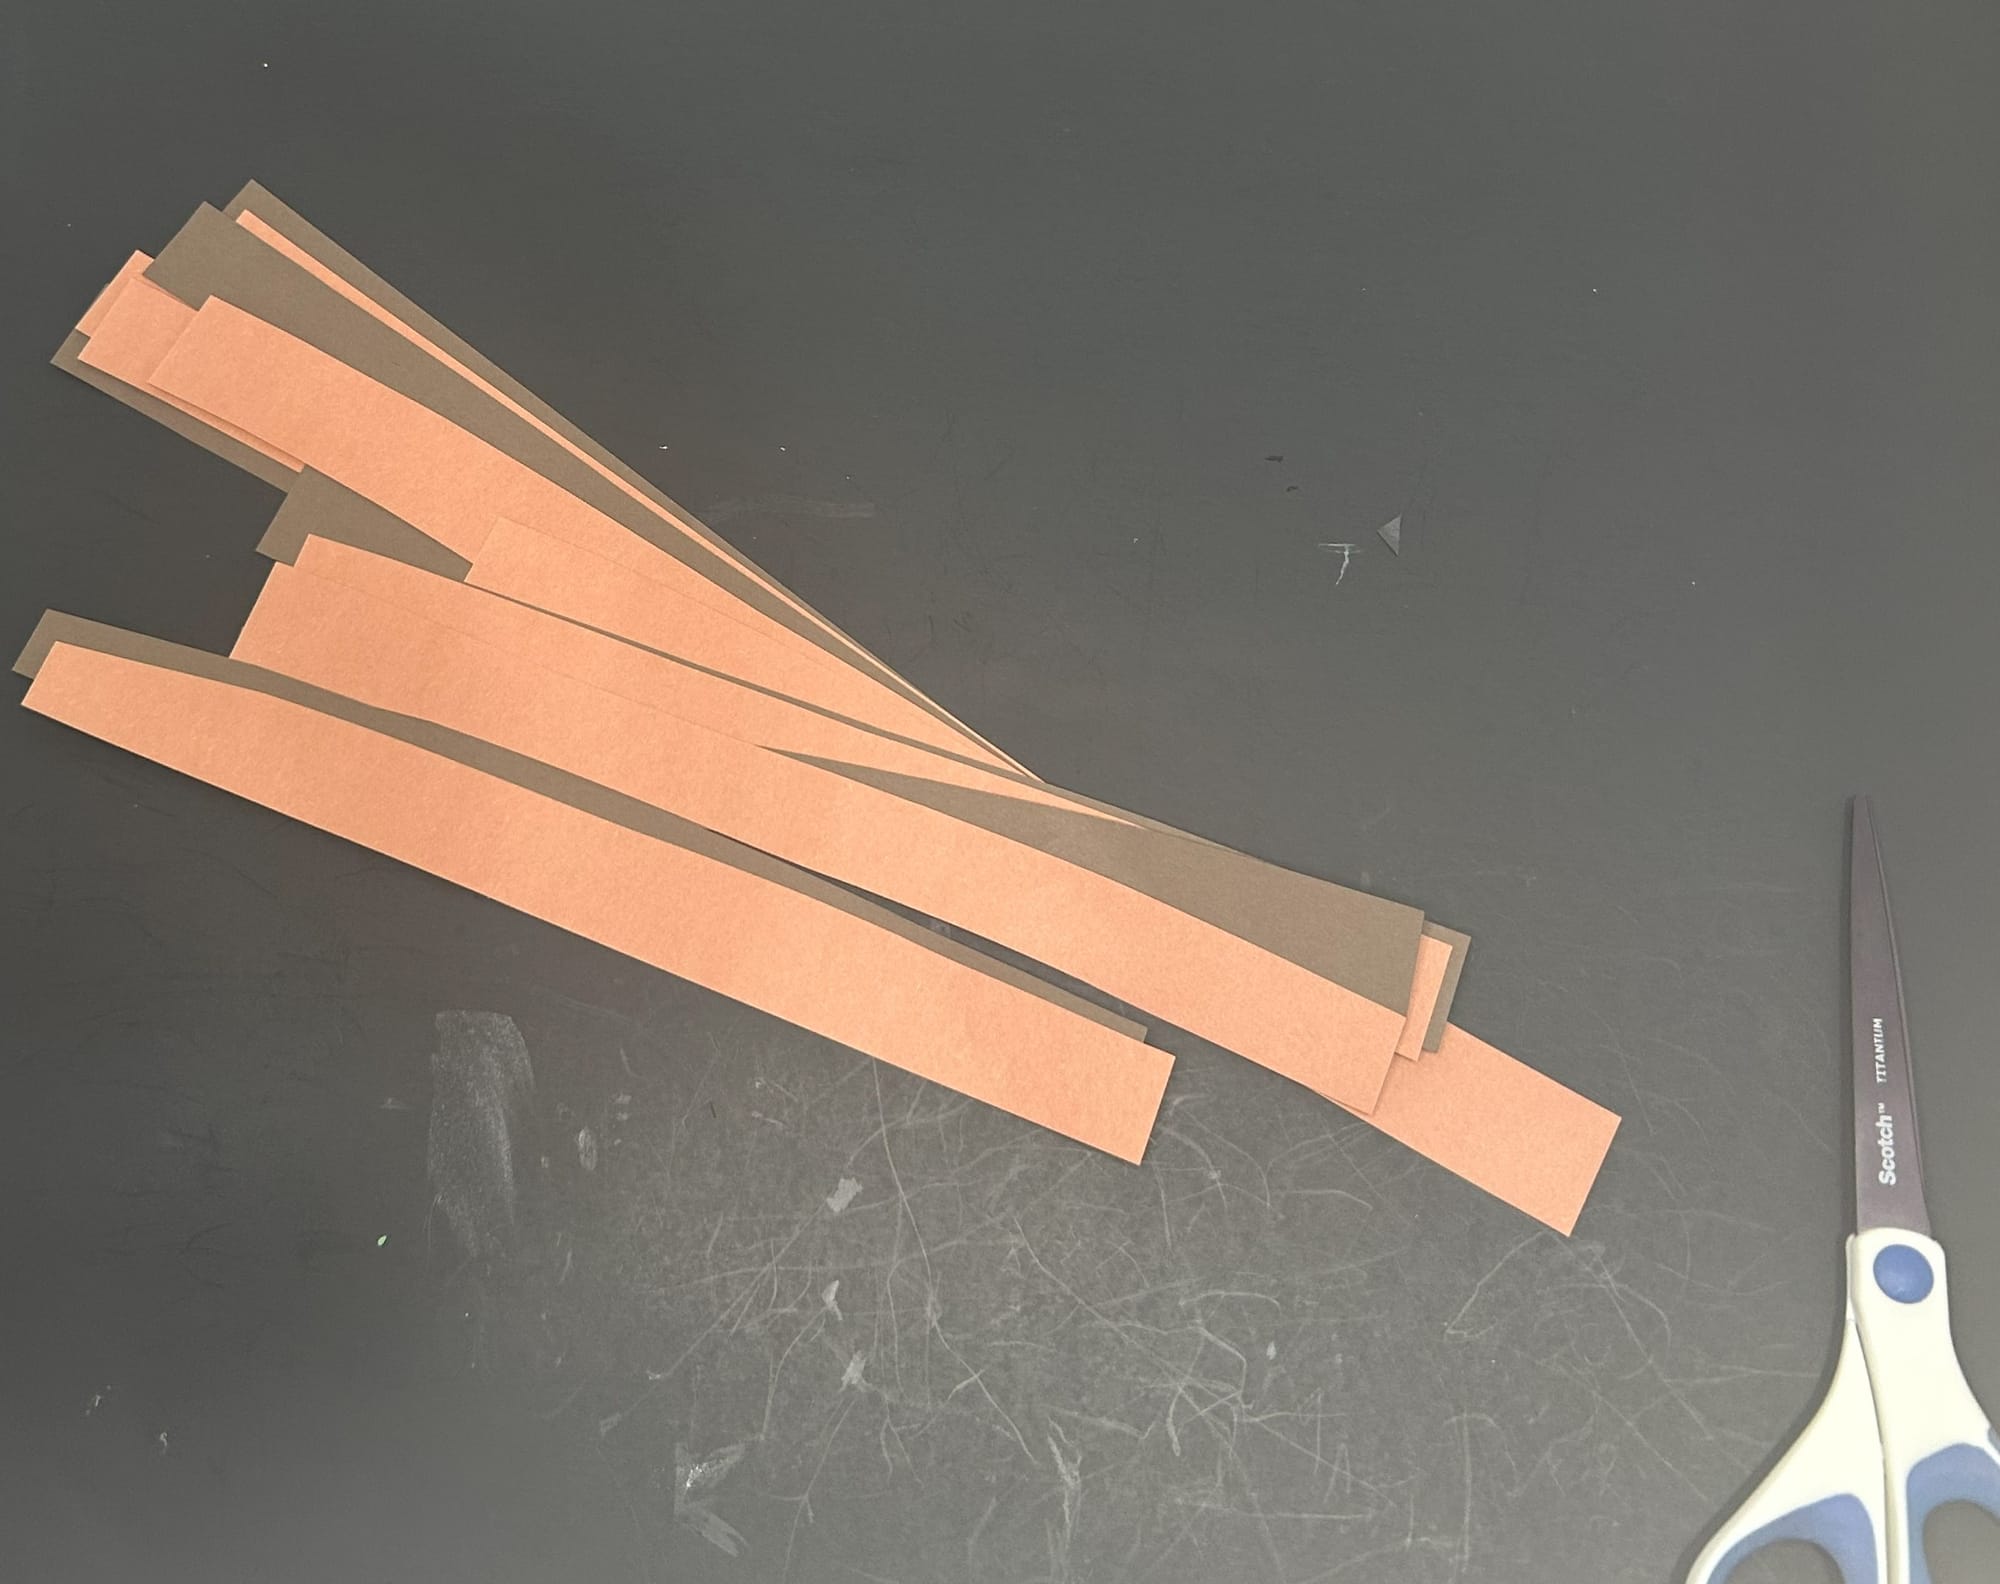
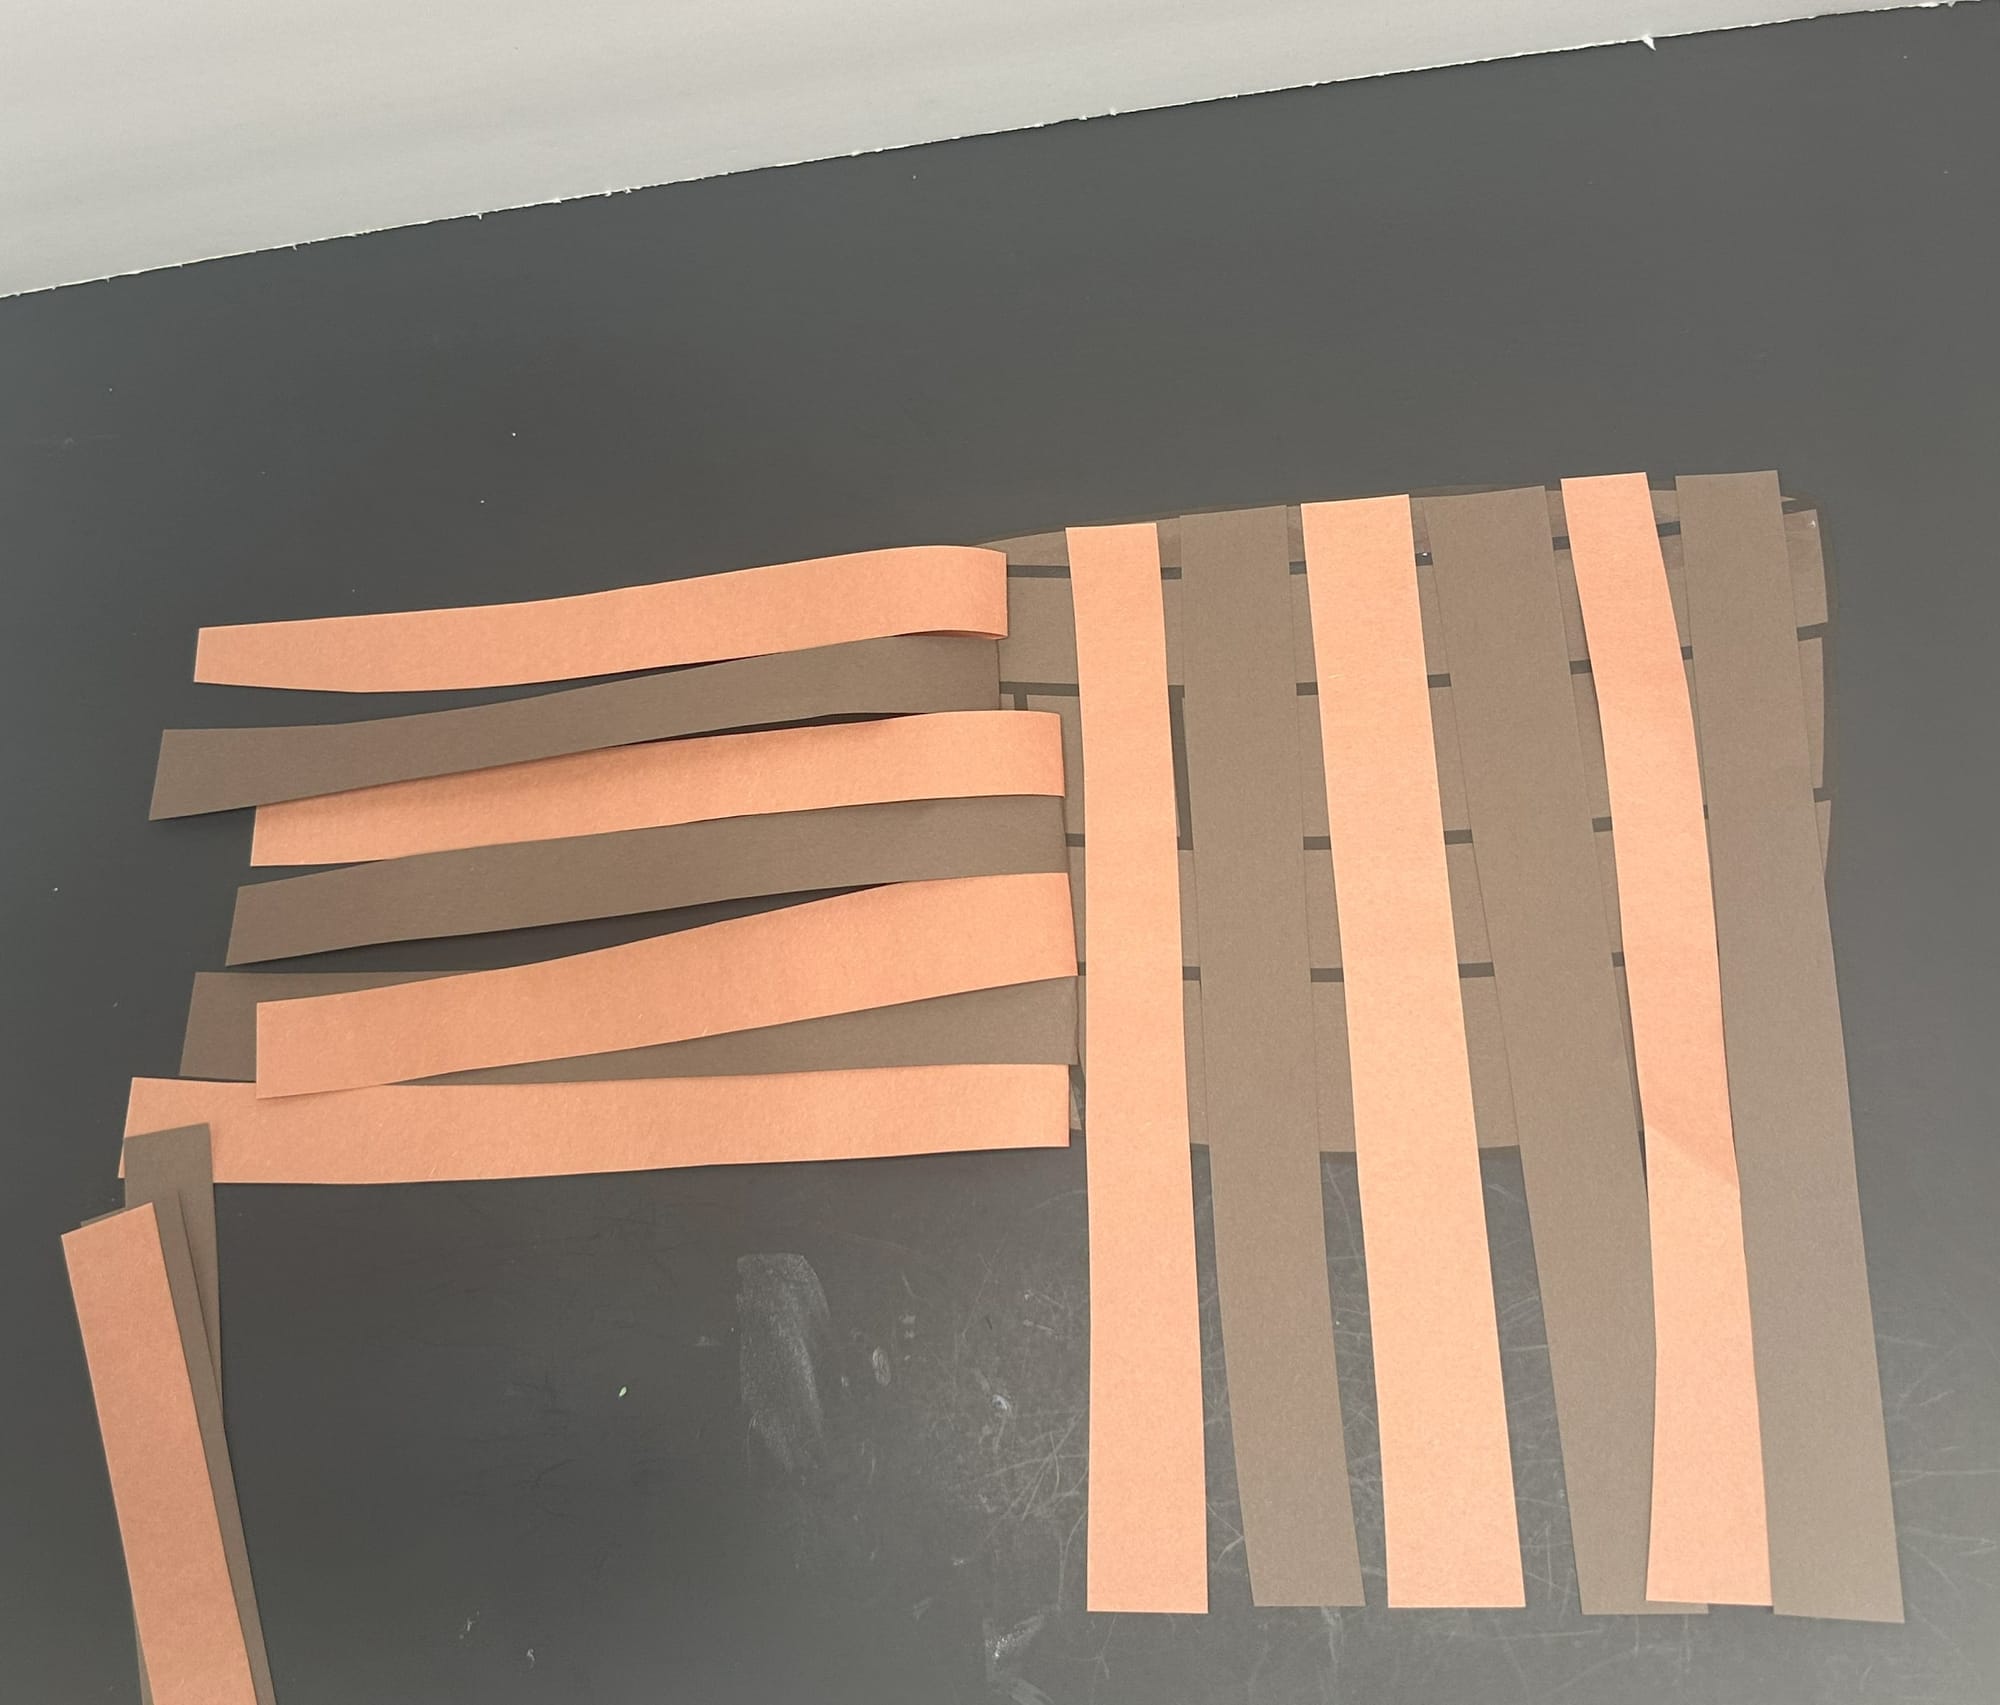
- Brown construction paper, cut into strips
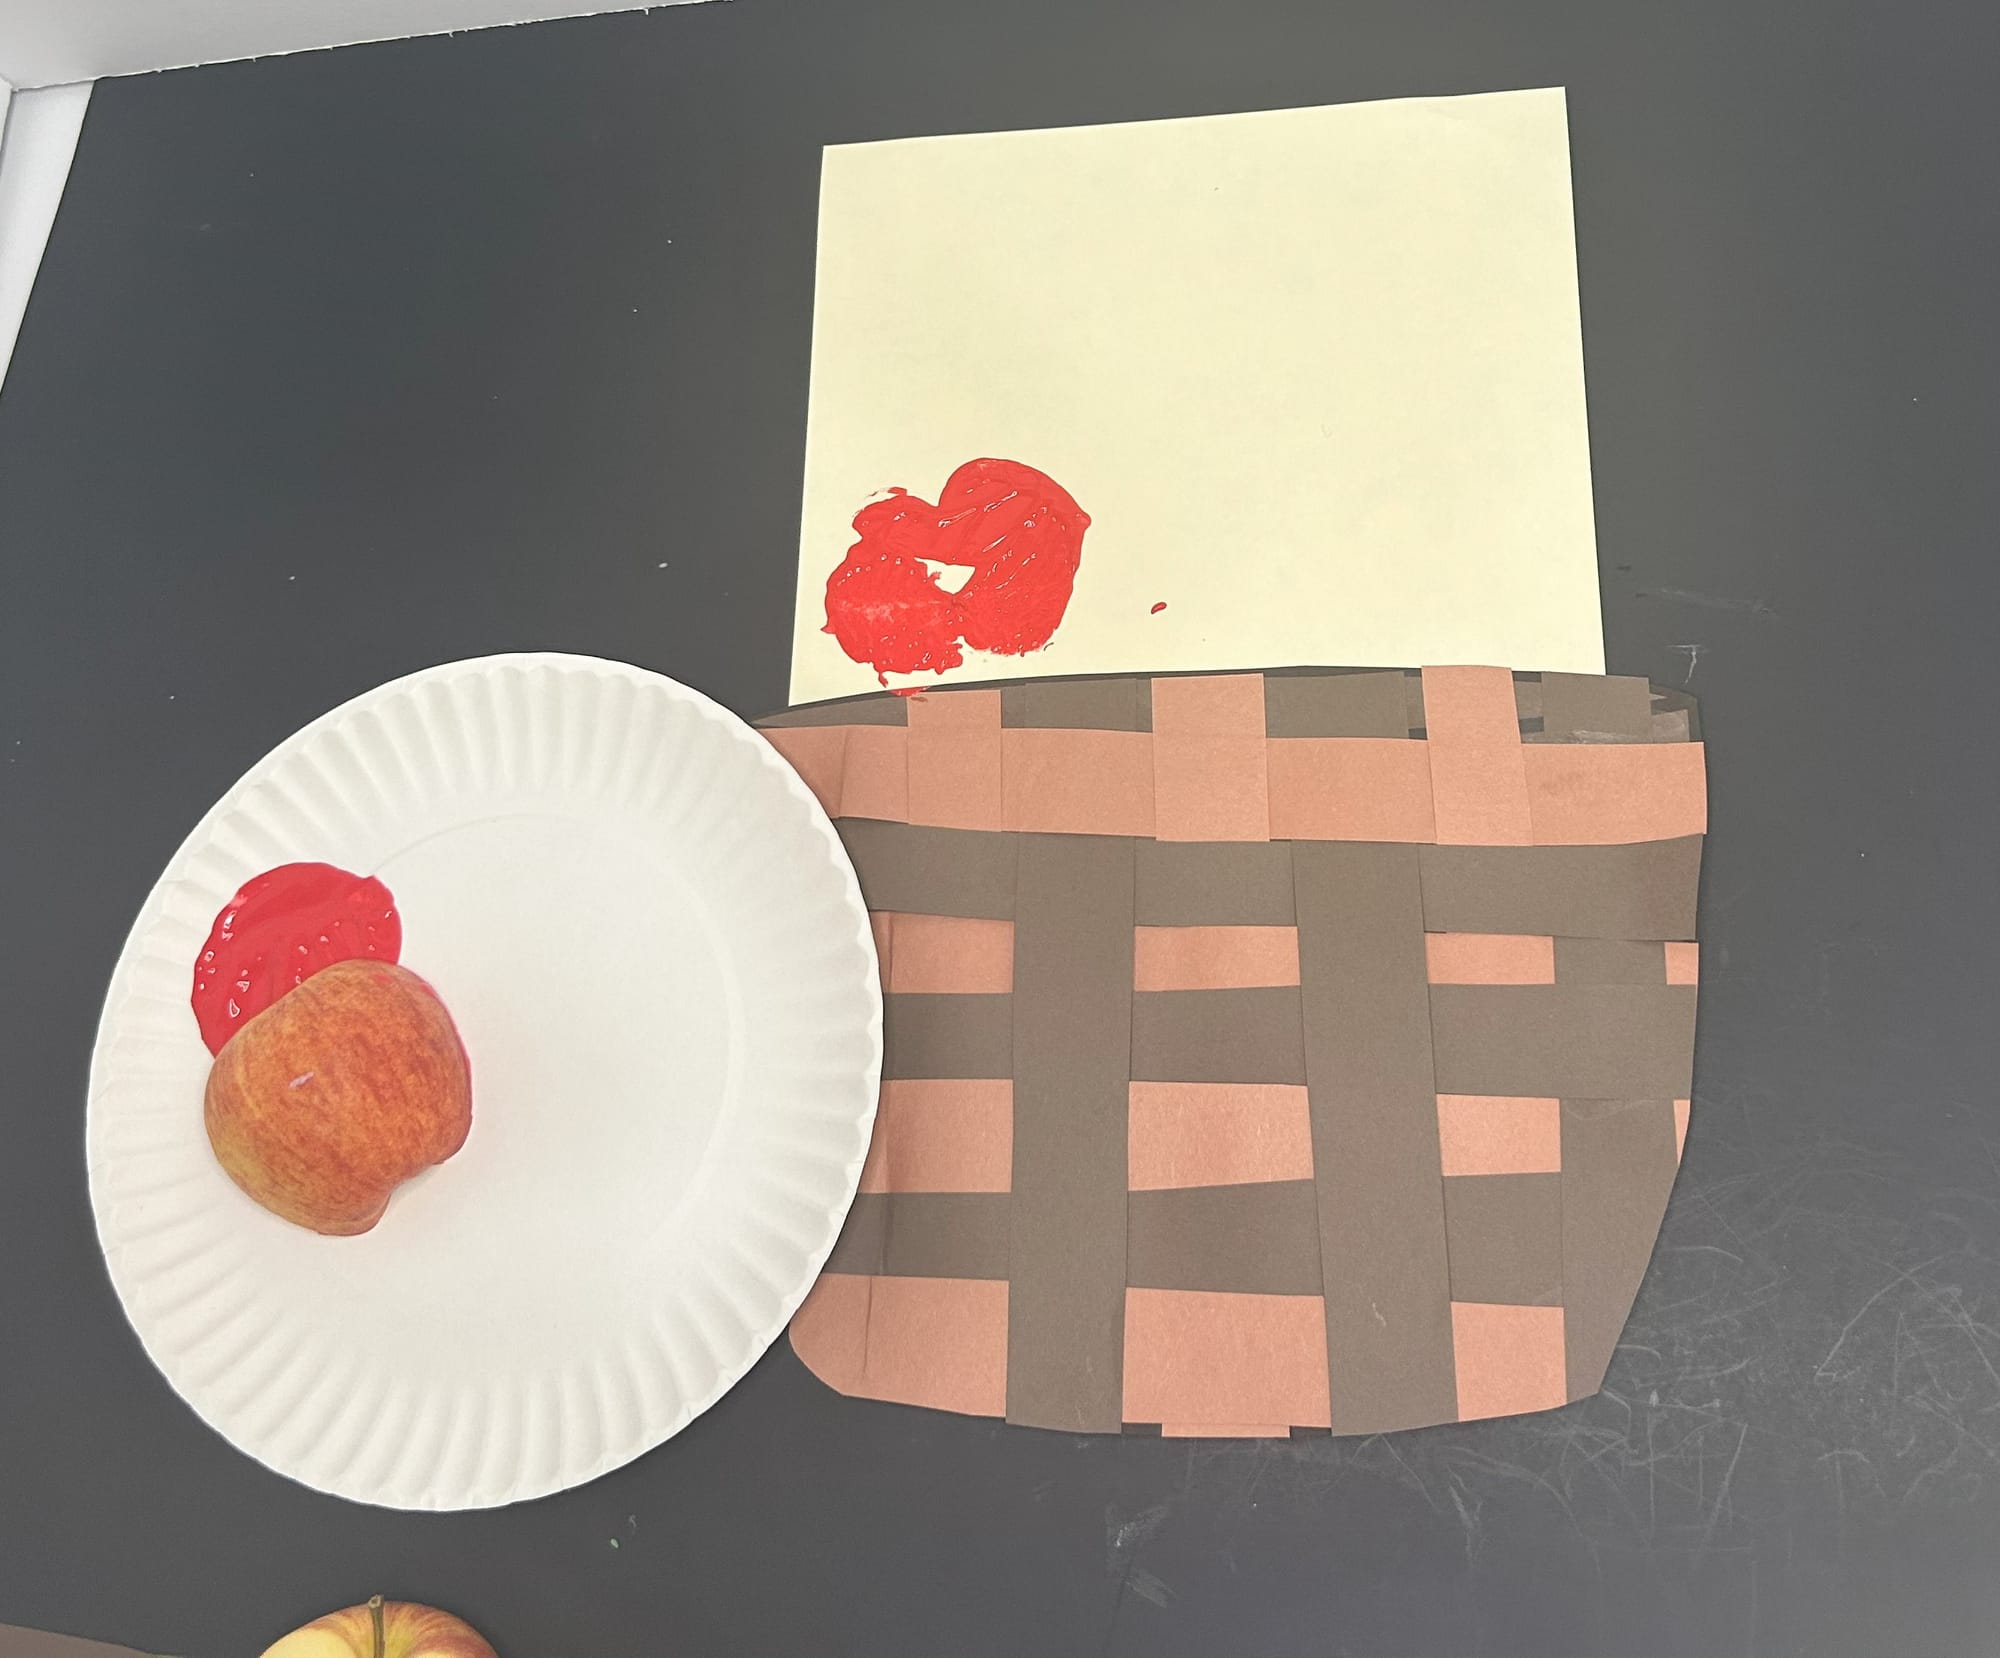
- apple cut in half
- red, yellow and green paint
- Gluestick
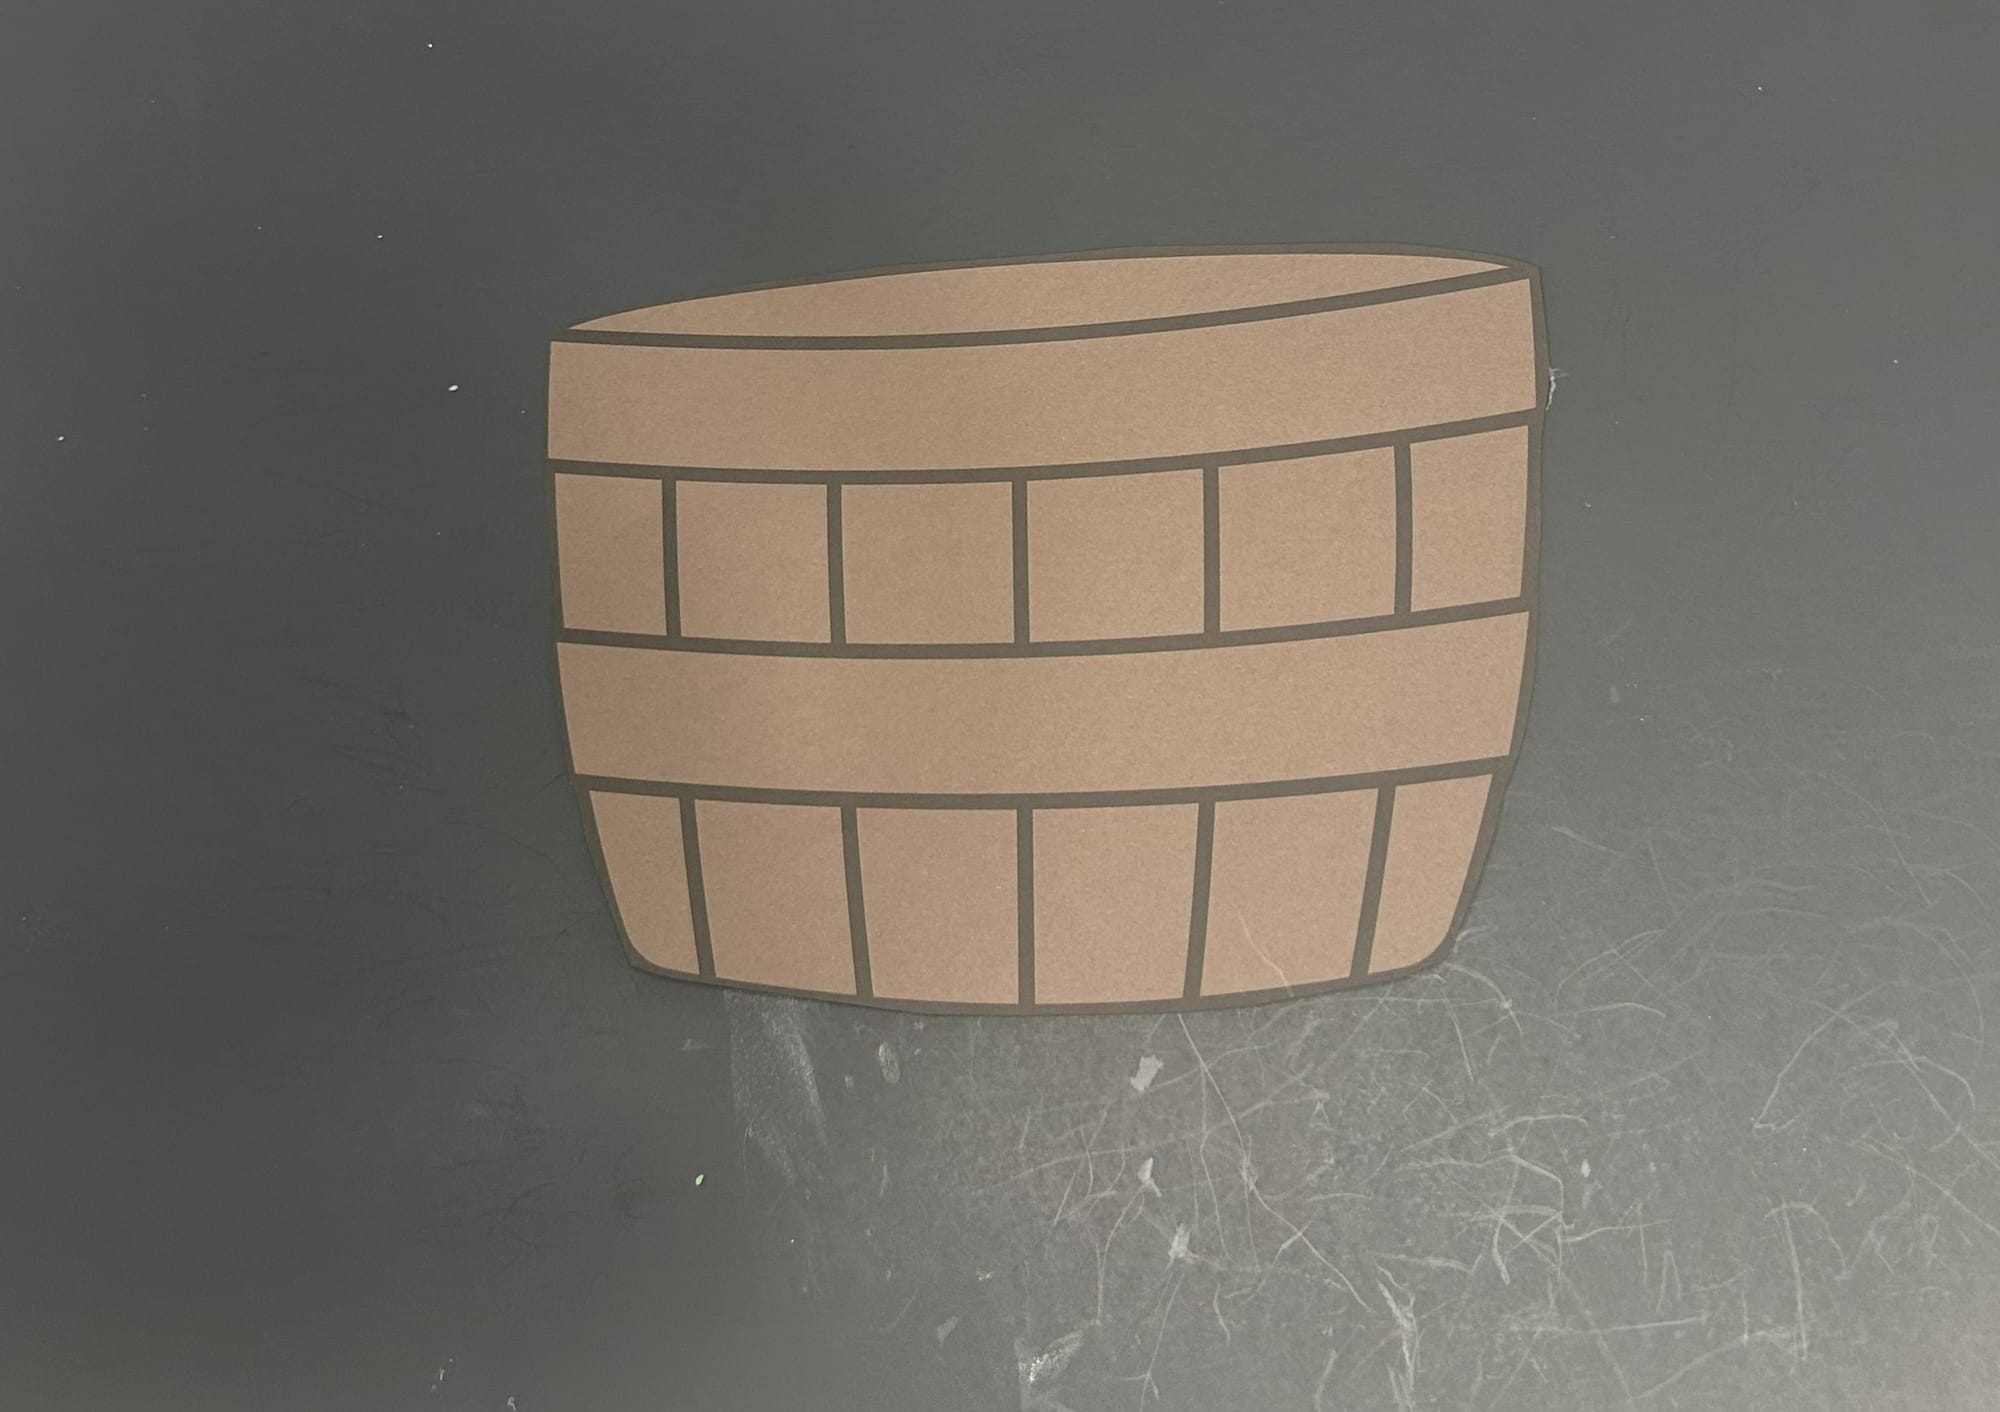
- Apple basket template
Directions:
Basket weave basket:
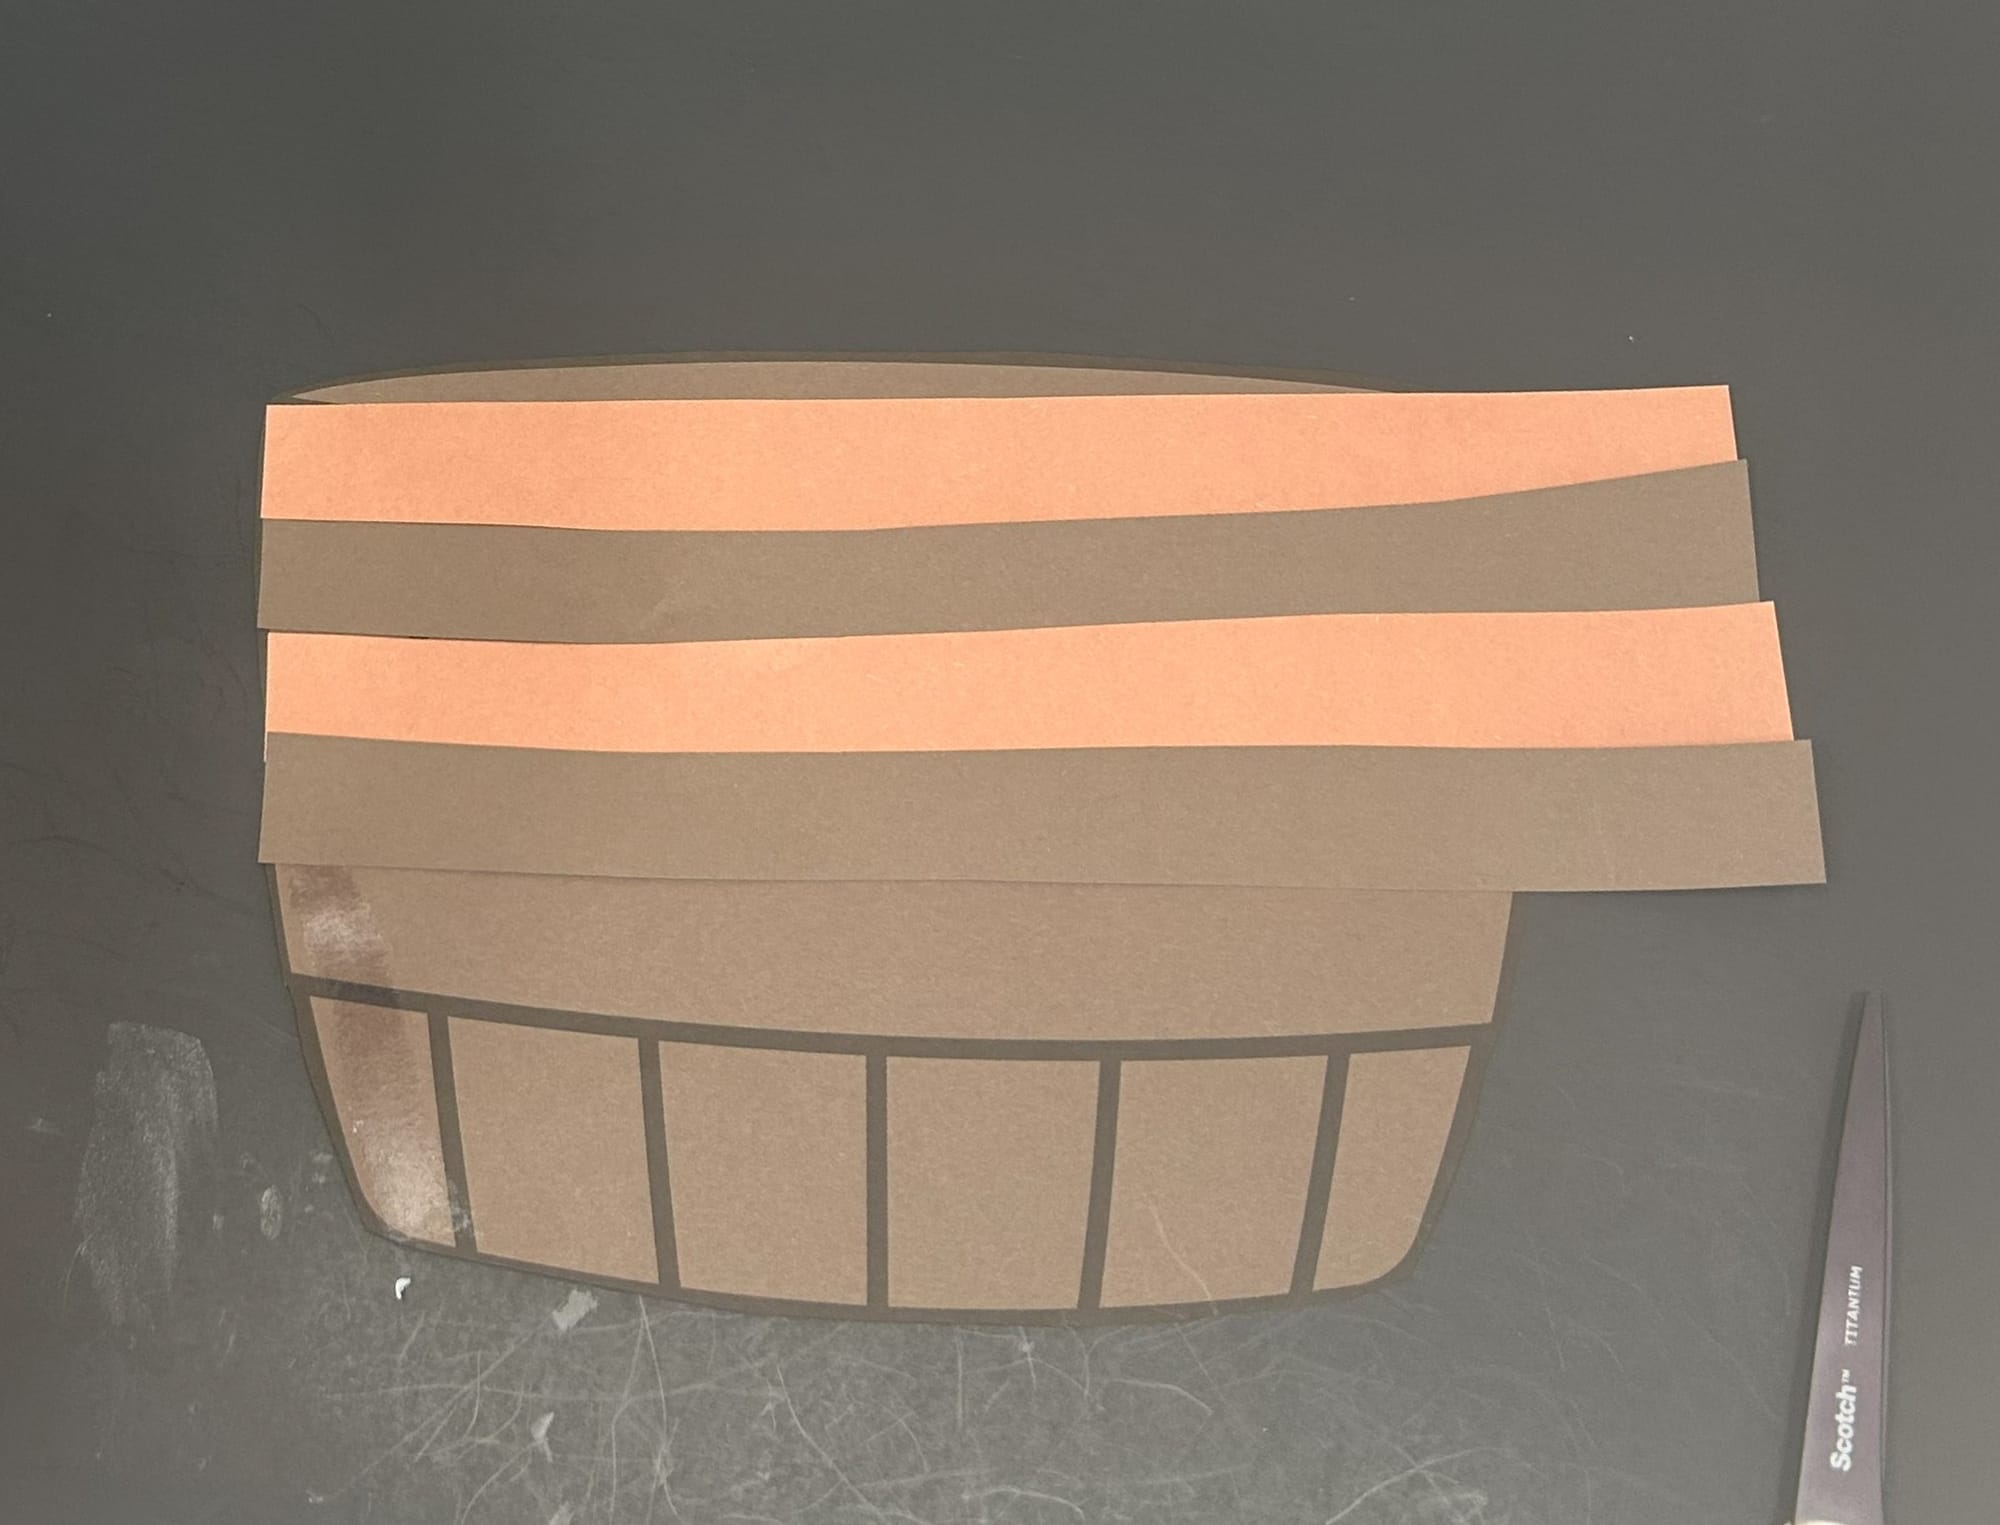
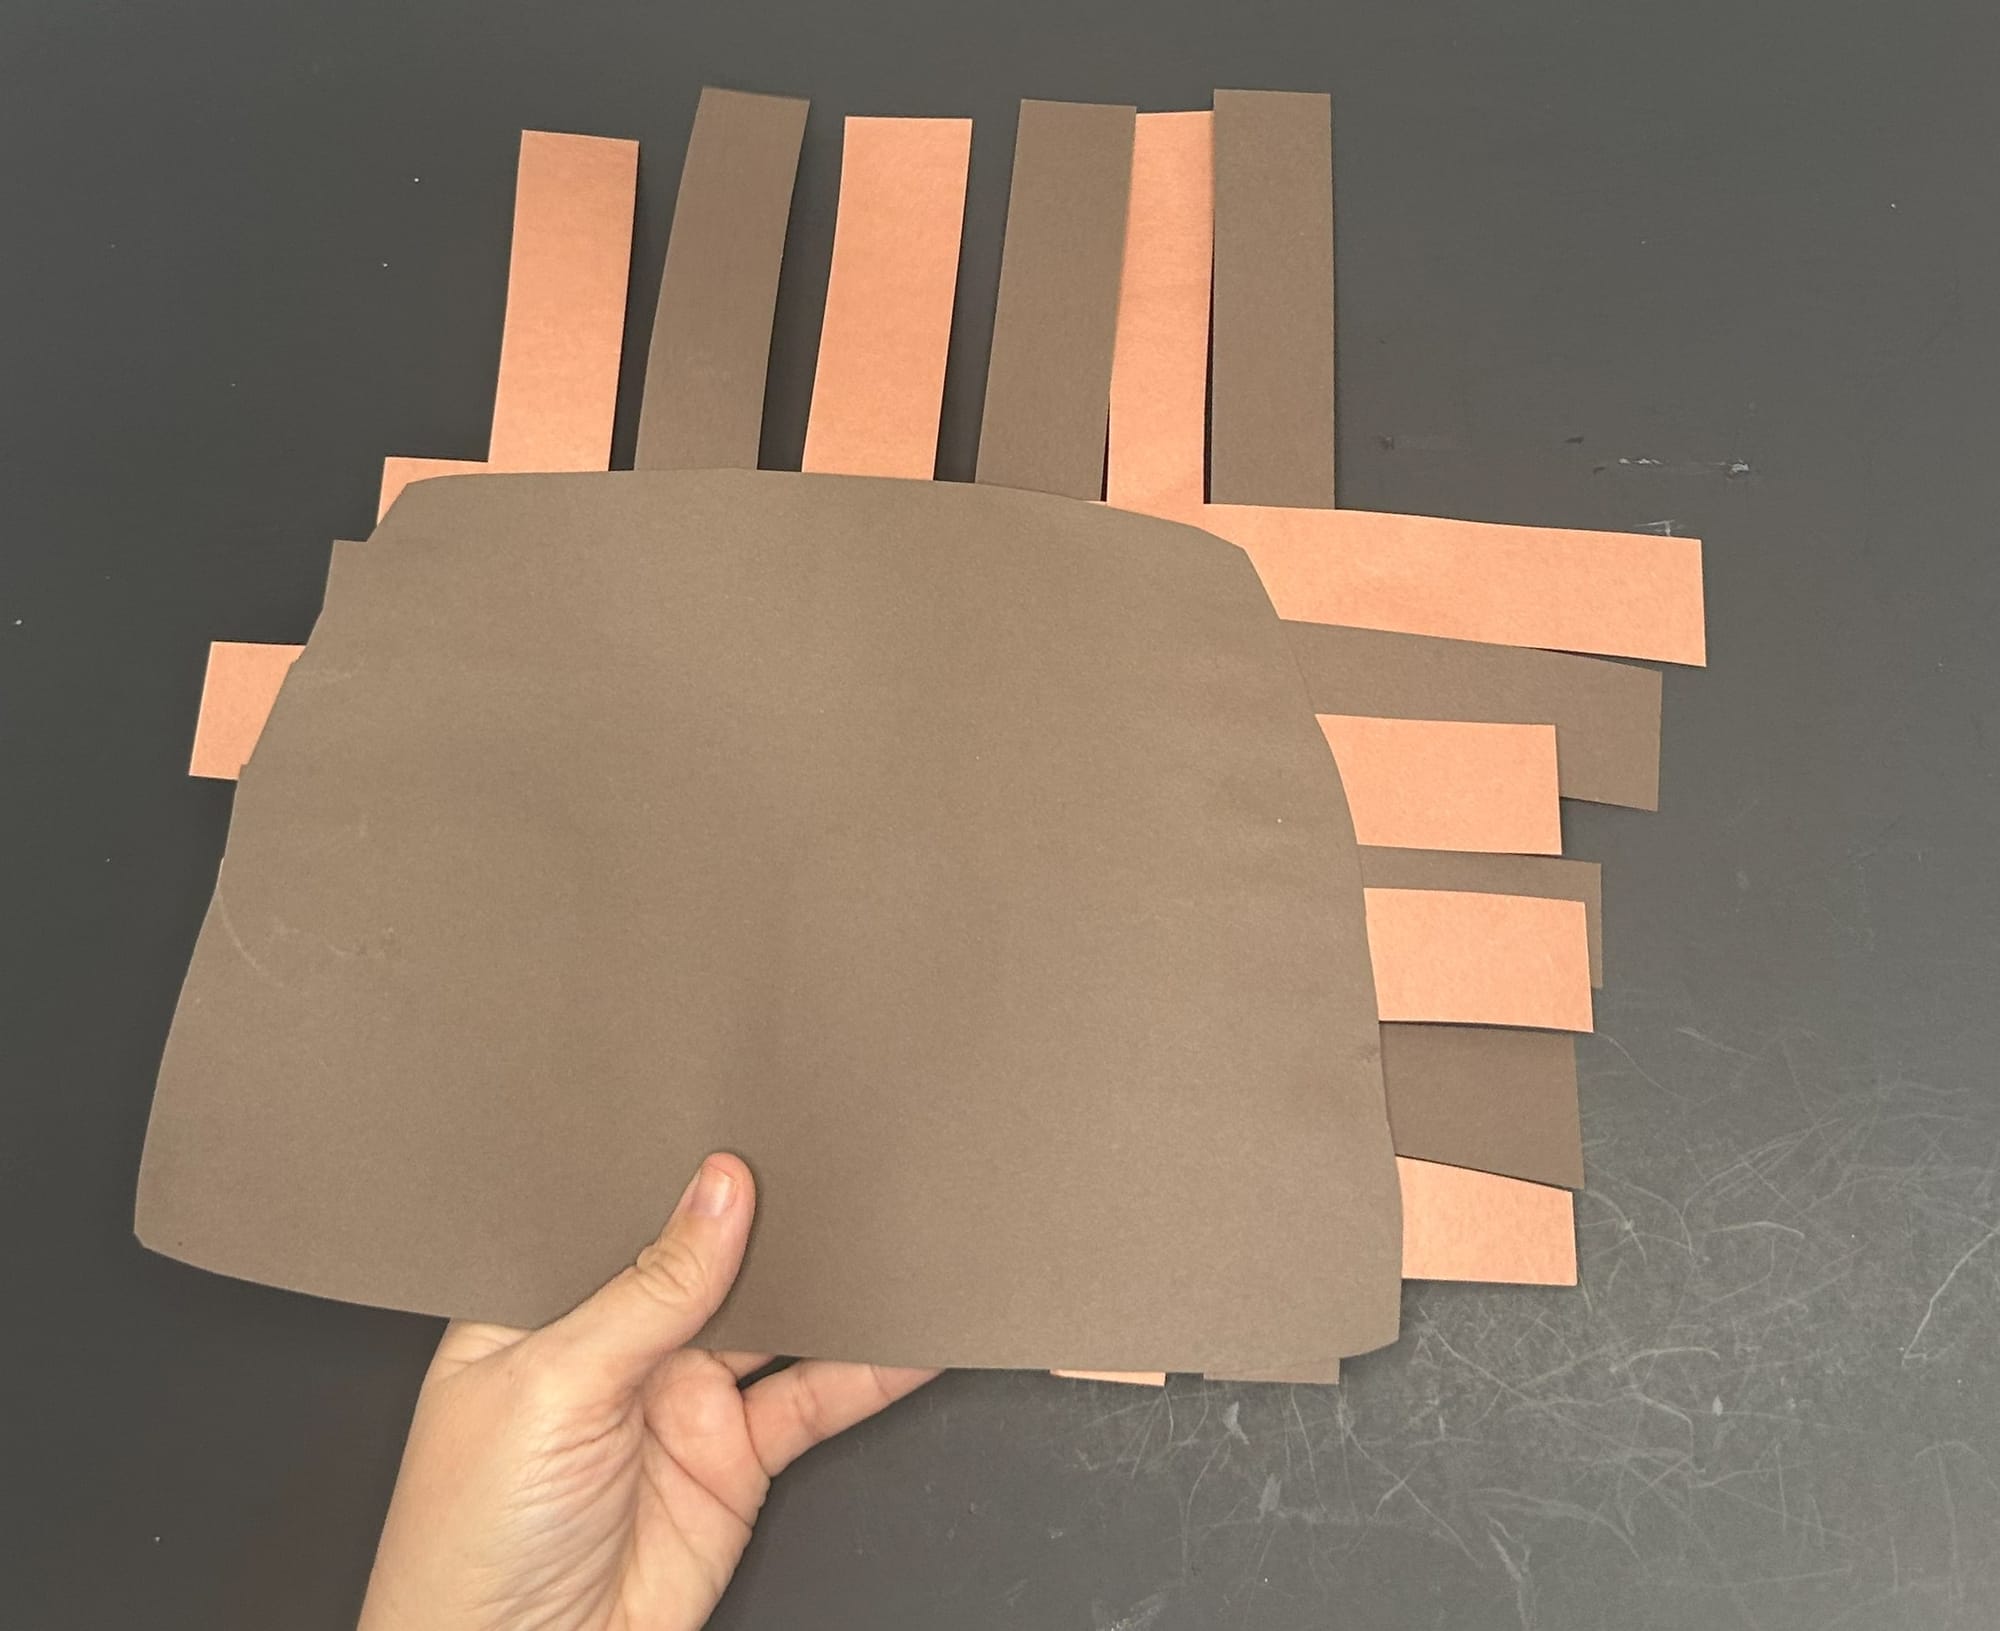
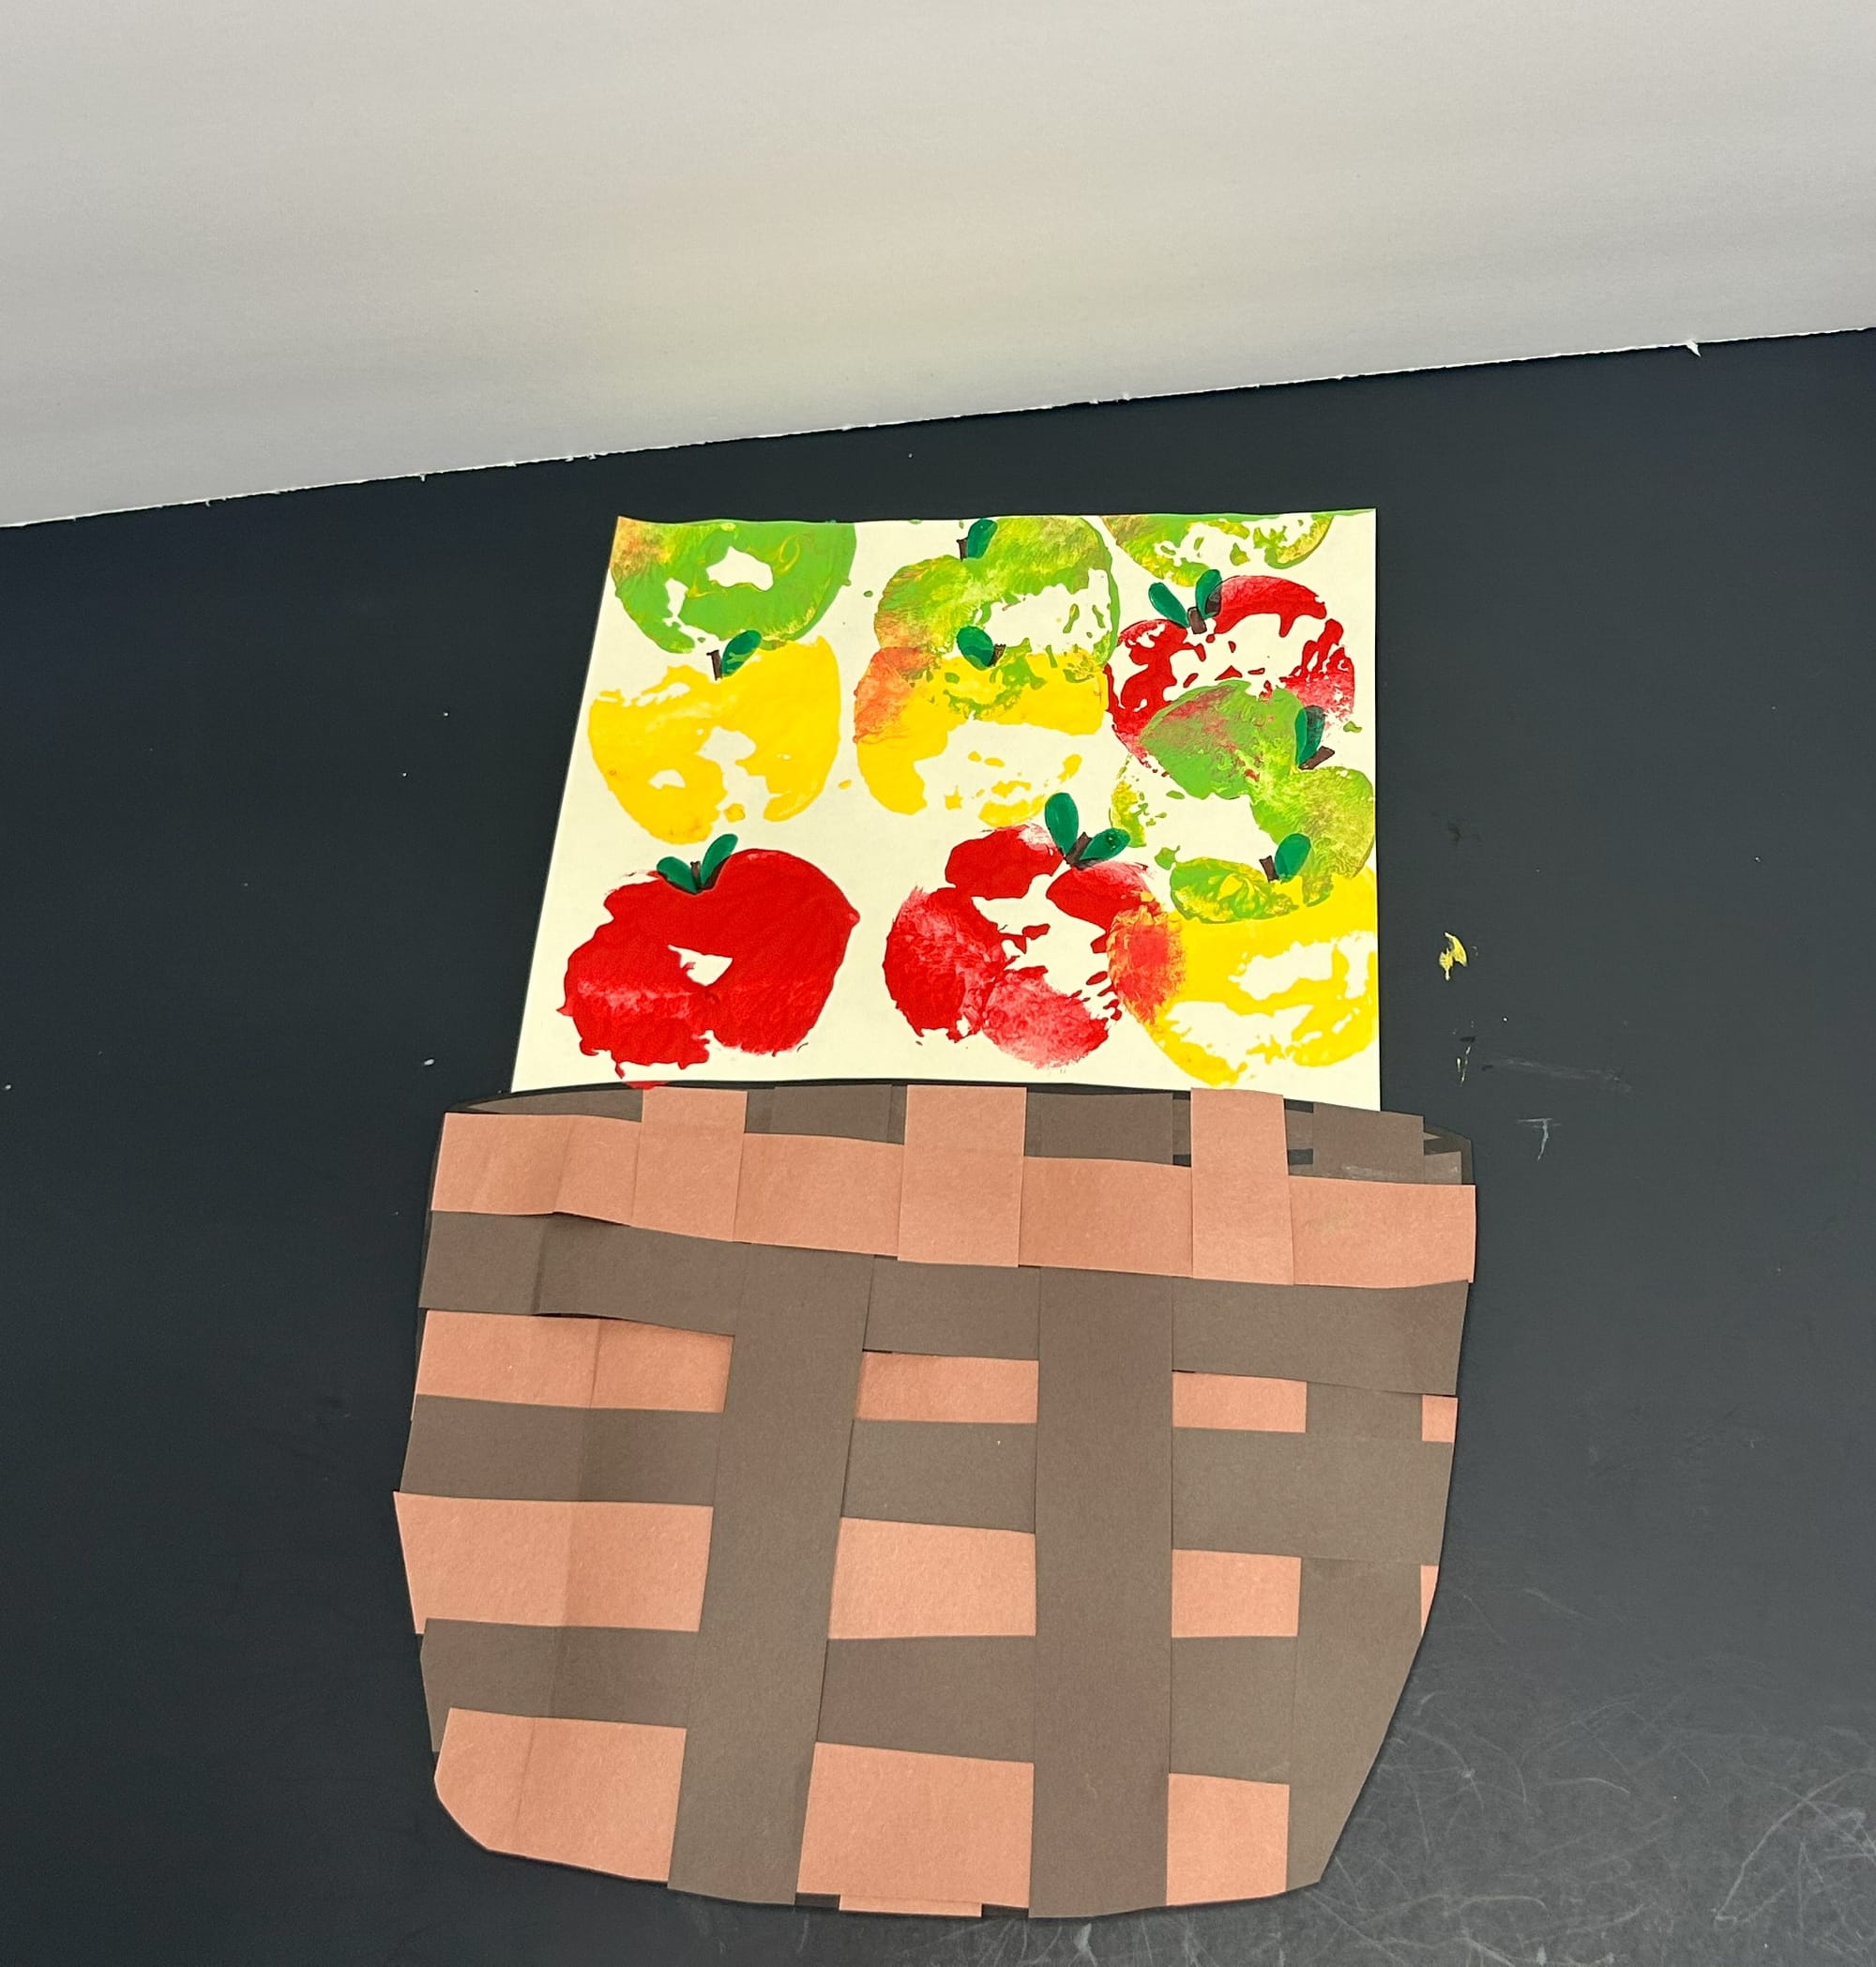
- Print out basket template on construction paper or cardstock color of your choice. I chose brown. Then, cut out the basket.
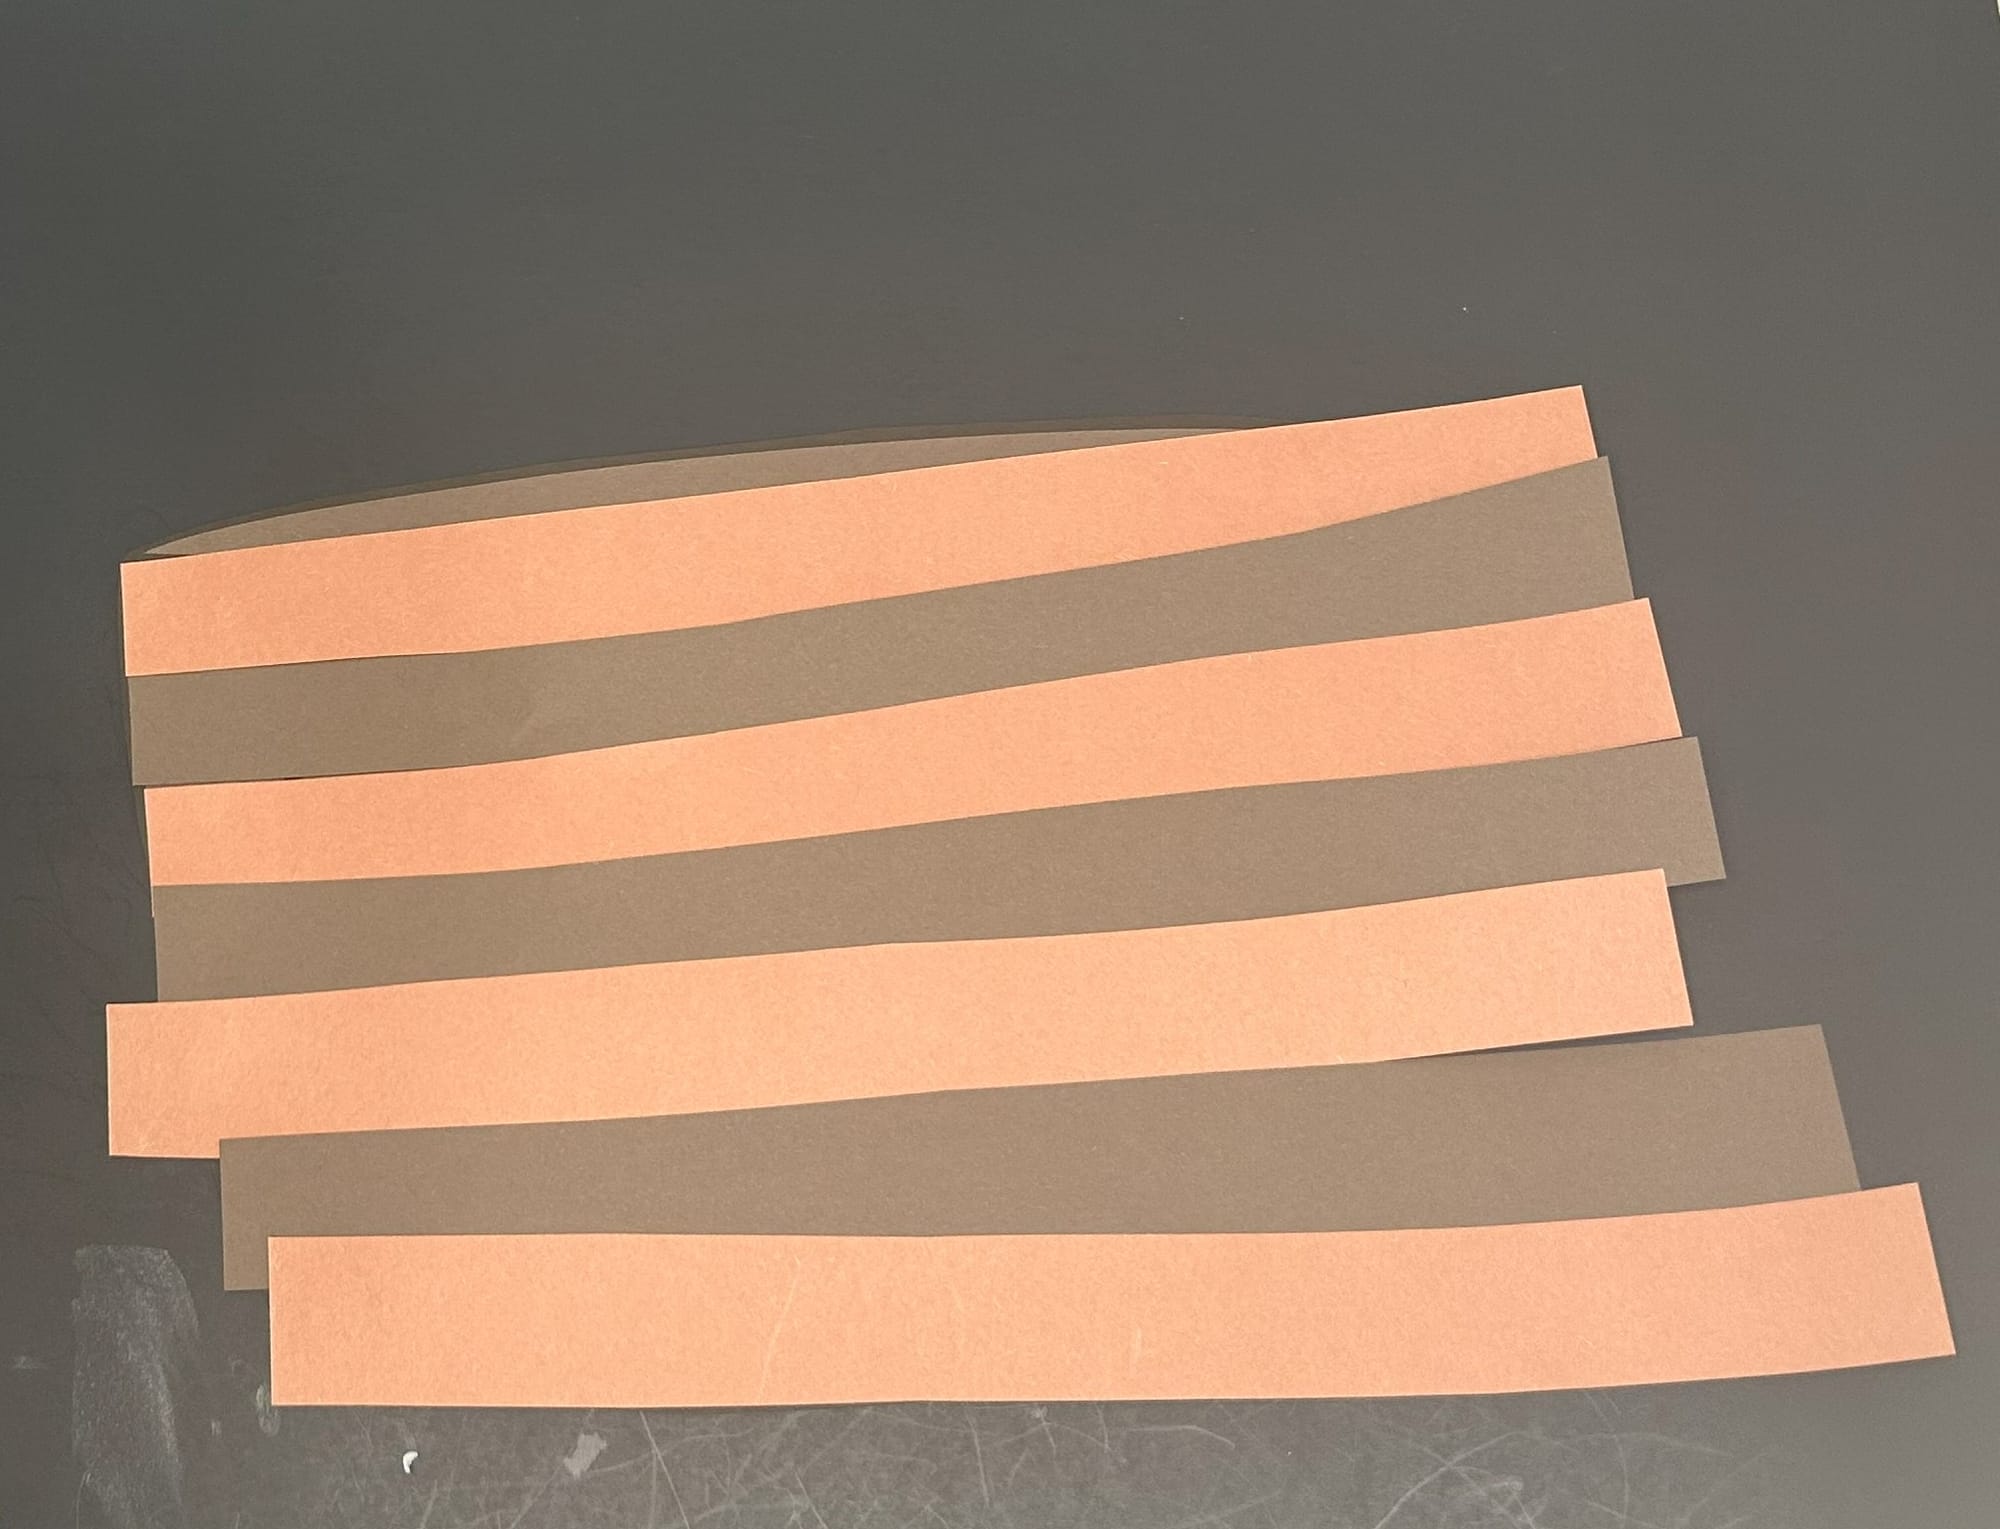
- Cut strips of brown paper for the basket weaving. I chose 2 different shades of brown.
- Glue strips of paper along the edge of the apple basket. Cover the basket entirely, it is oaky if they are bigger than the strip.
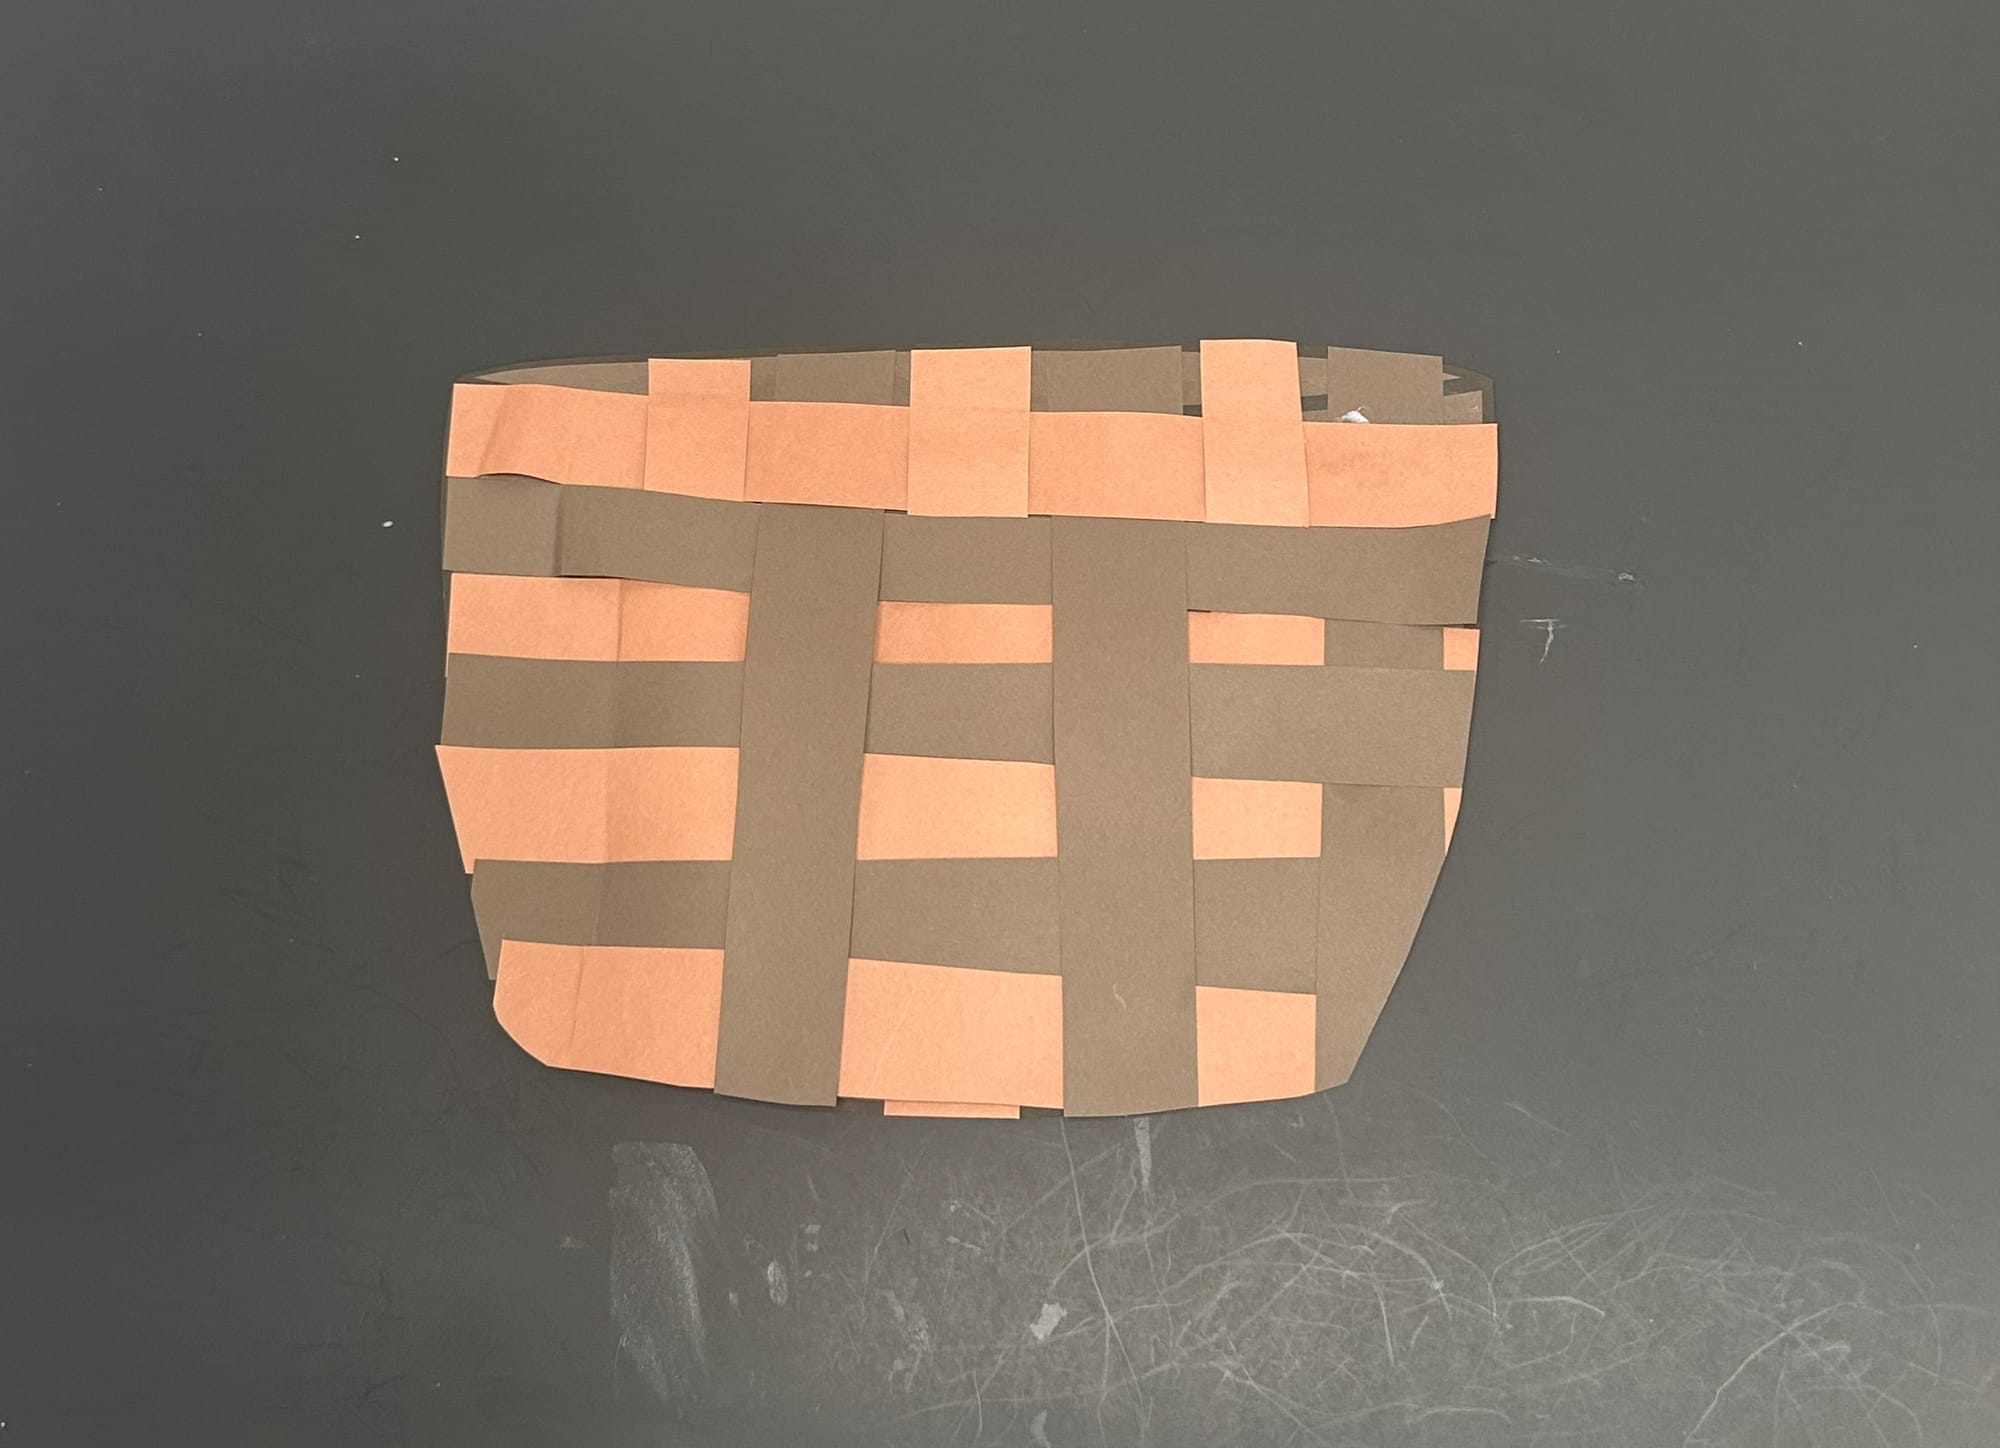
- Fold back the strips you have glued and glue a strips to the top of the basket going down.
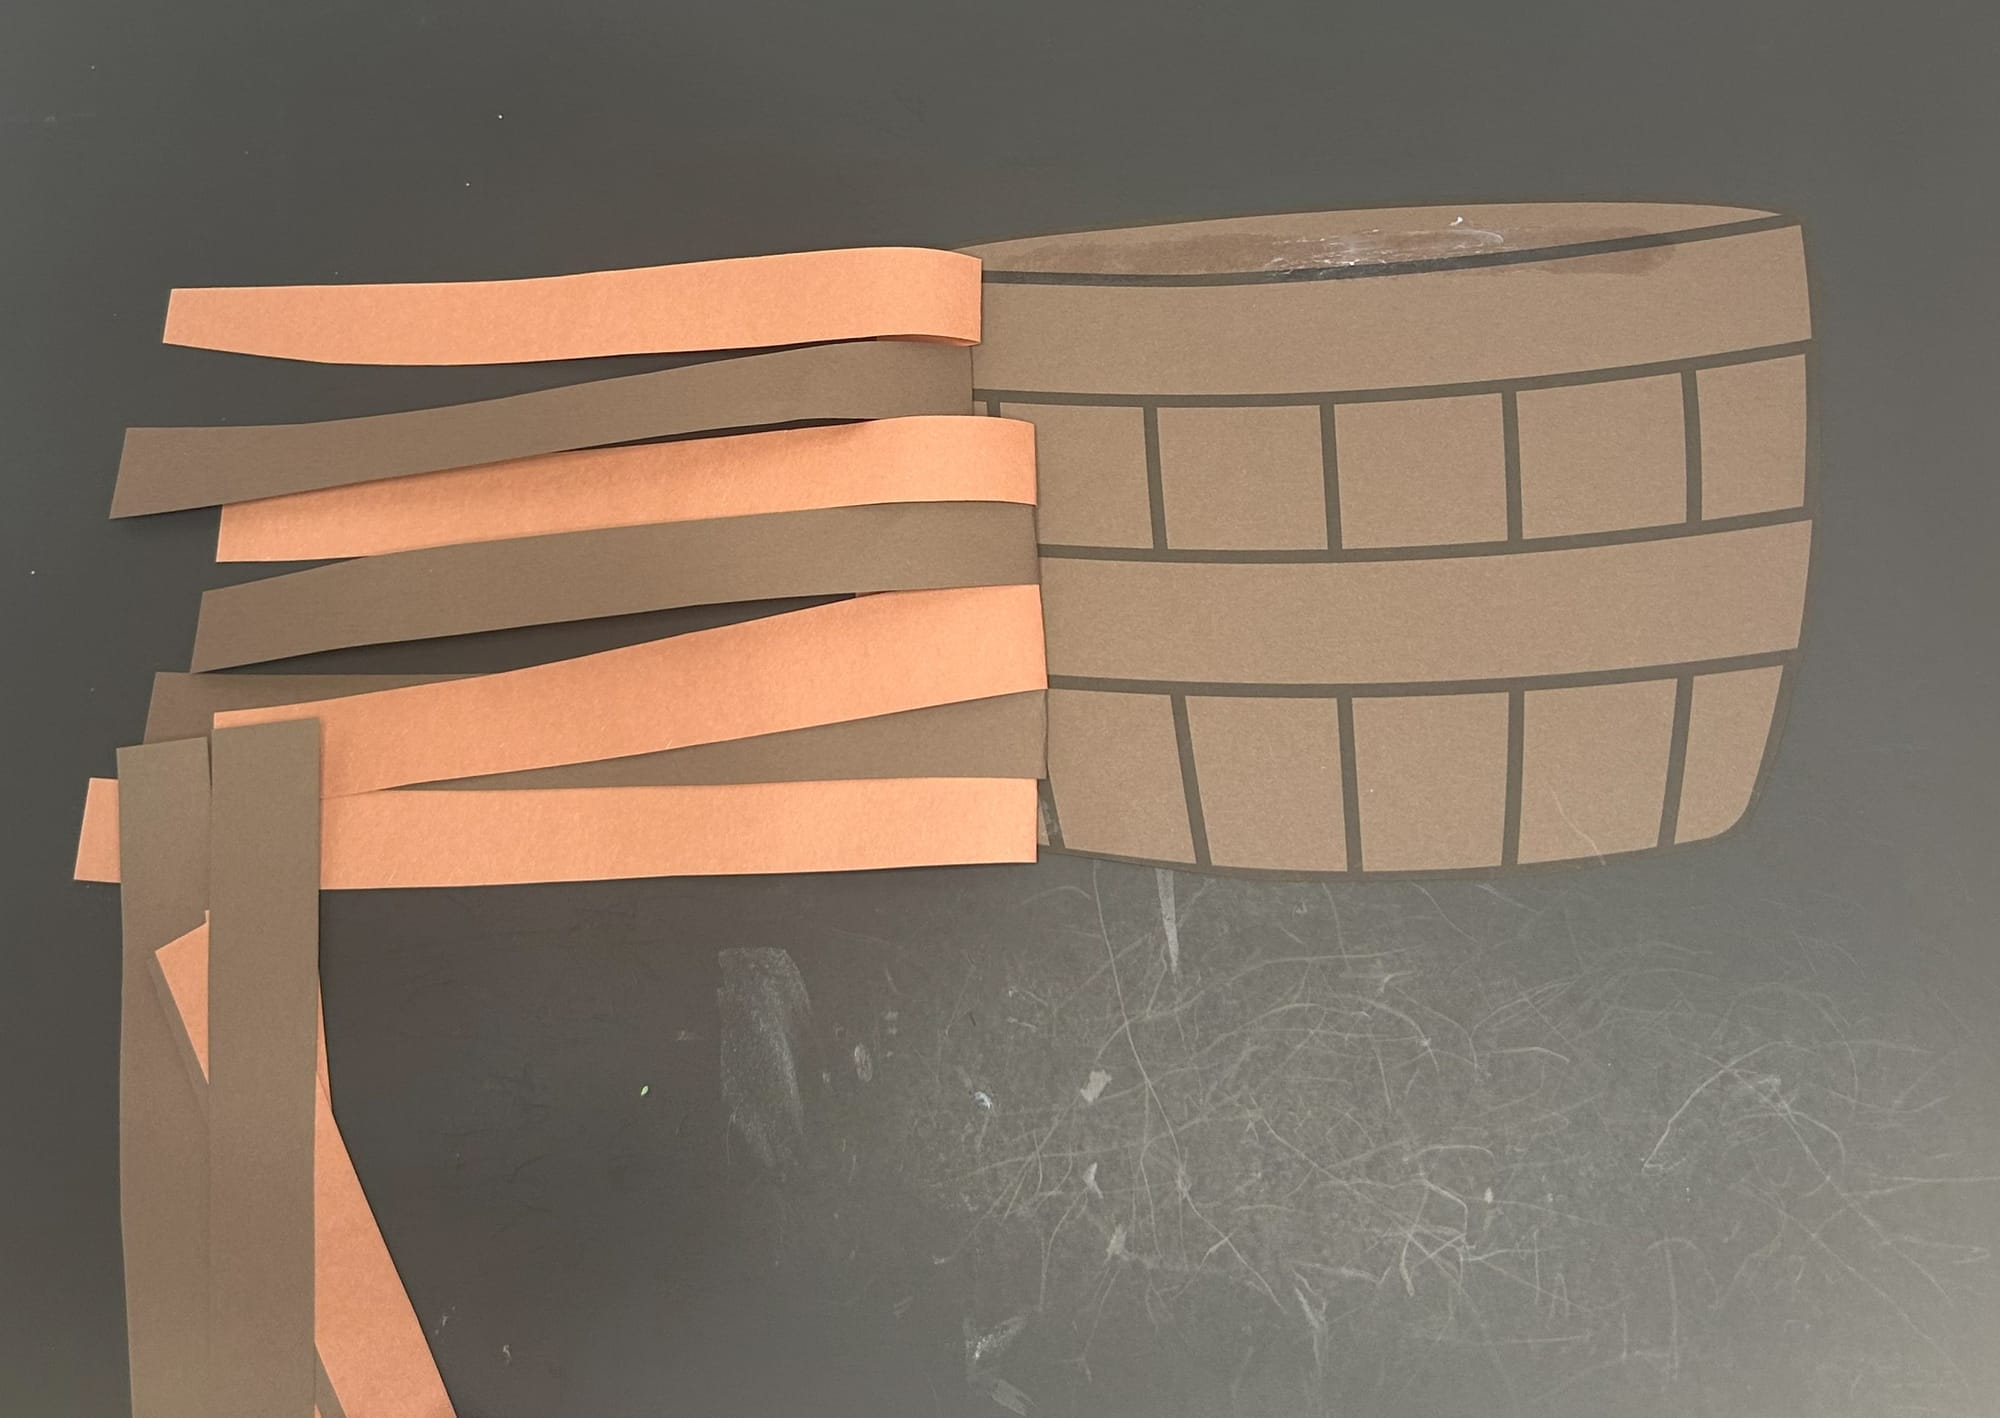
- Take a strip from the left and weave it under the strips going down. Take the strip and go under, over, under, over in a pattern until you reach the end. Then, glue the strip to the other side of the basket.
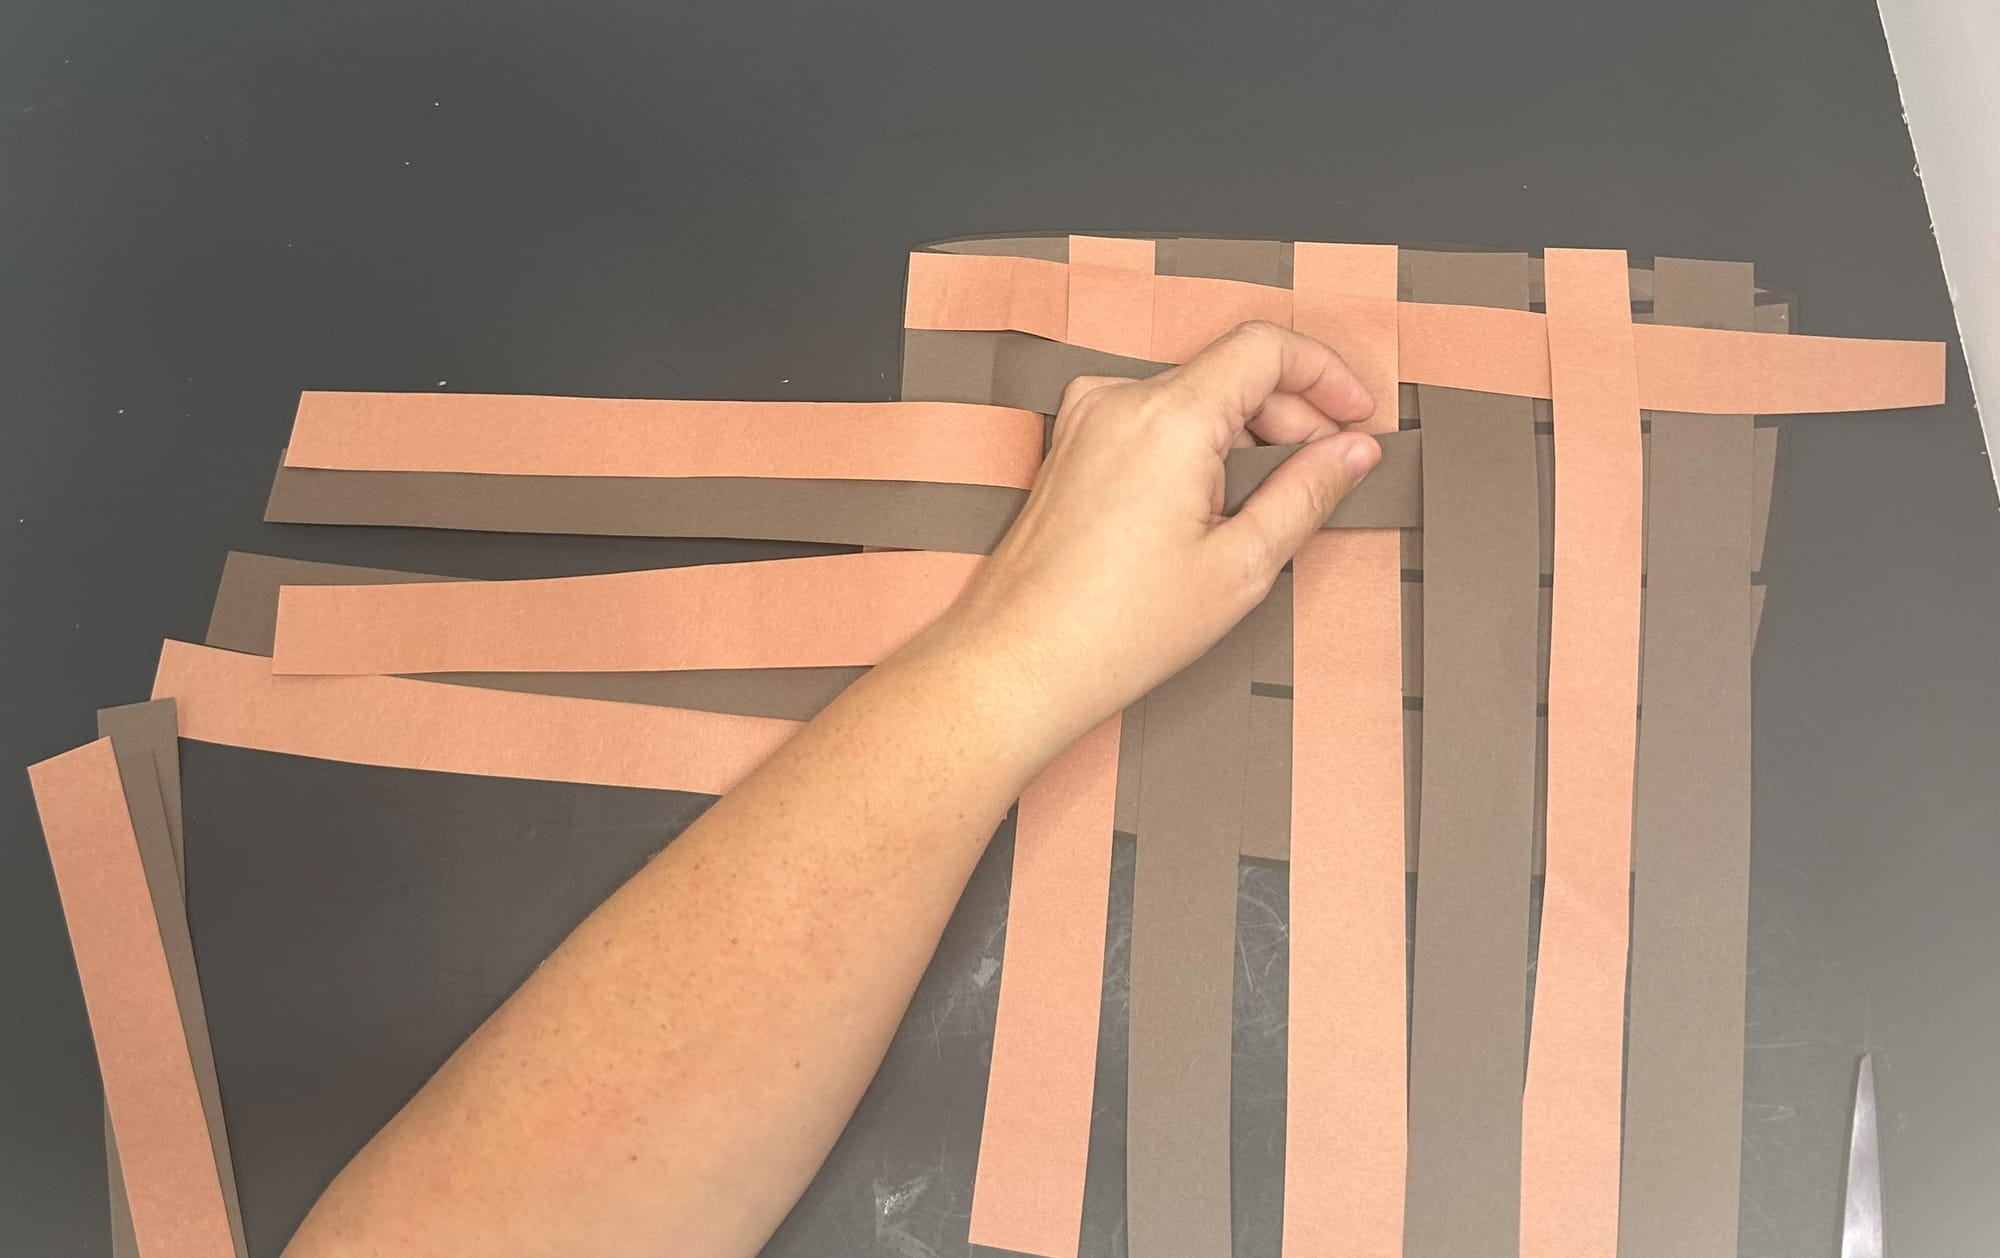
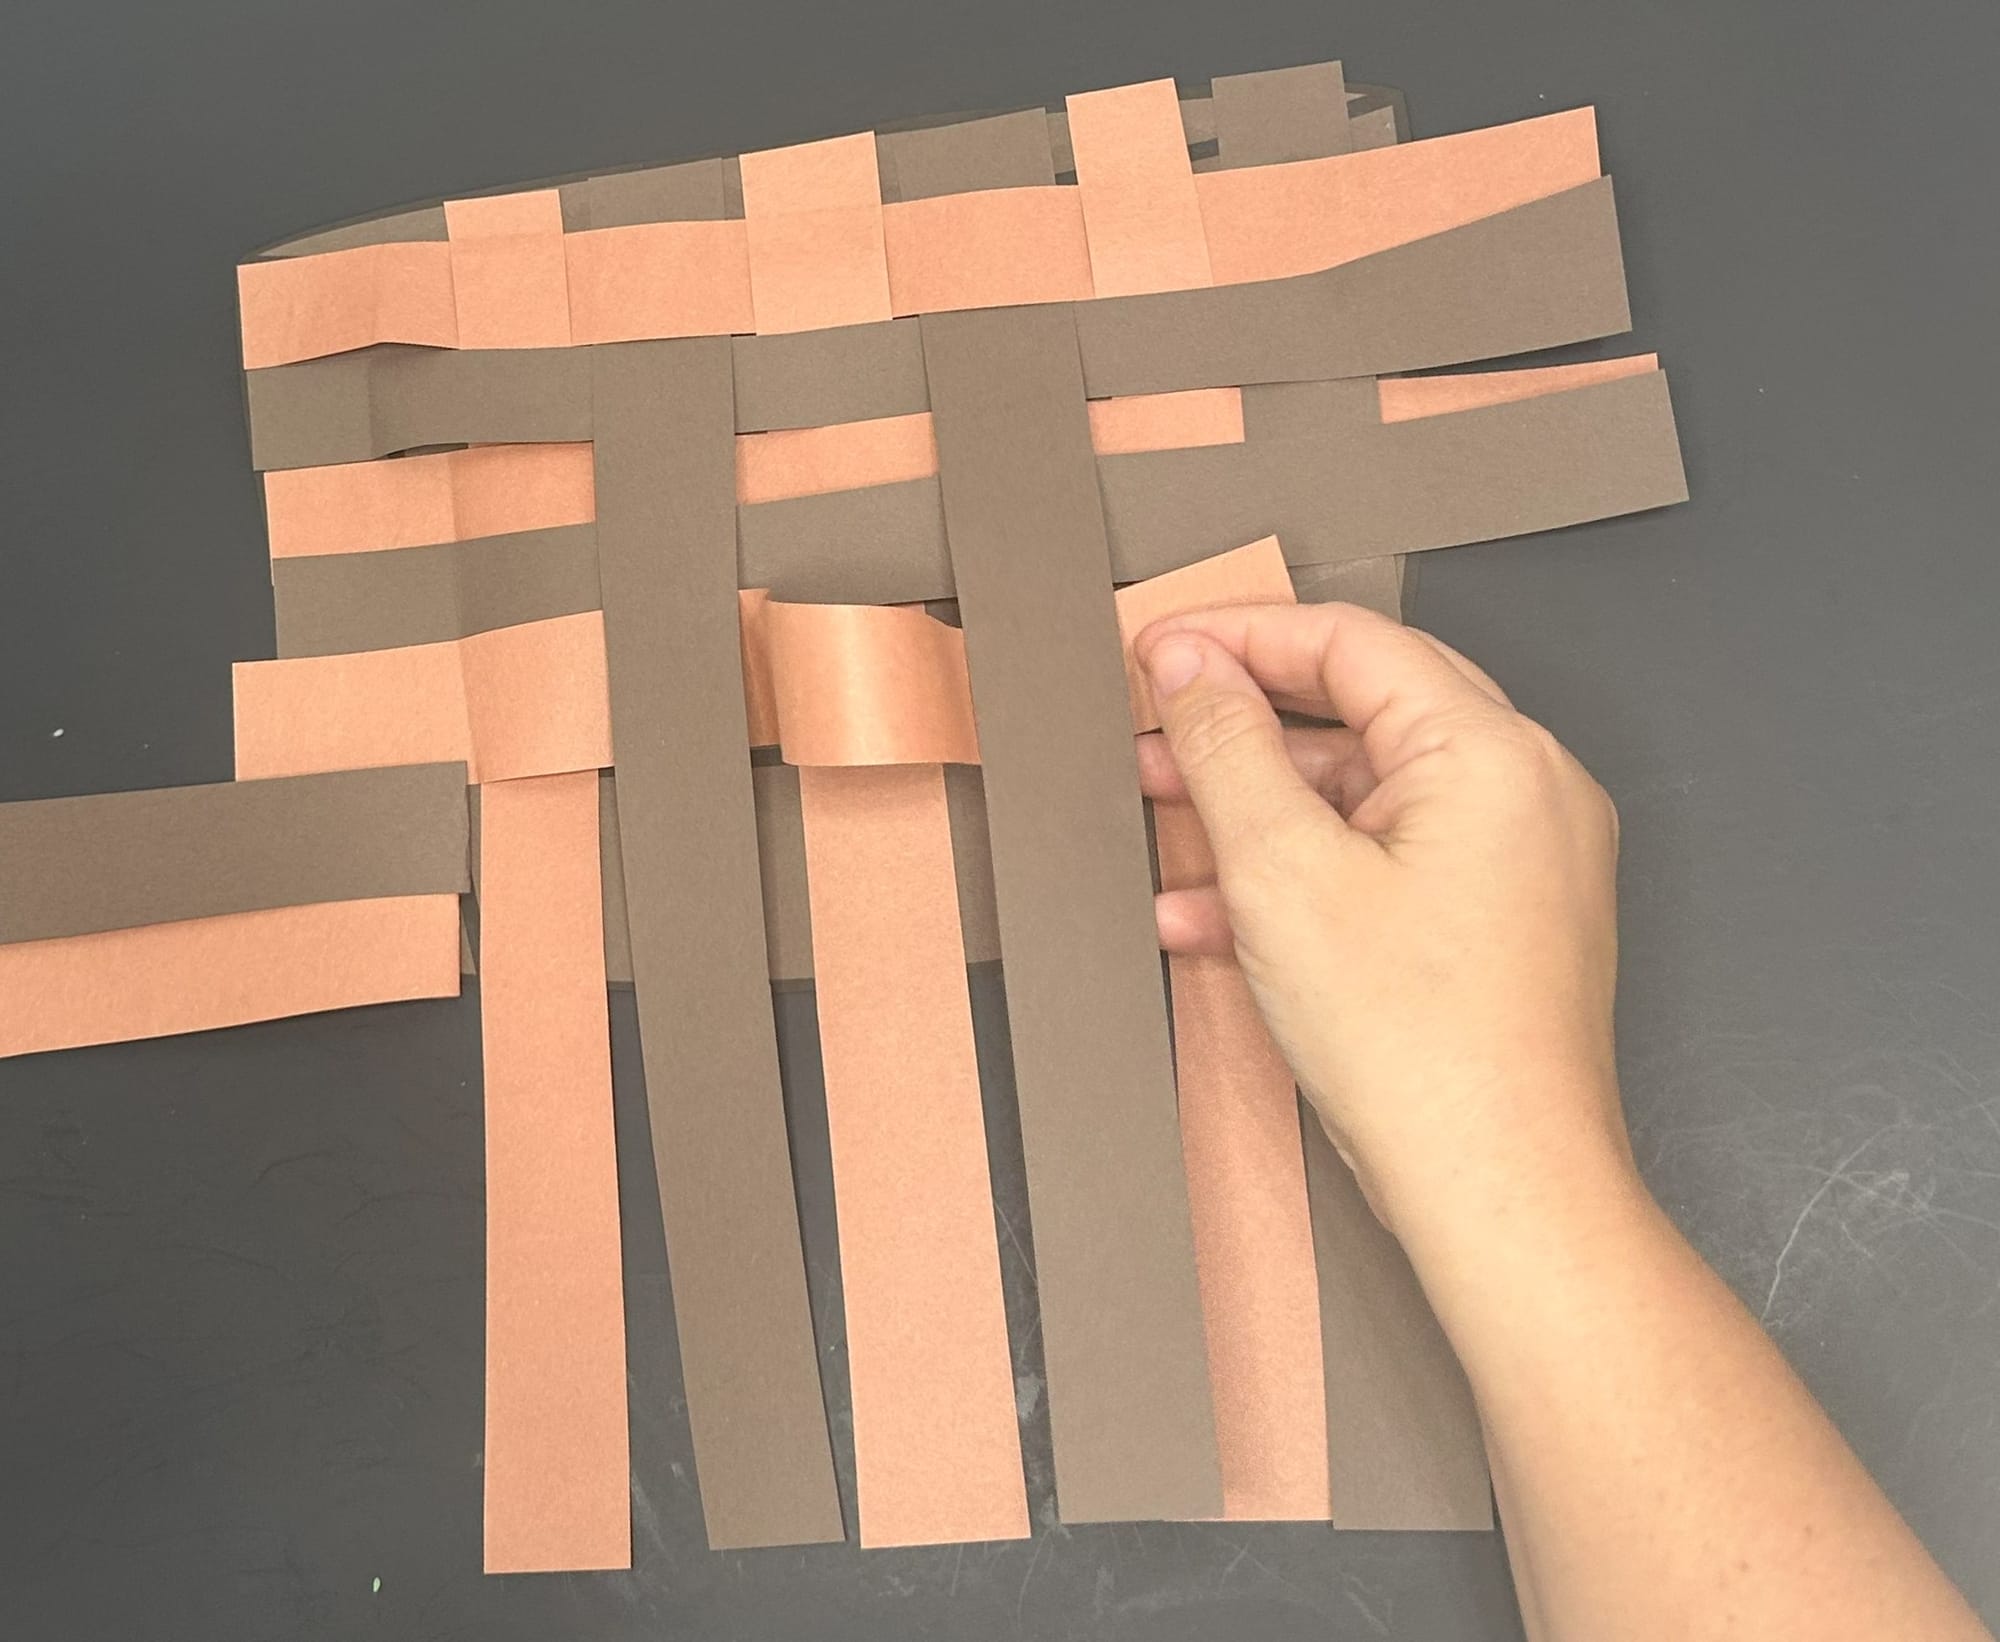
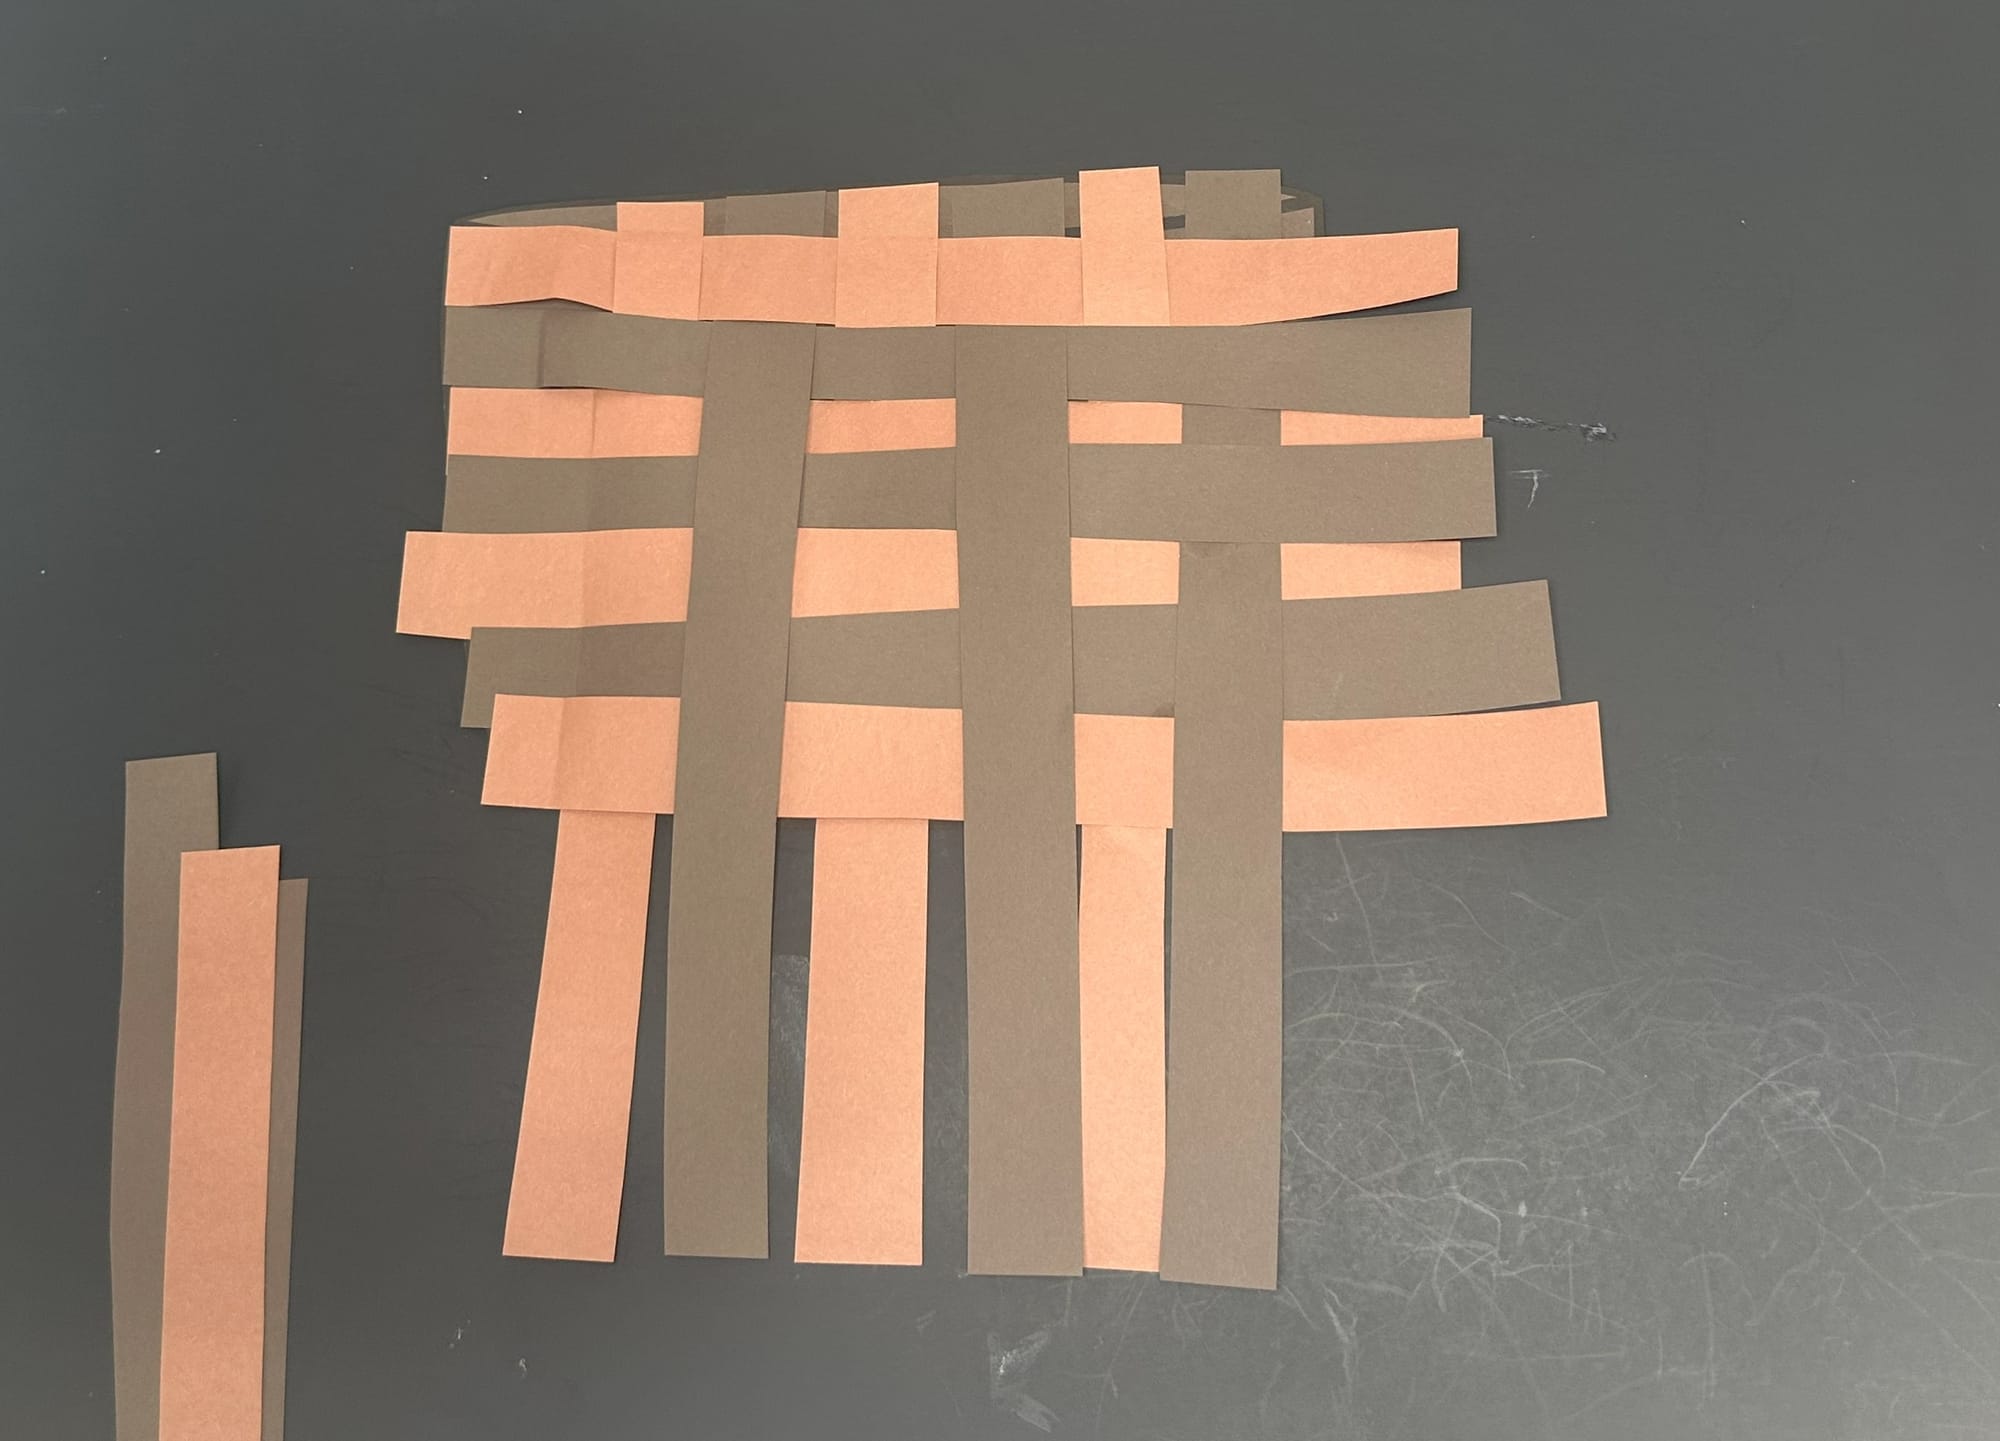
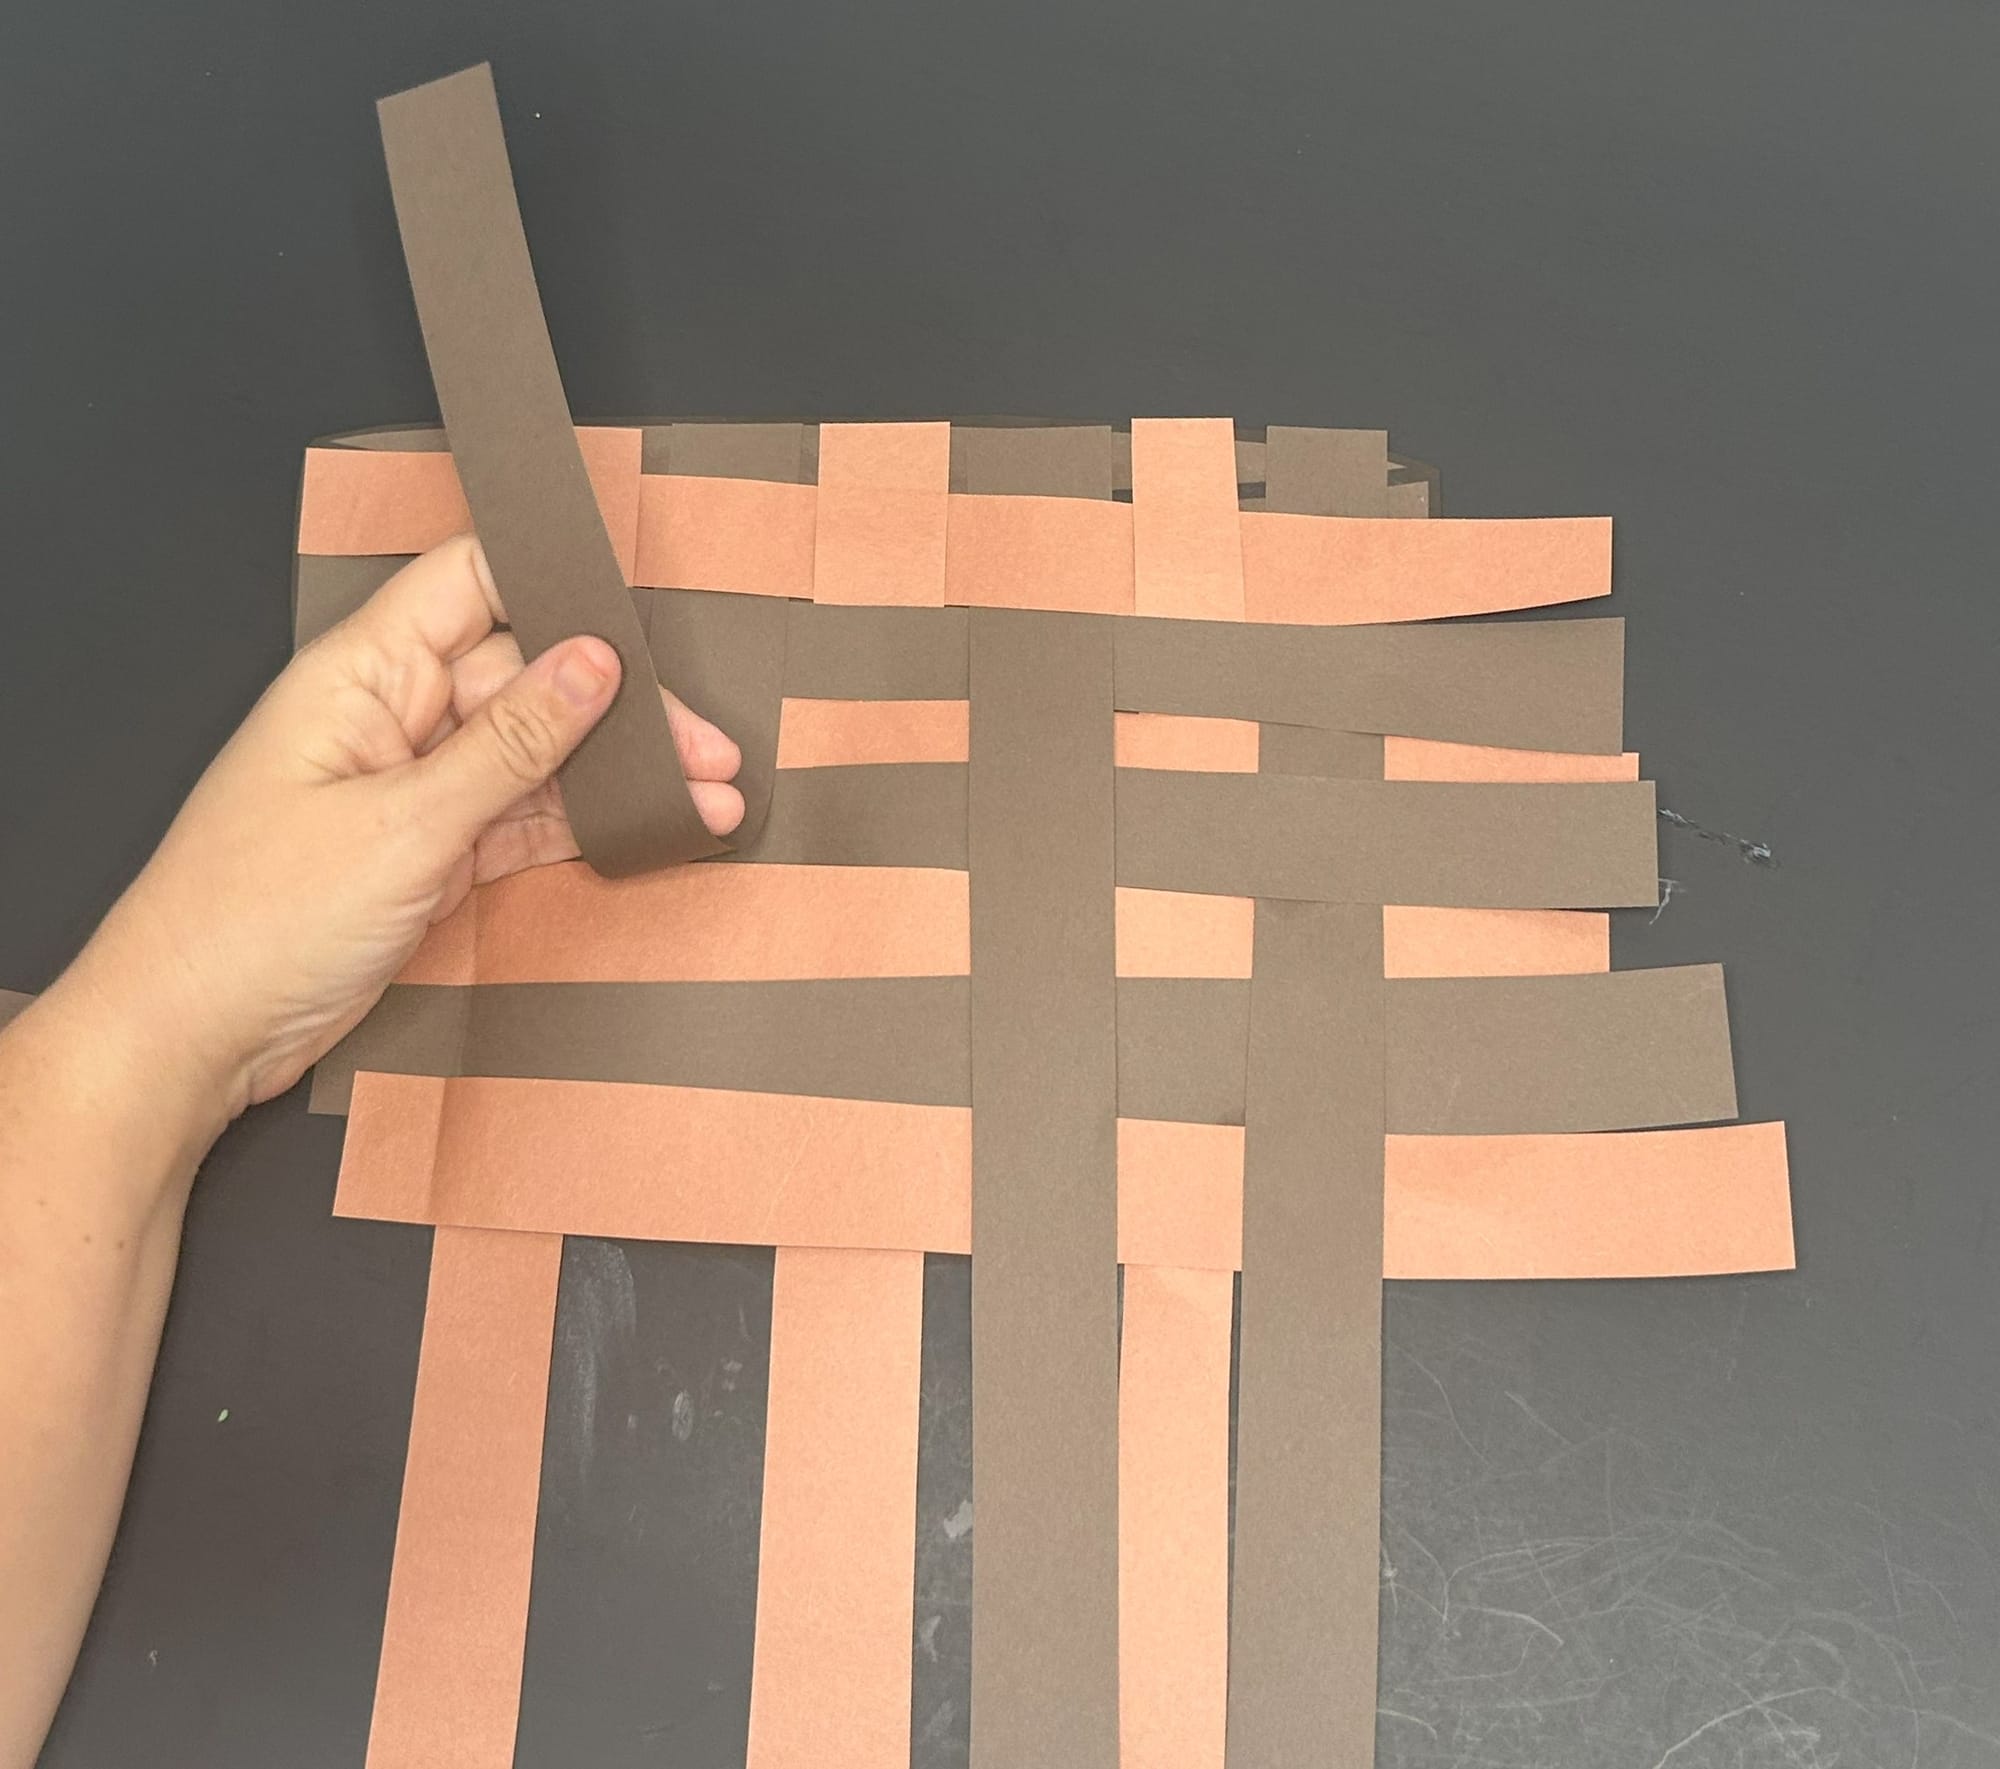
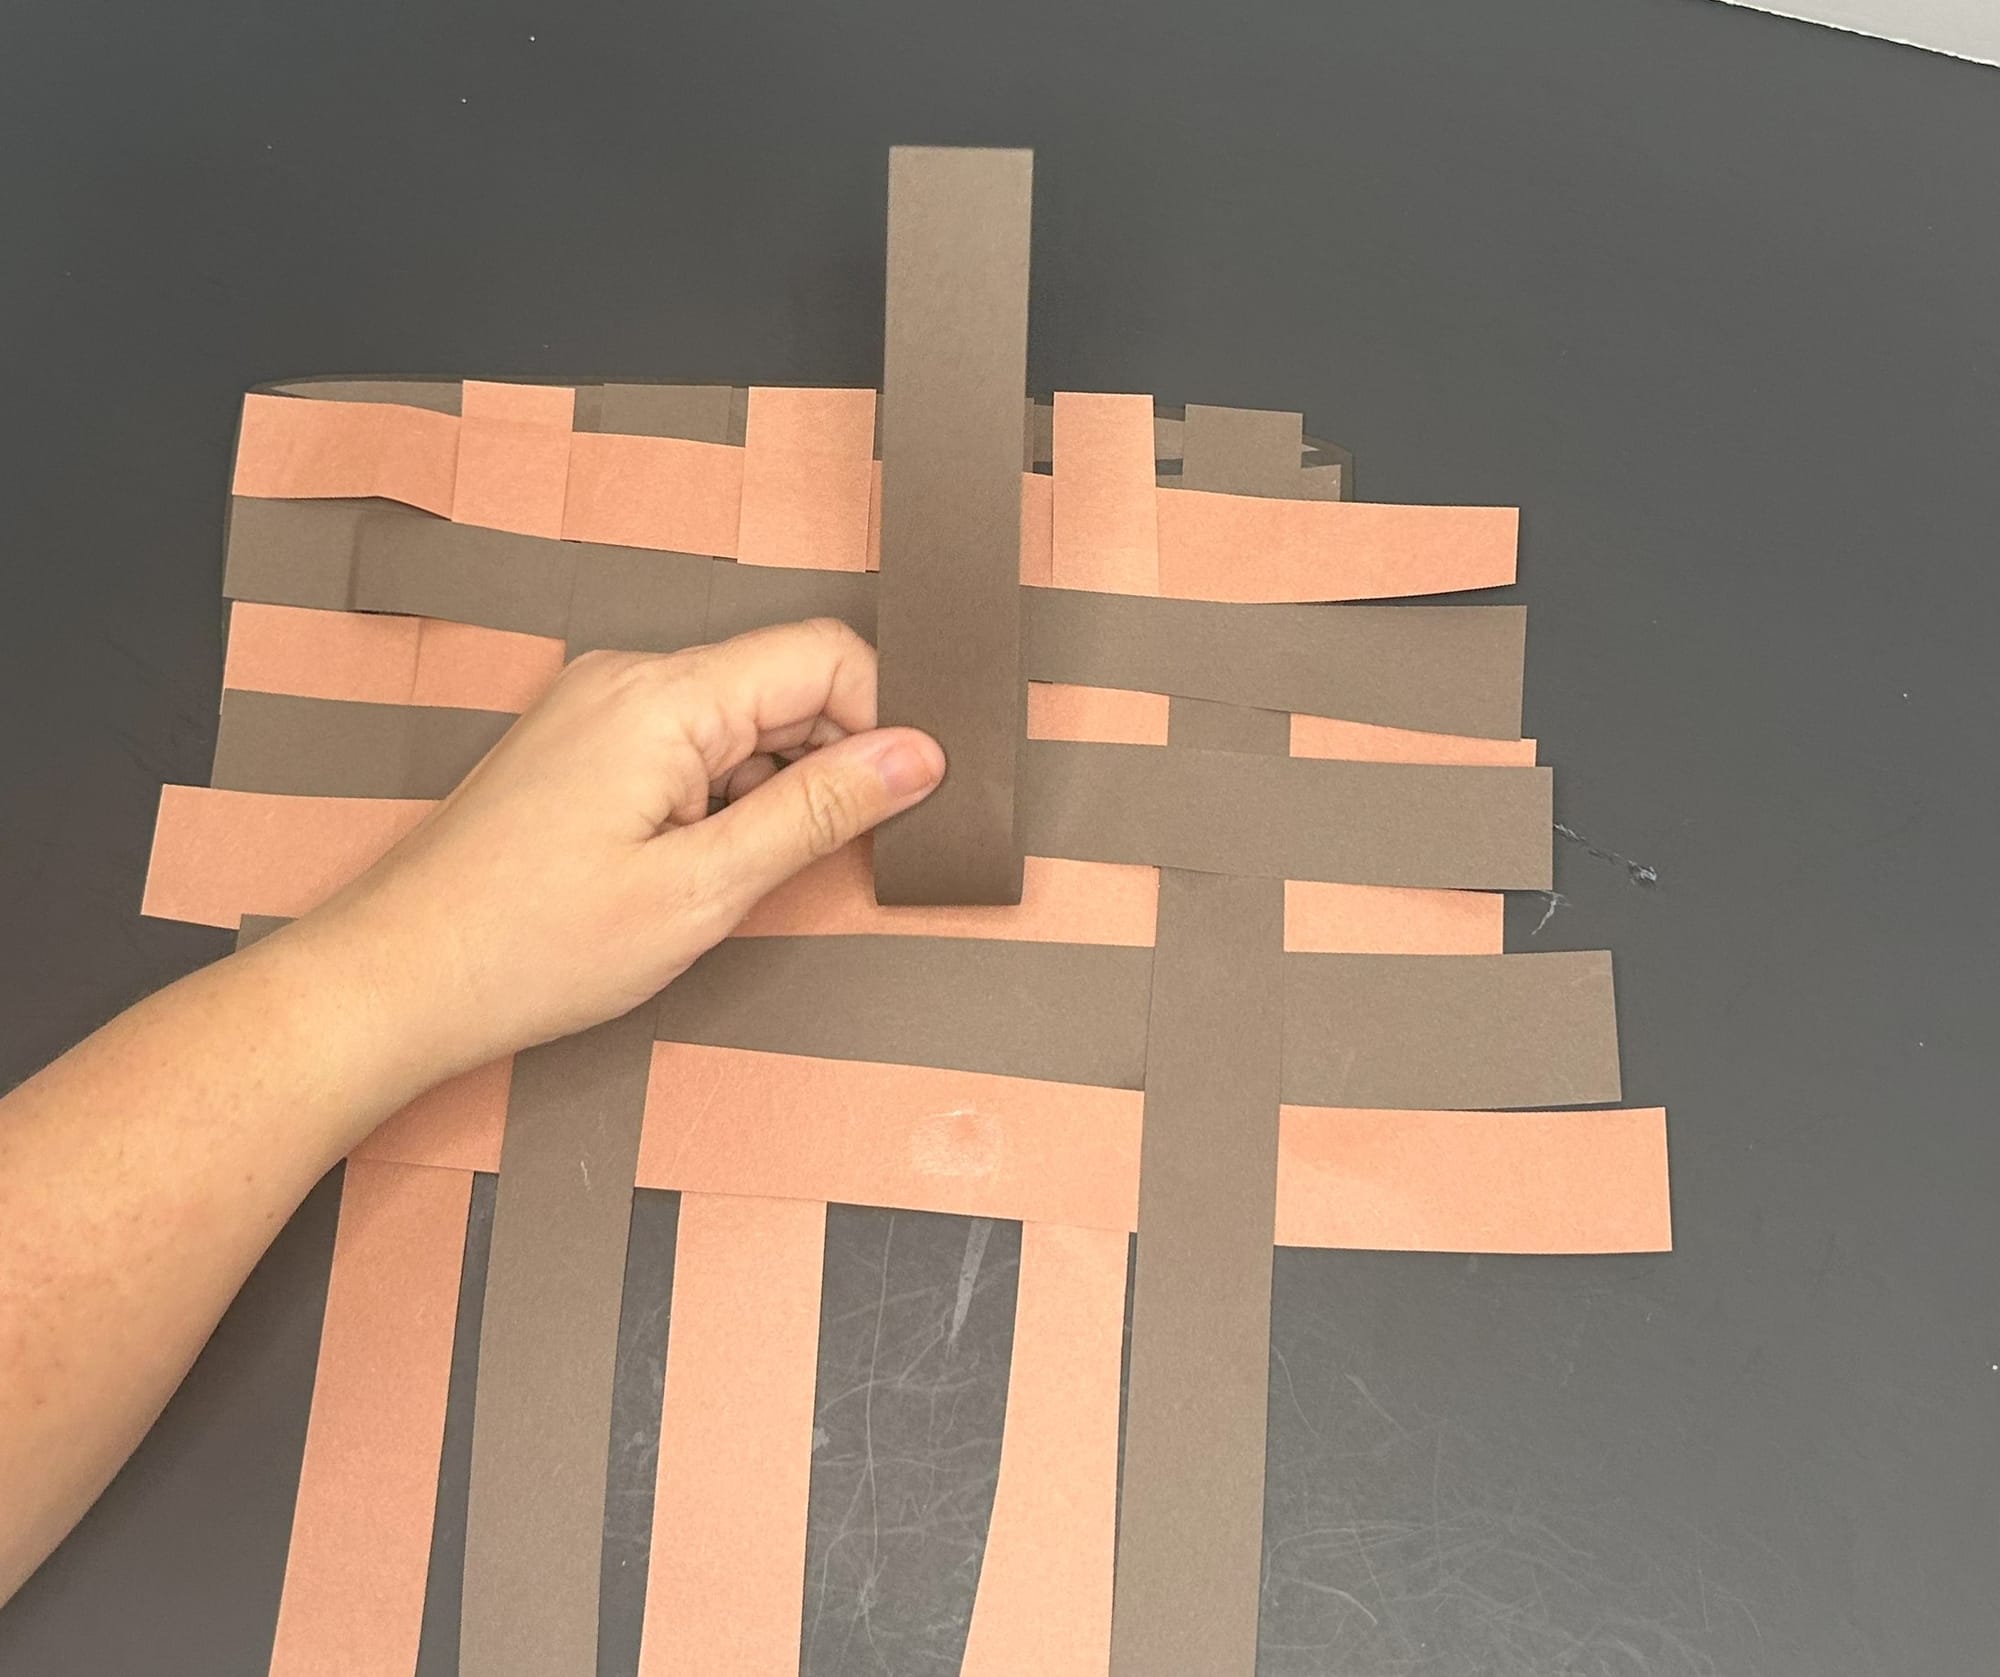
Weave the strips under and over to create the basket pattern.
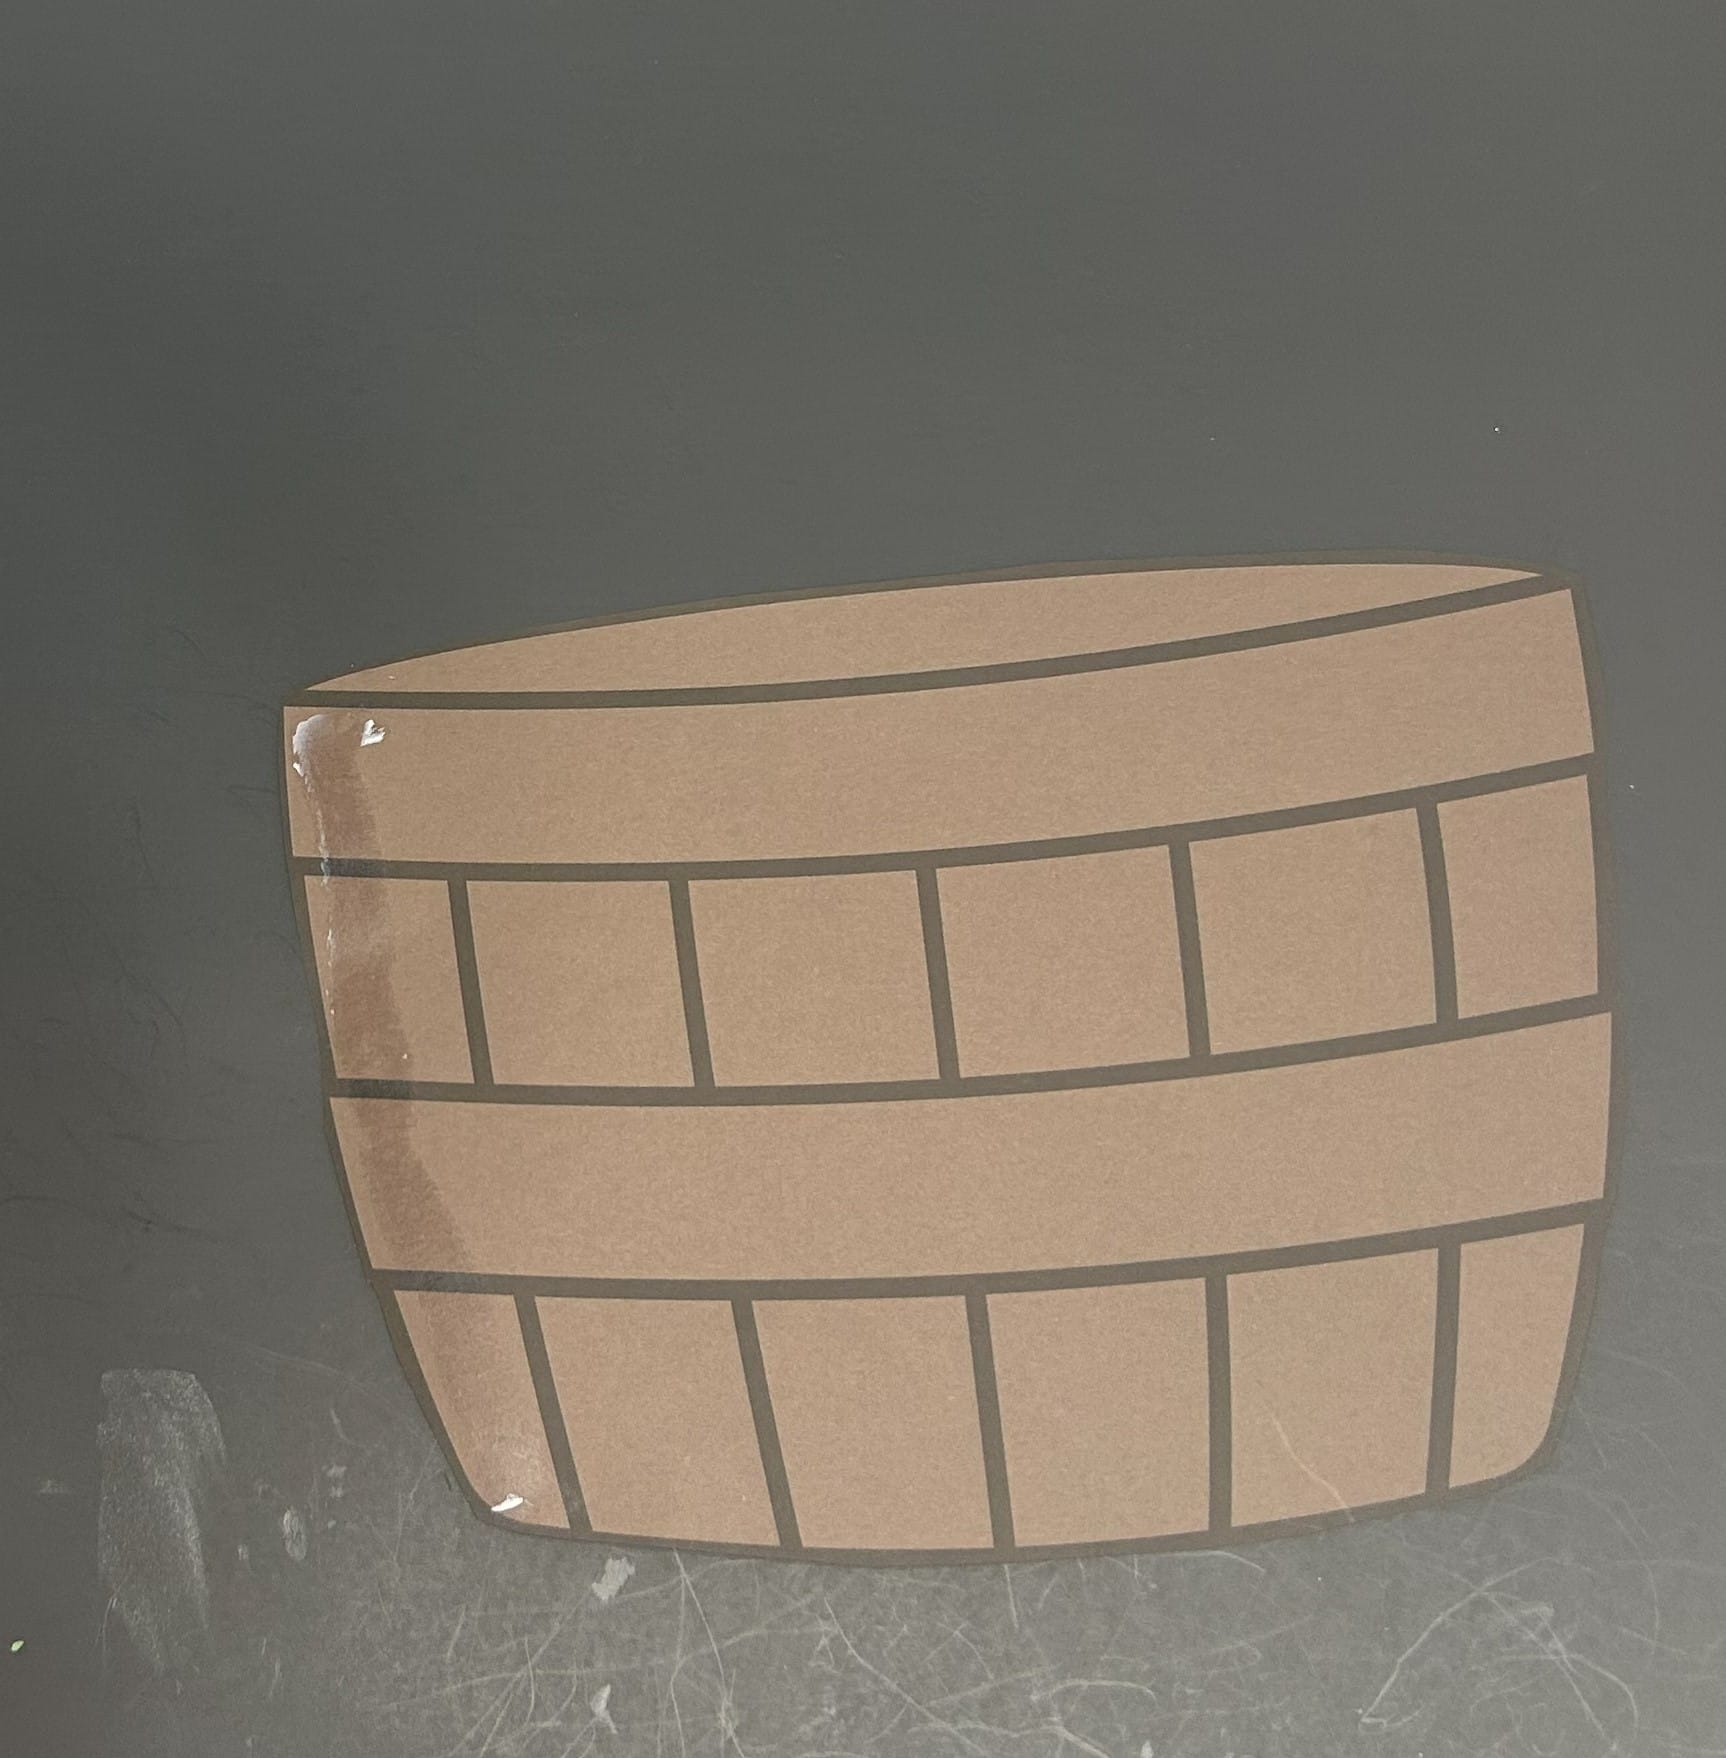
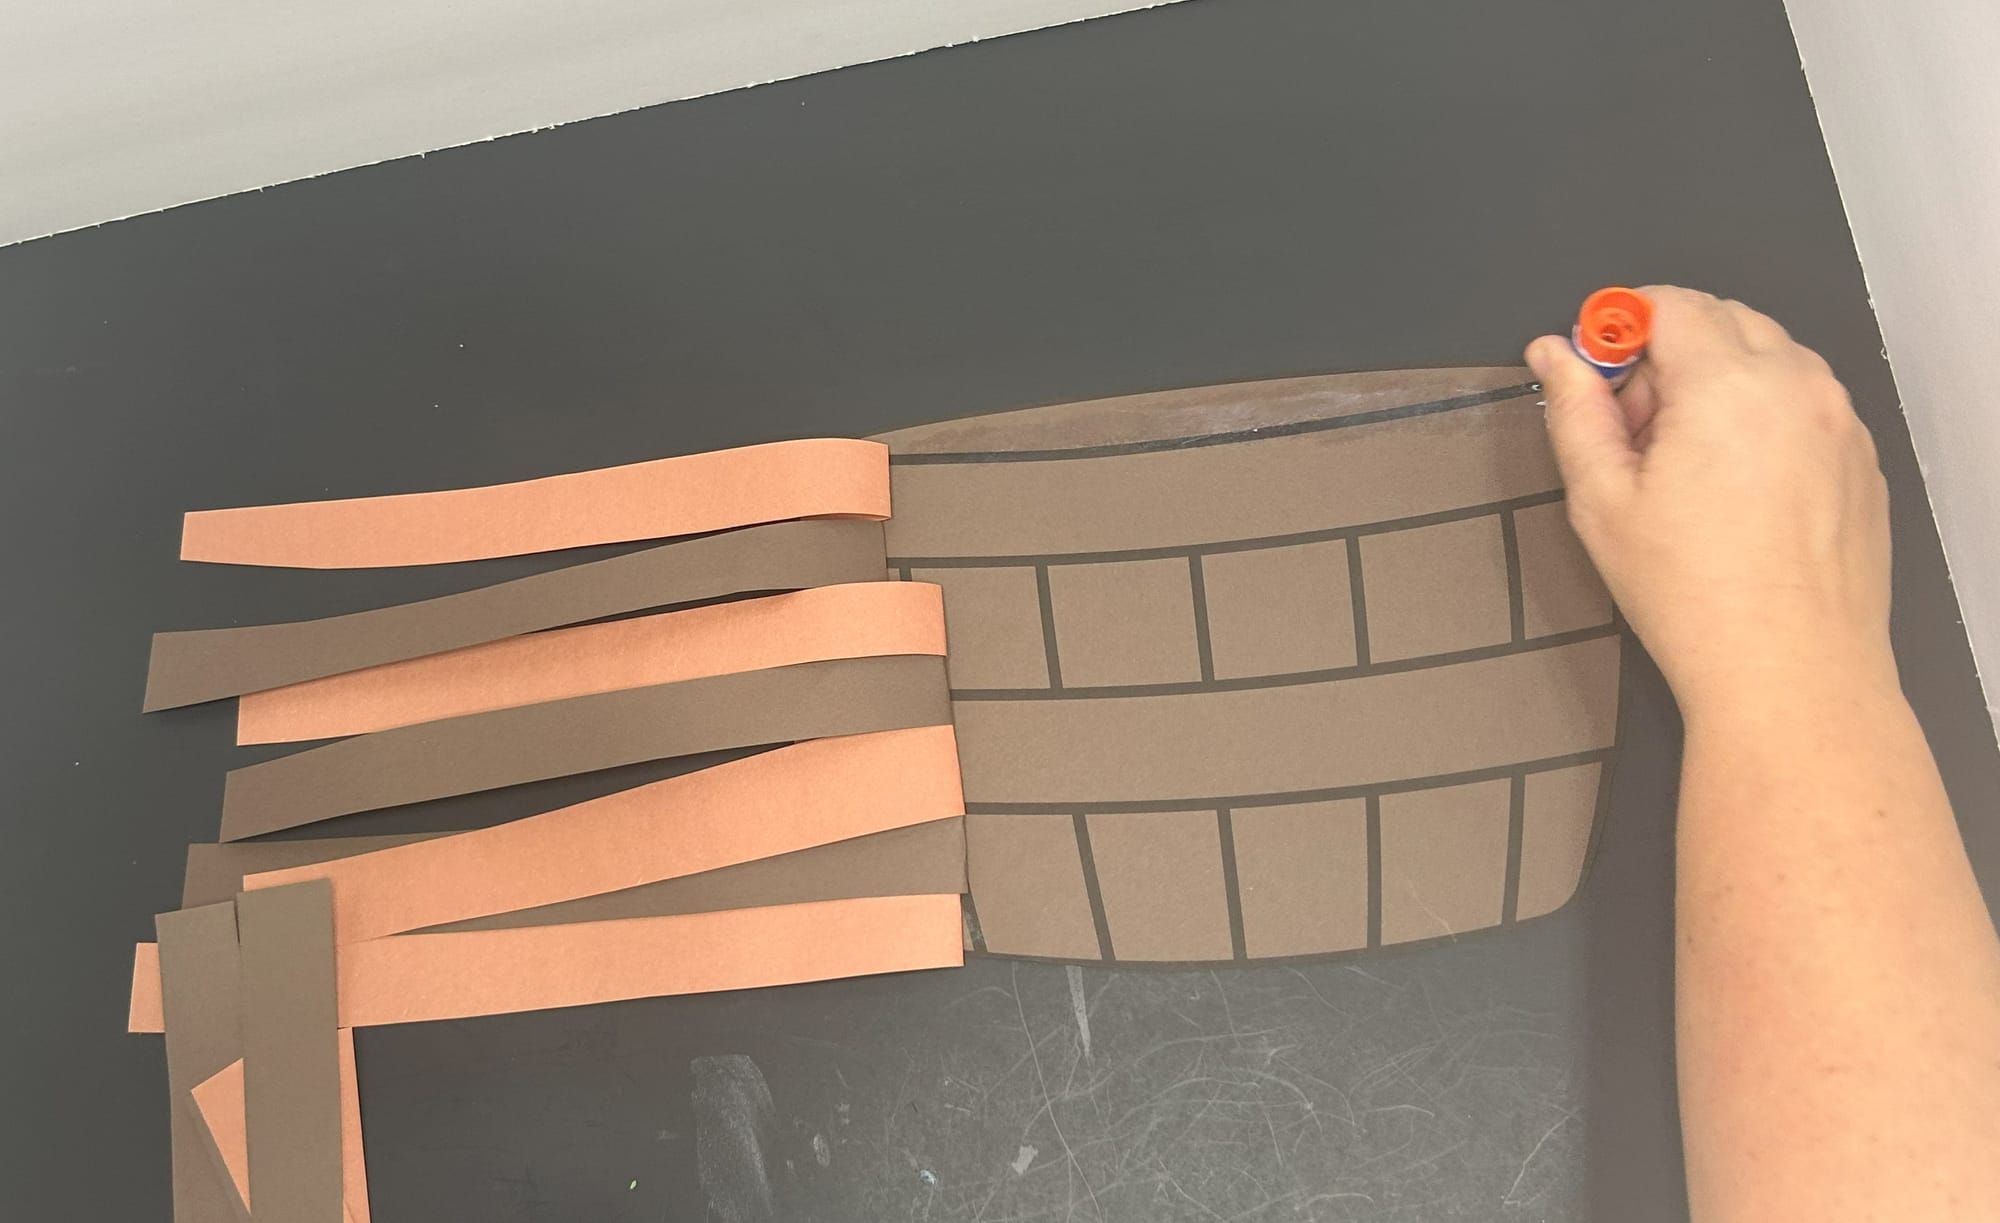
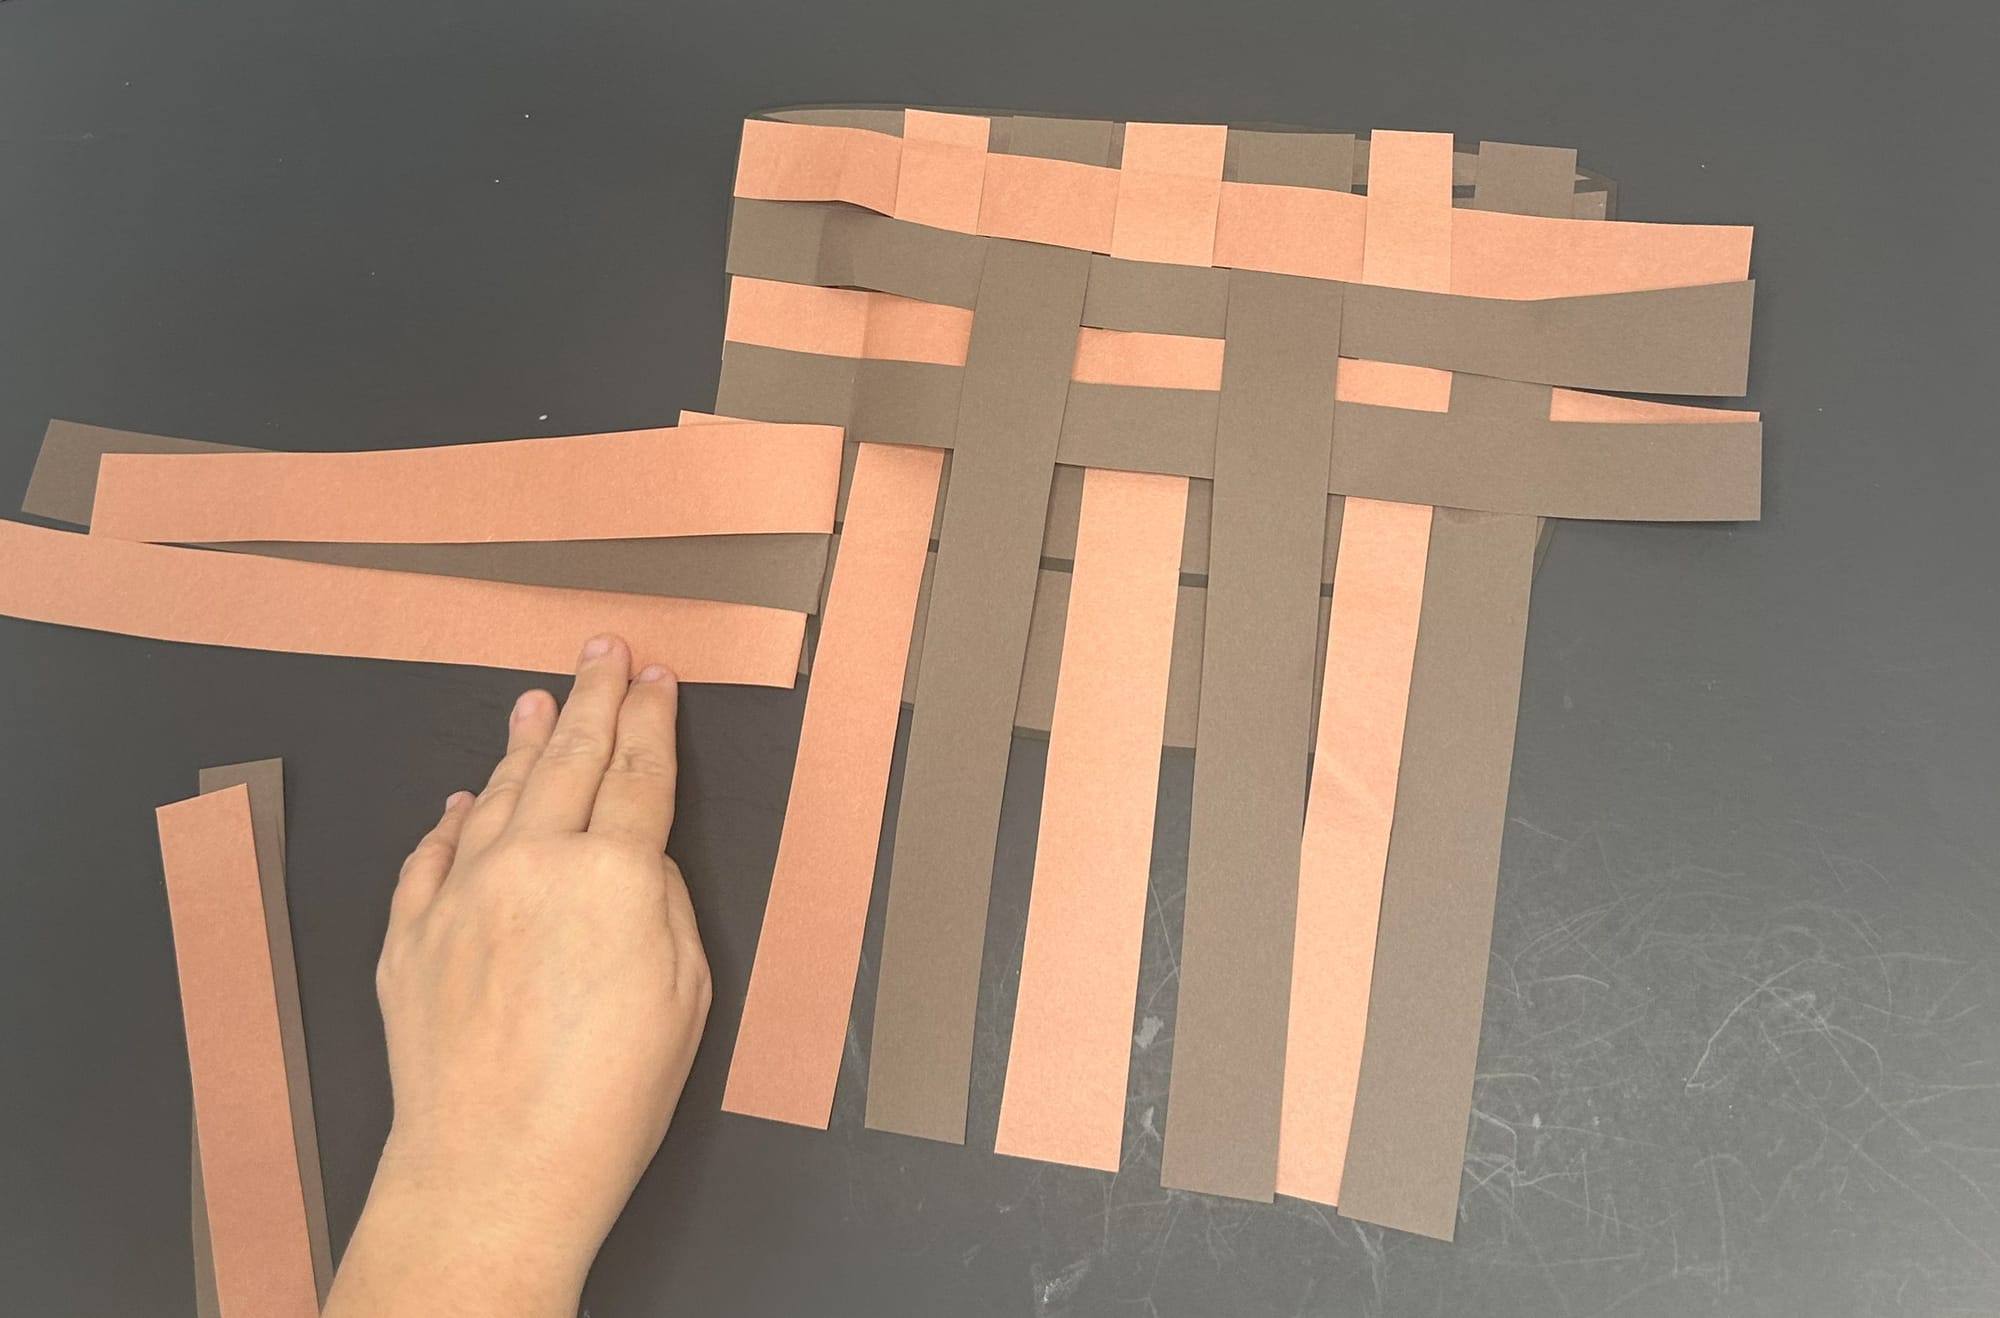
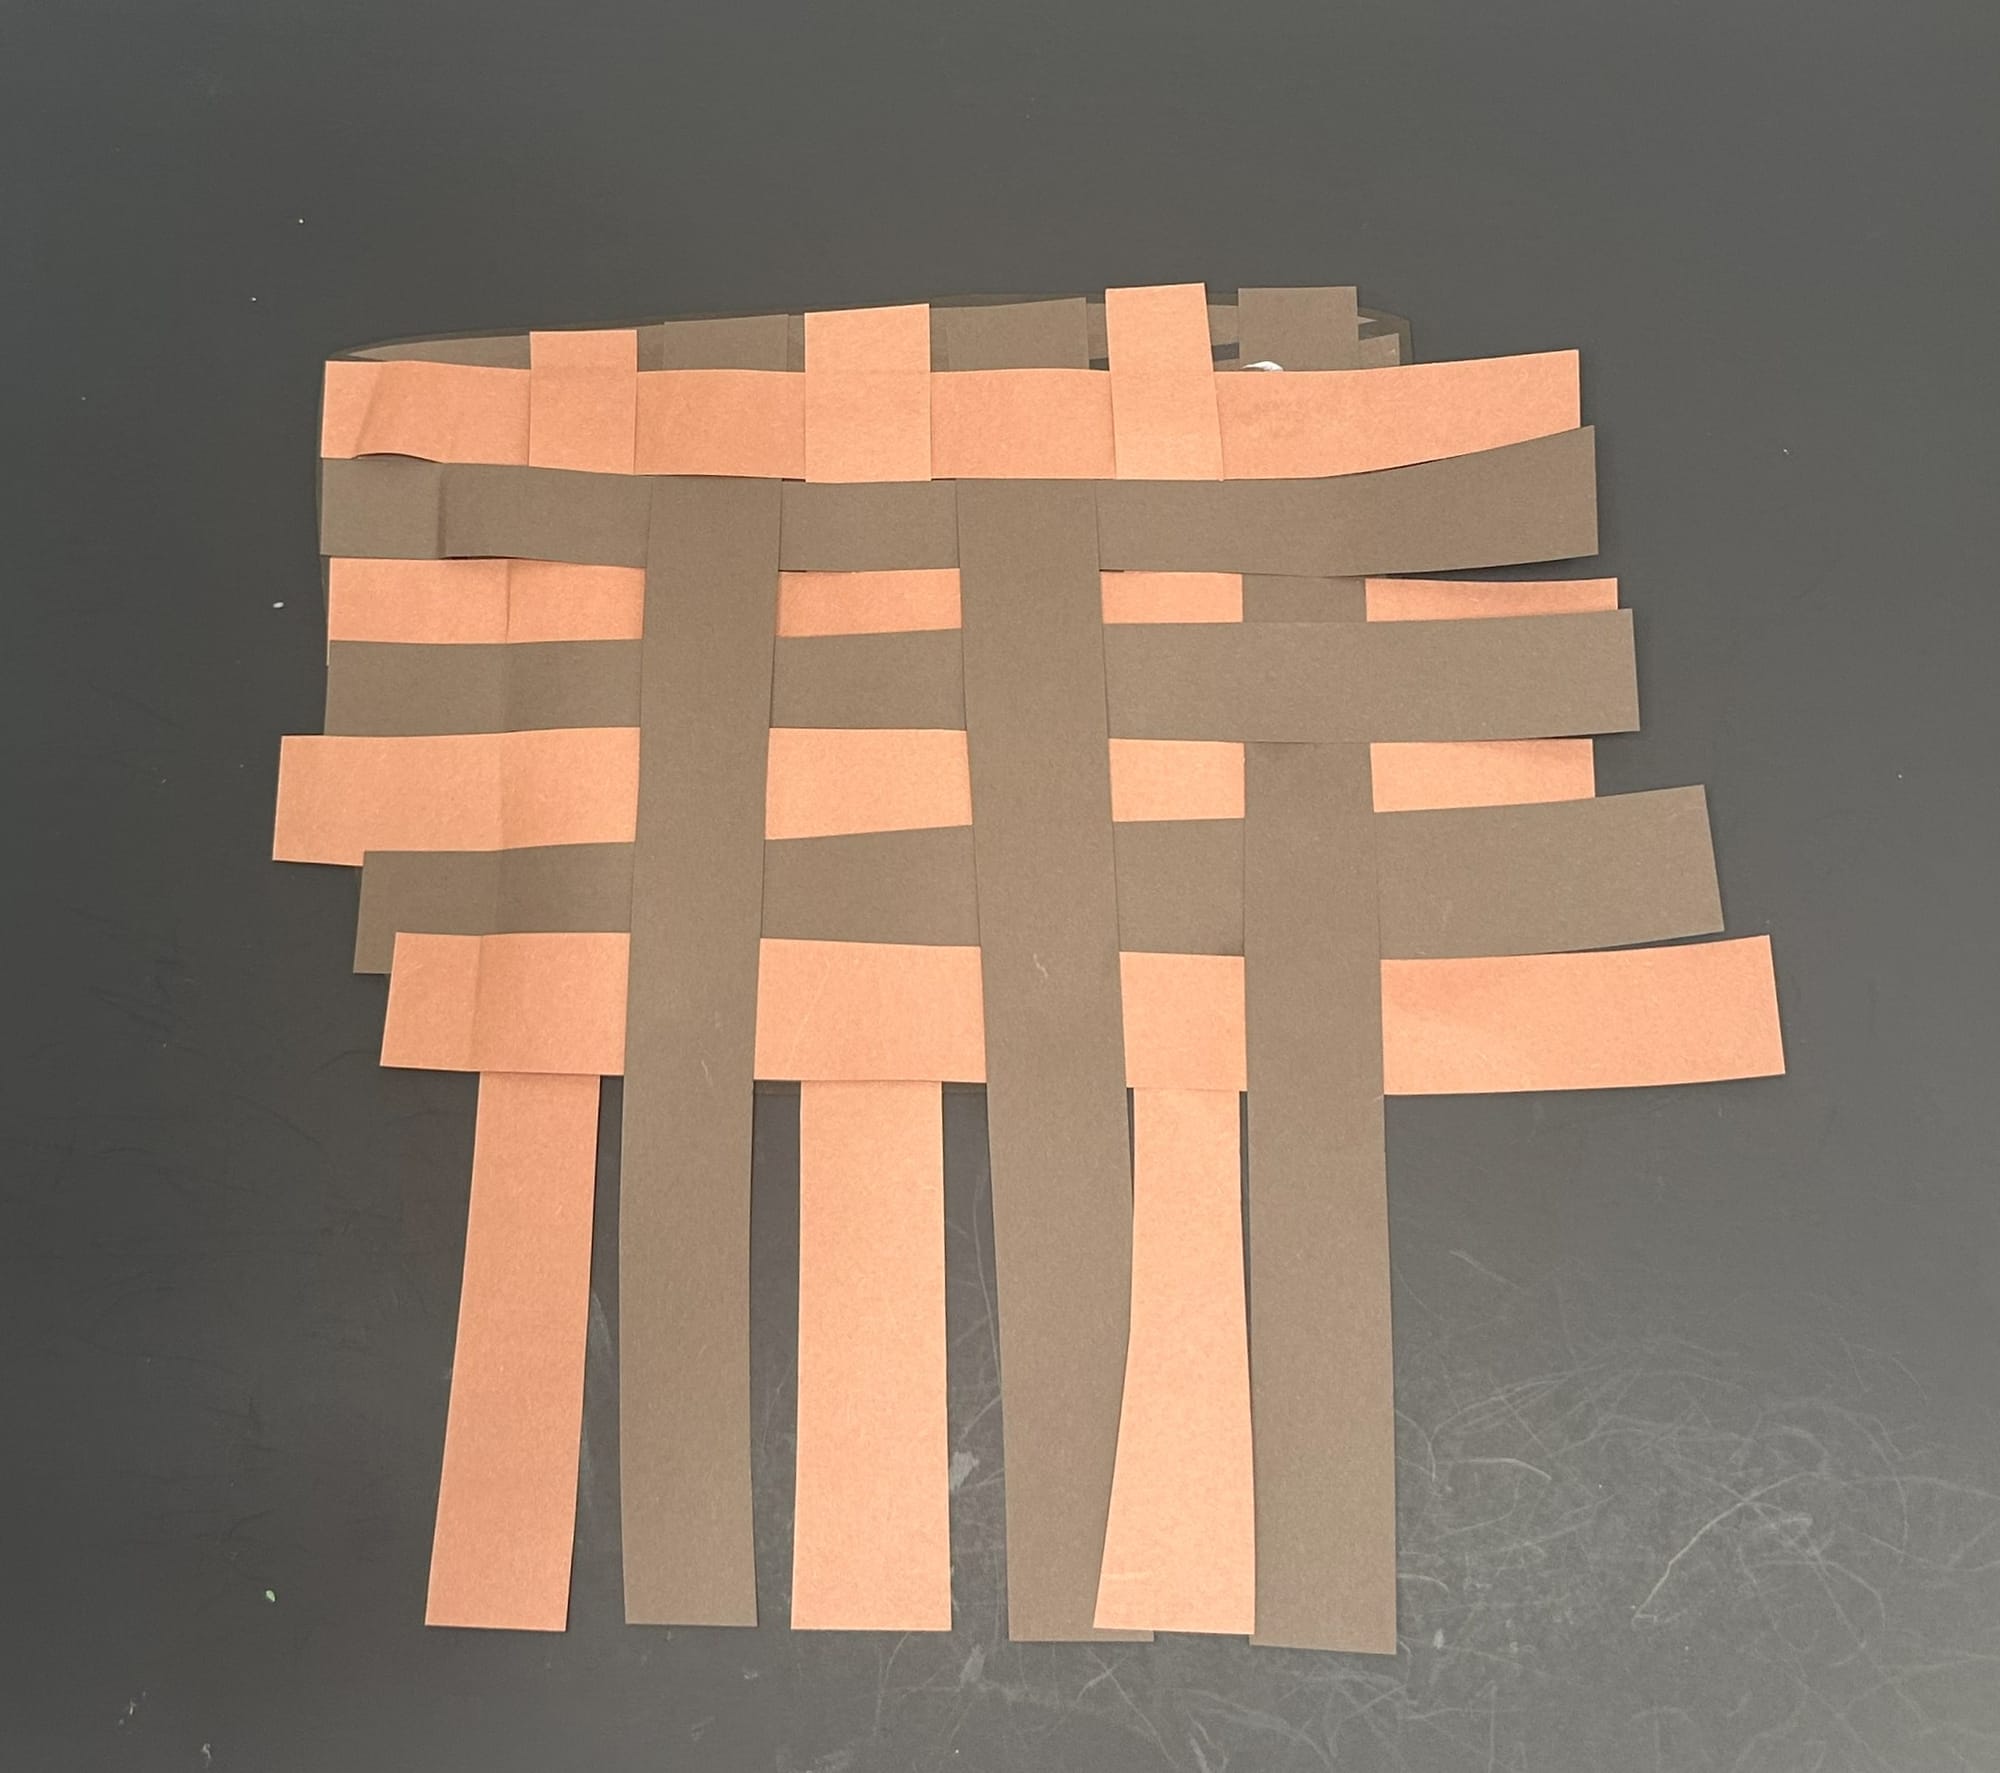
- Once completed, flip the basket over and cut the excess strips off to create the apple basket.
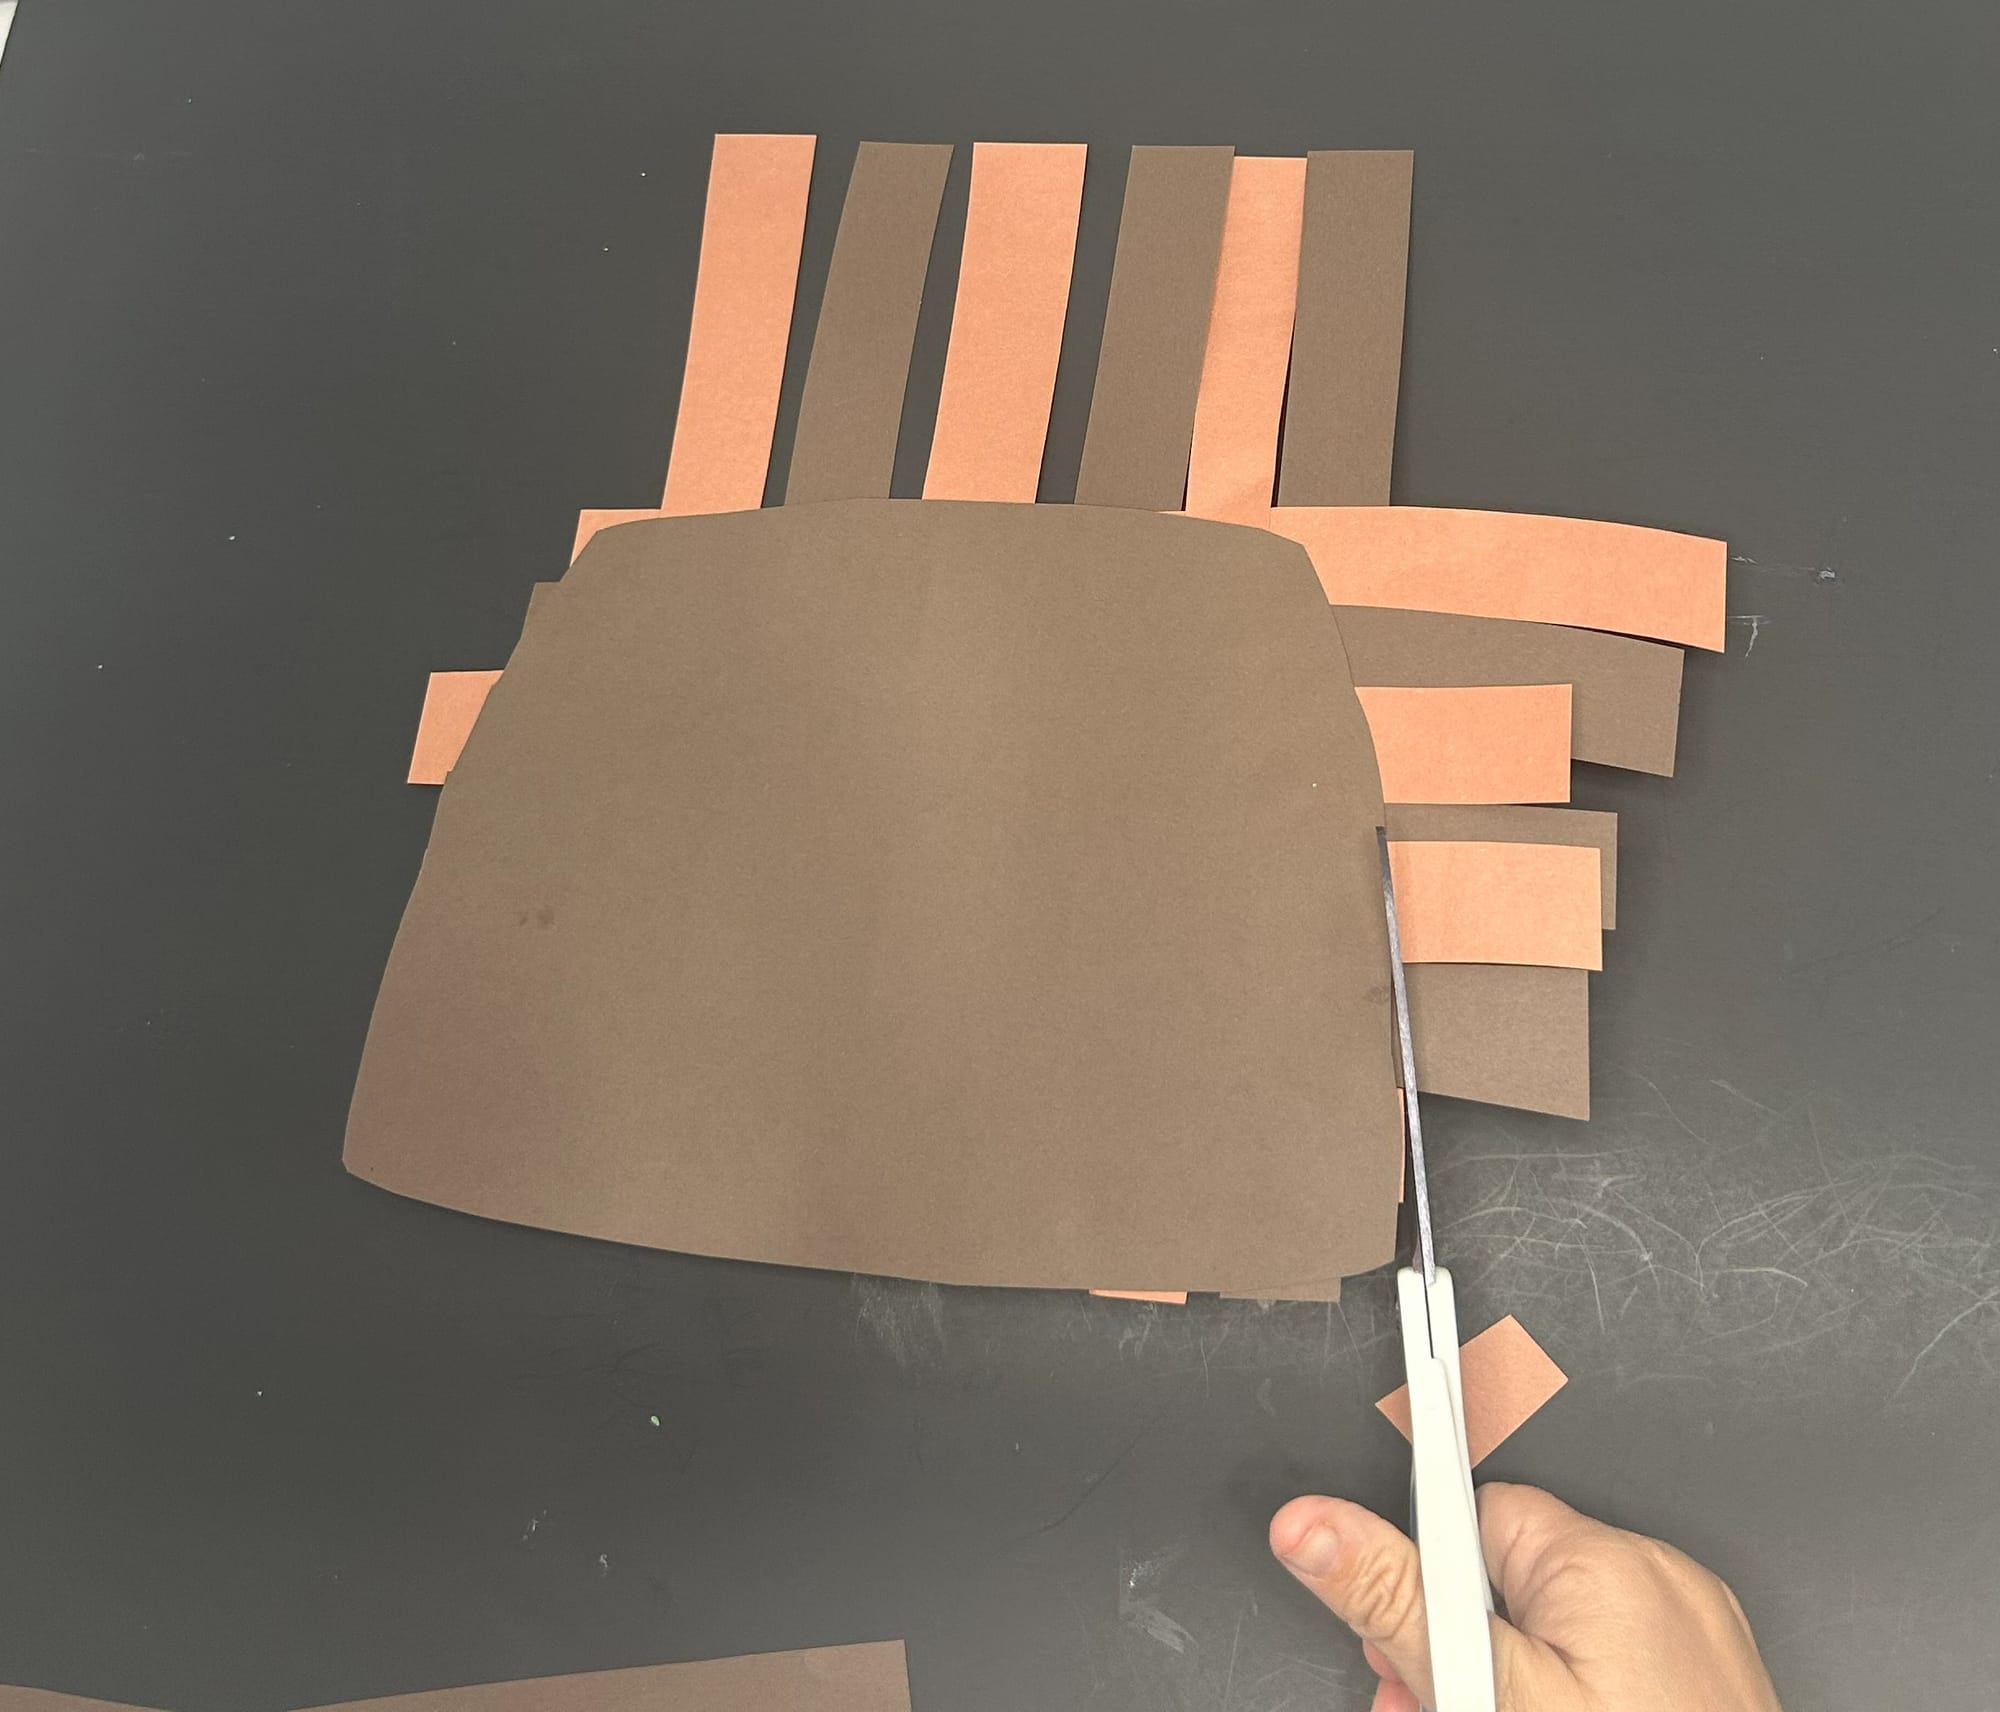
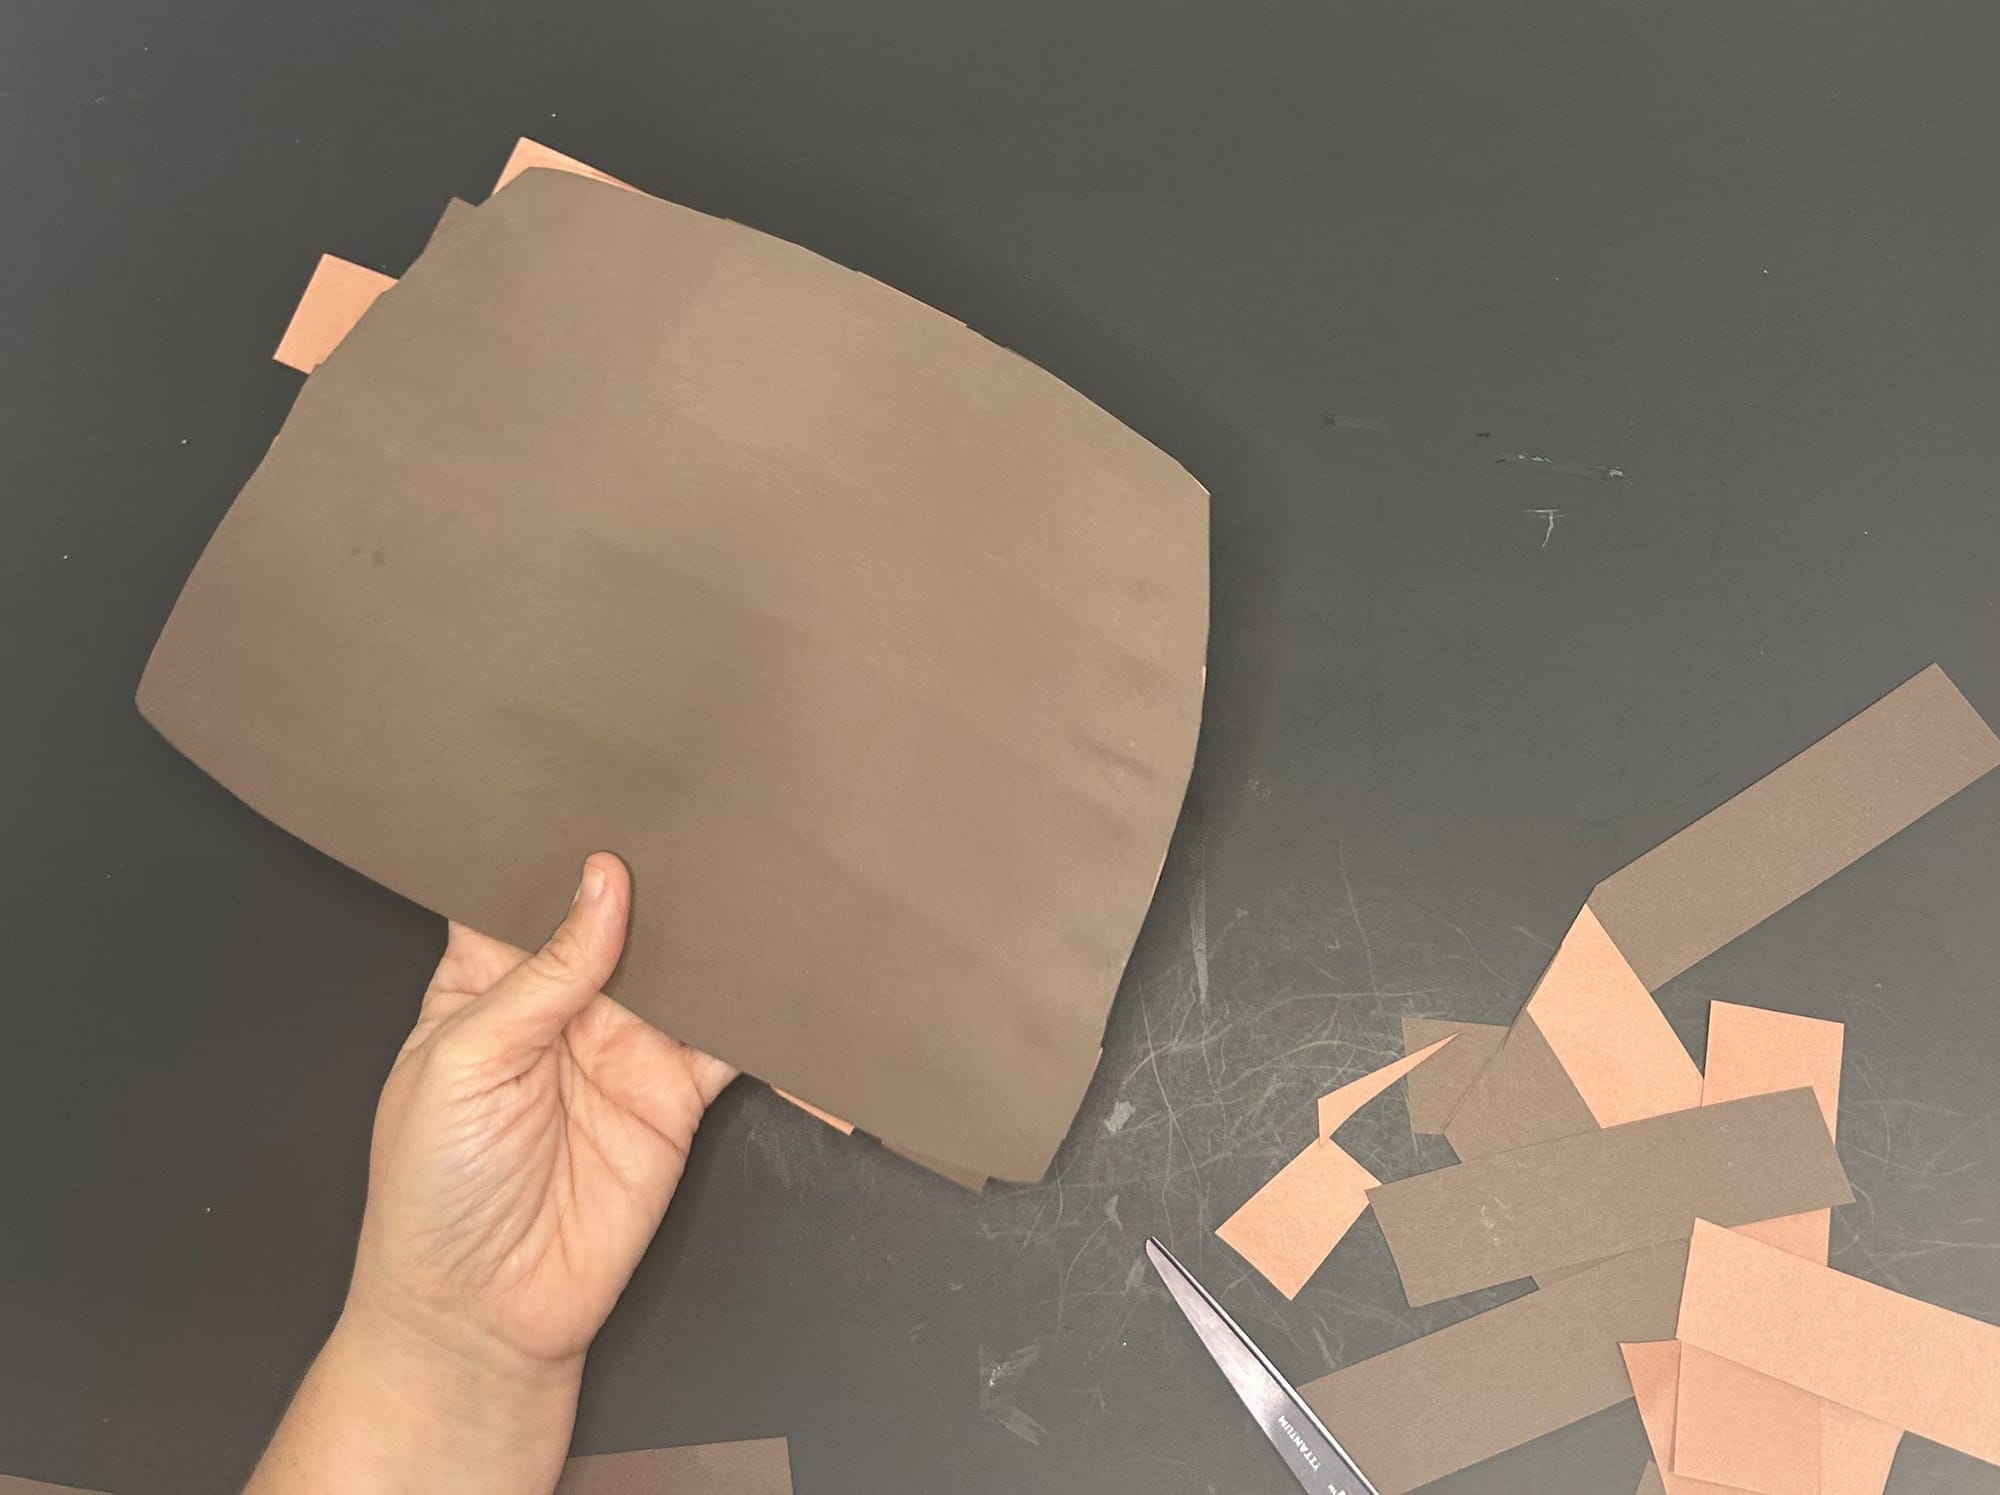
Flip the basket over and cut off excess strips.
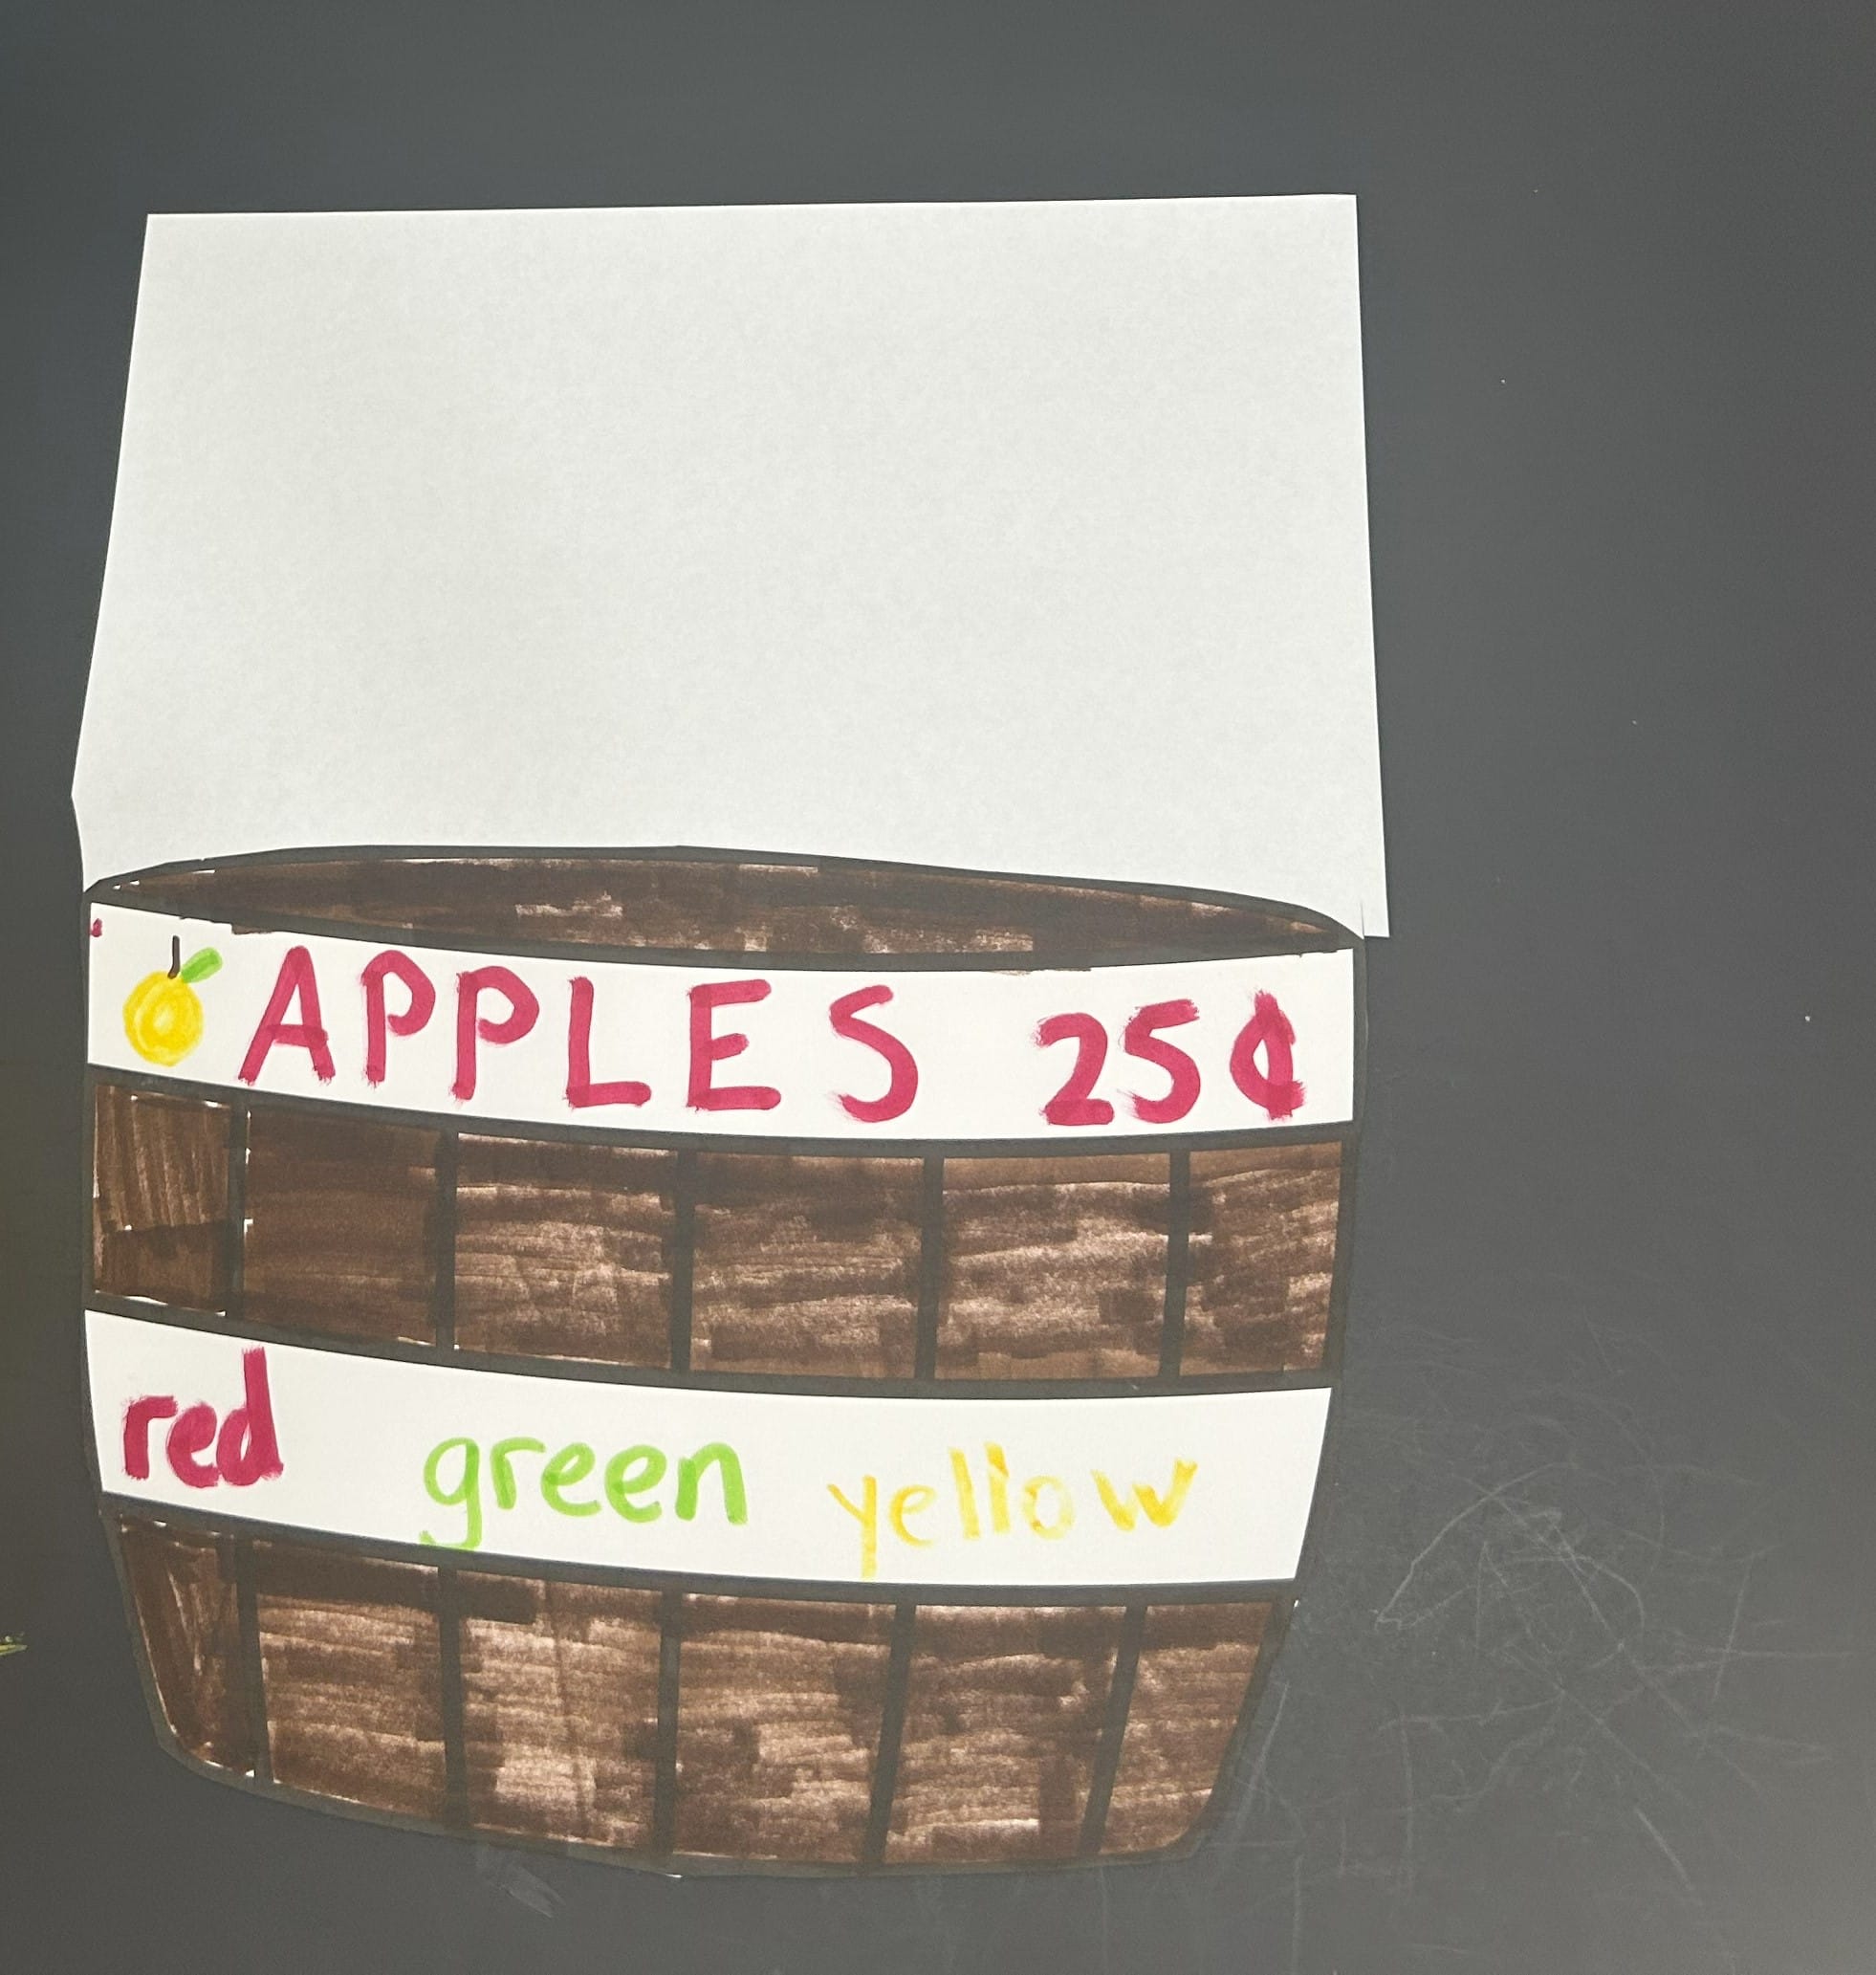
Alternatively, you color the basket too.
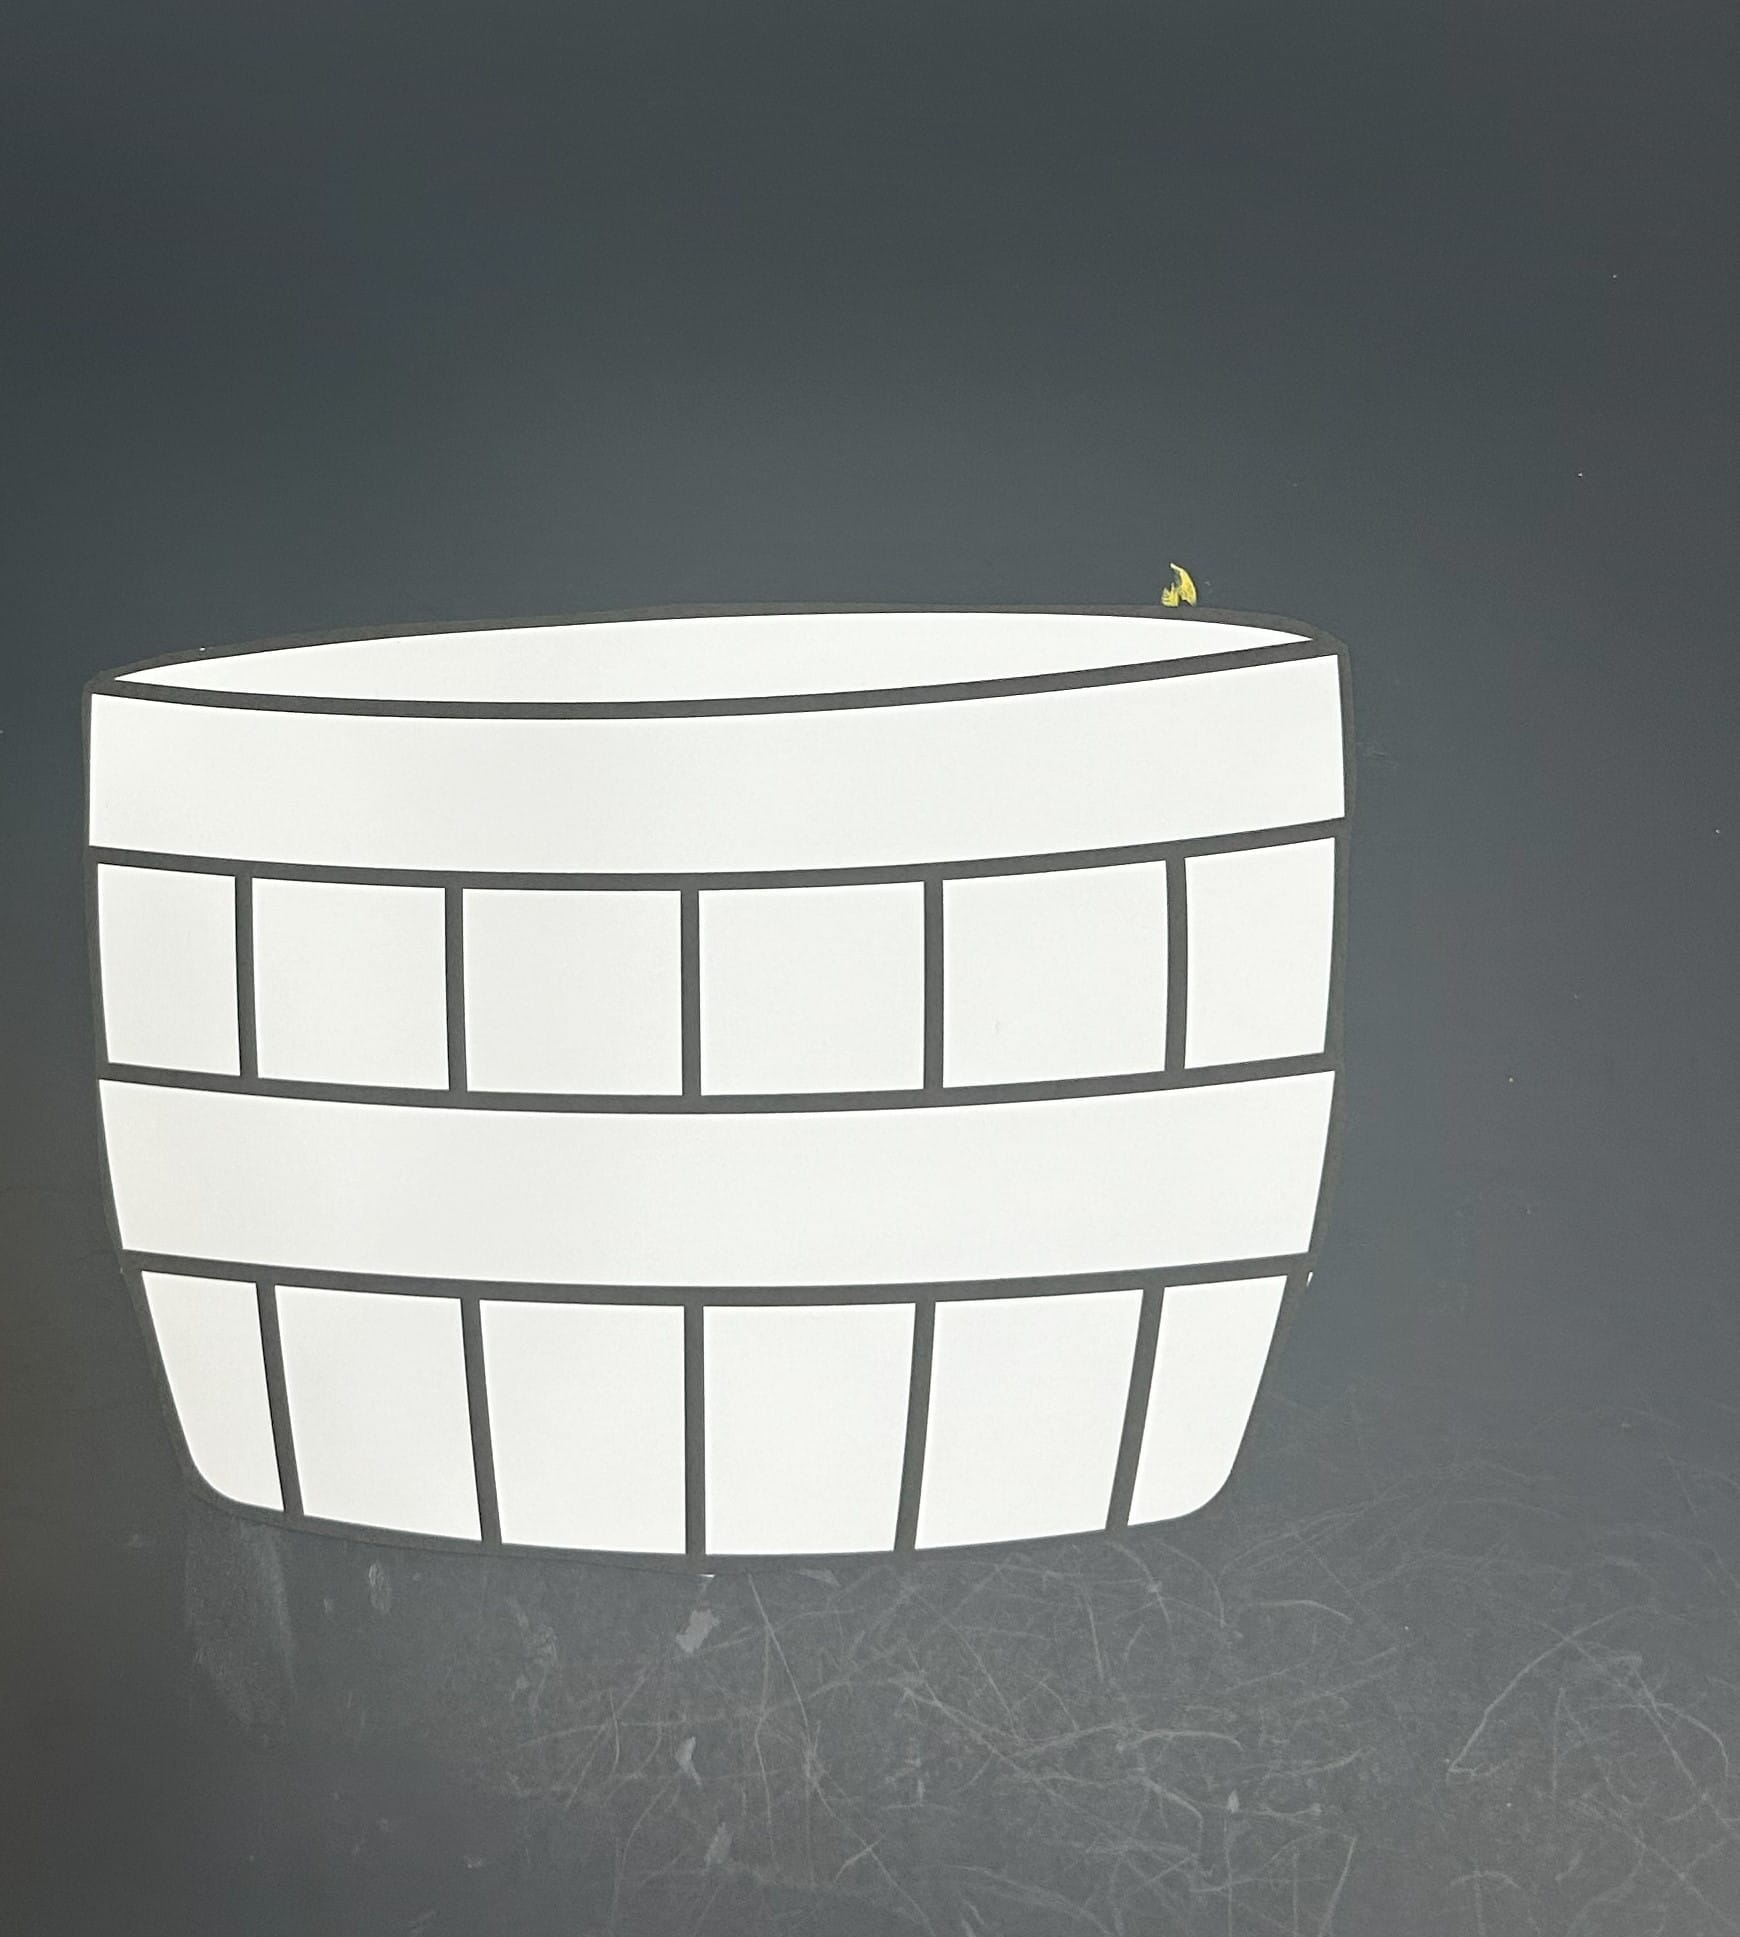
Allow you child to color the apple basket any way they would like. See what they come up with.
Apple Stamping
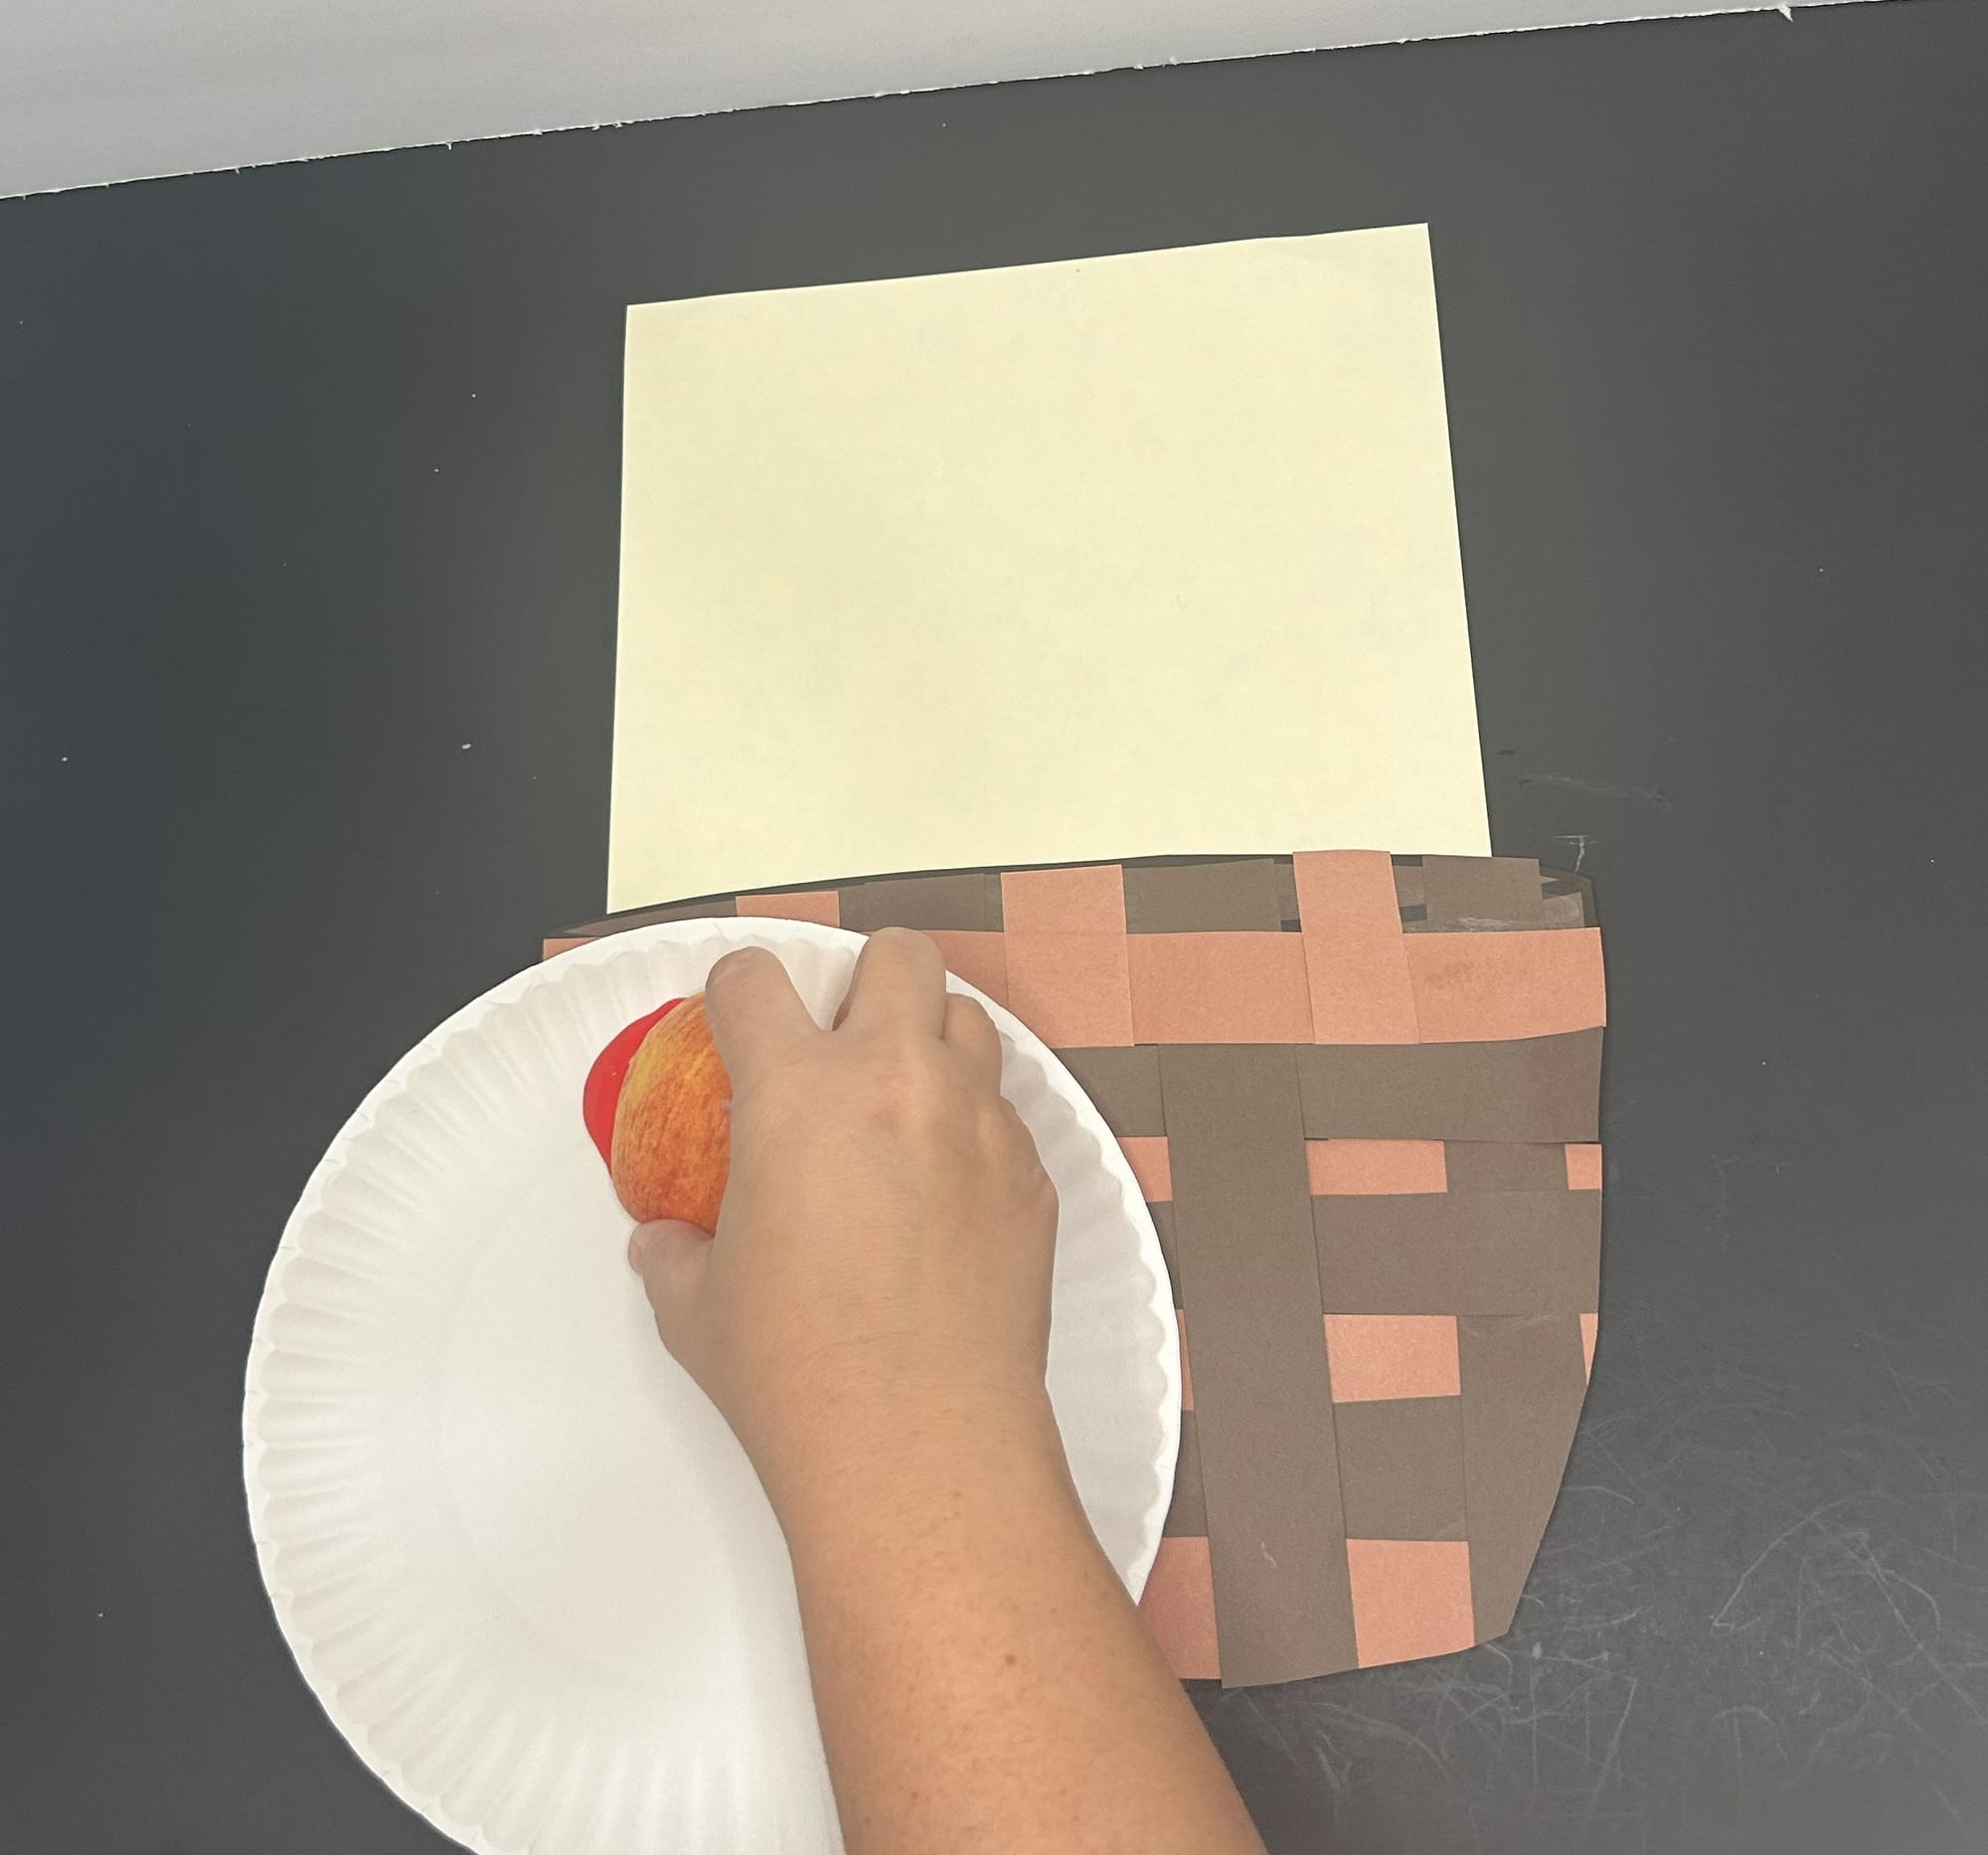
- Cut an apple in half. Look at the inside of the apple with your child. Ask them if they know what any of the parts of the apple are called. Talk about the part of an apples and point them out of the apple you have.
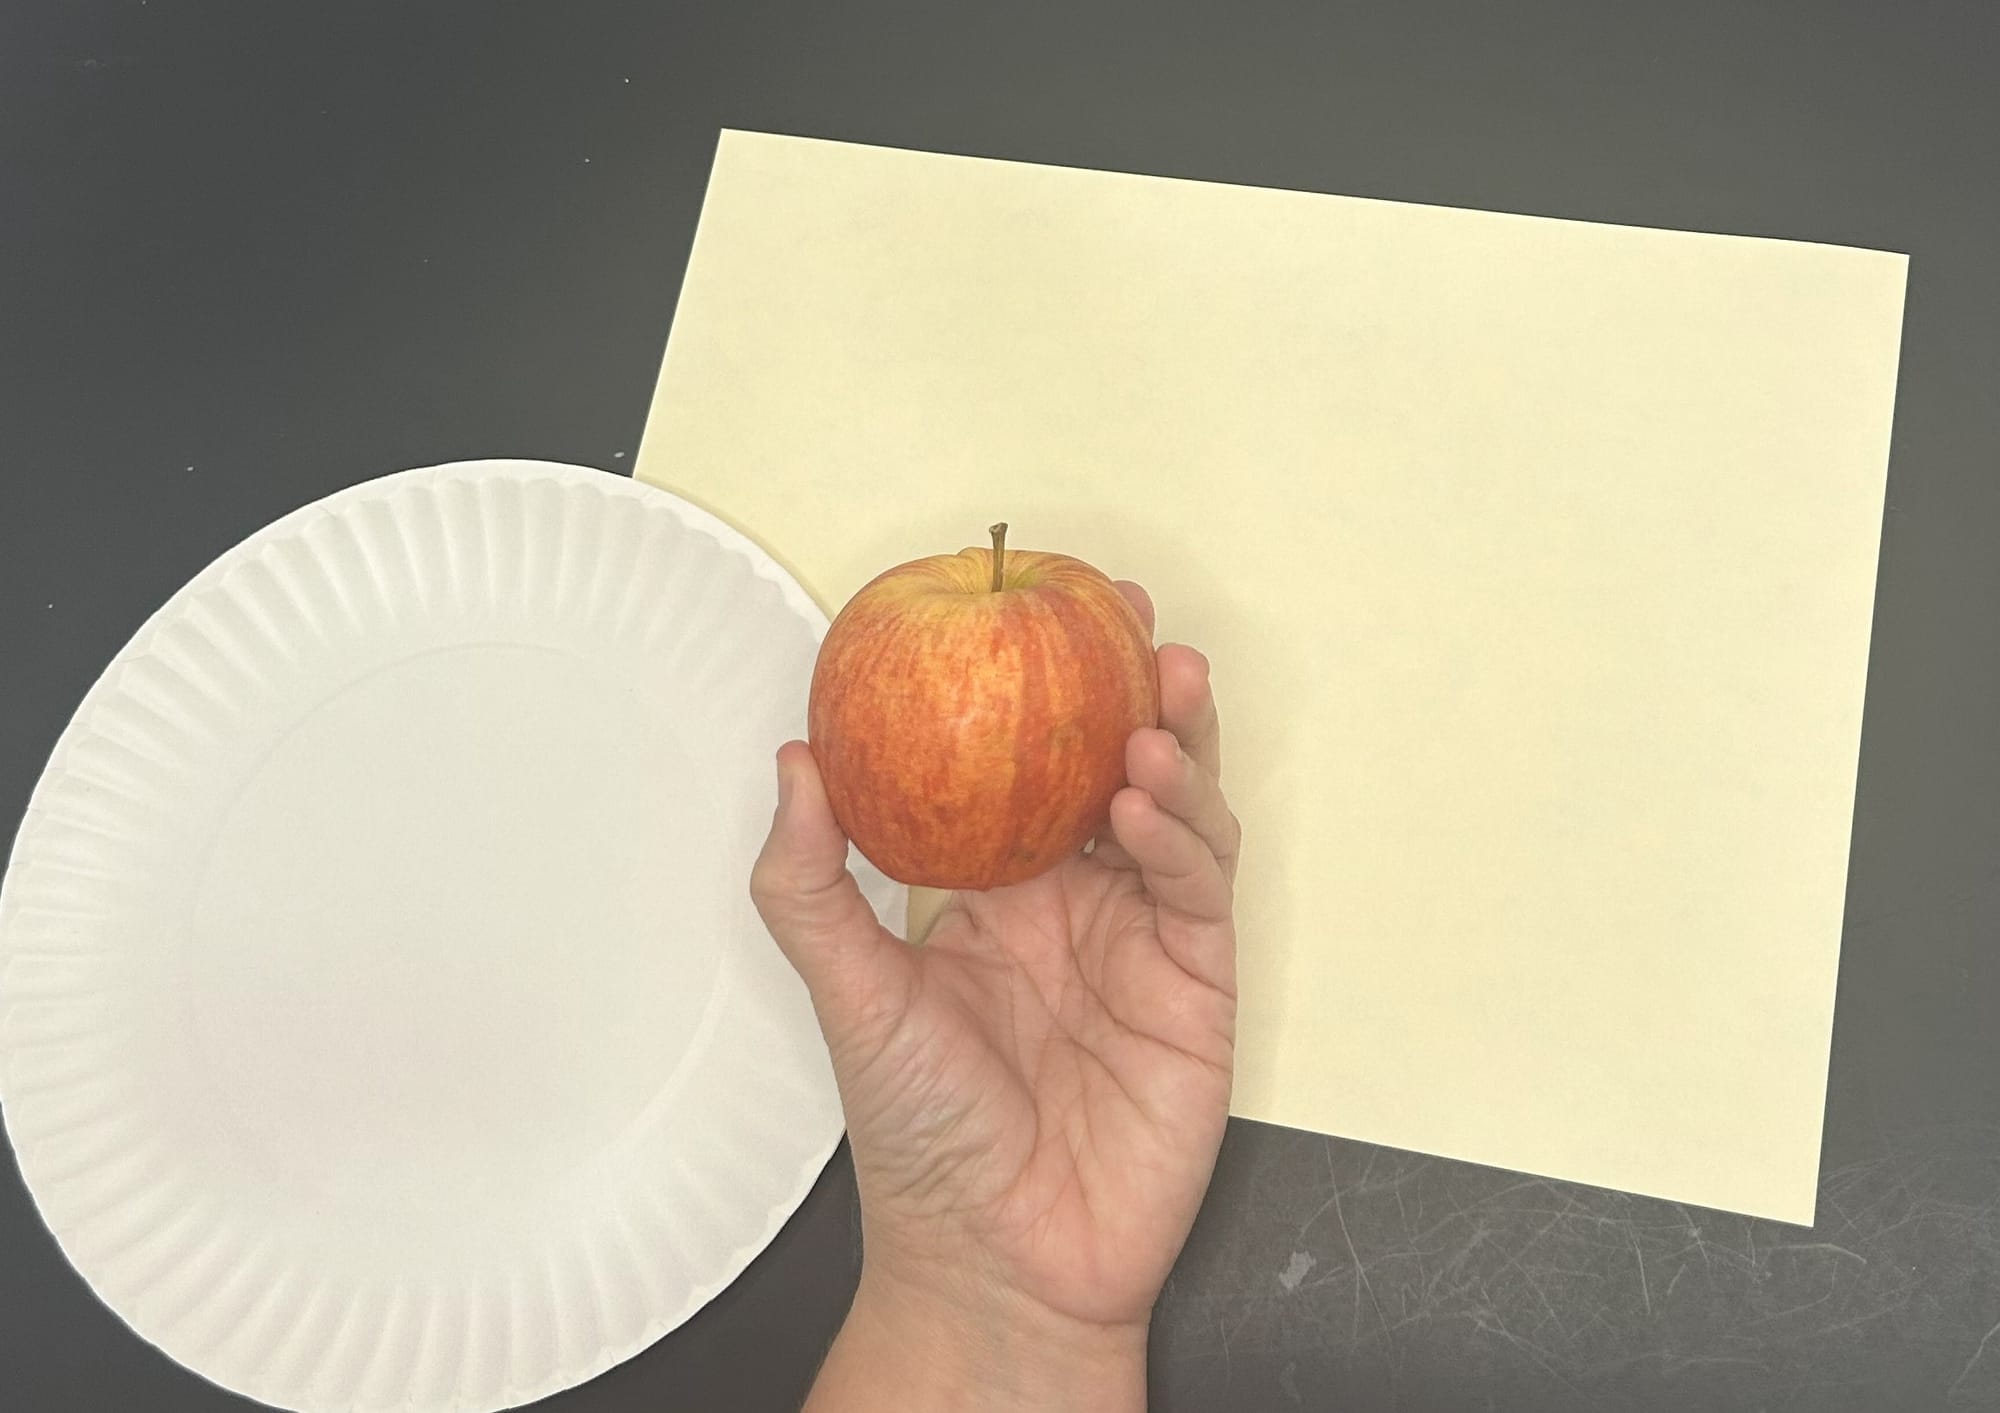
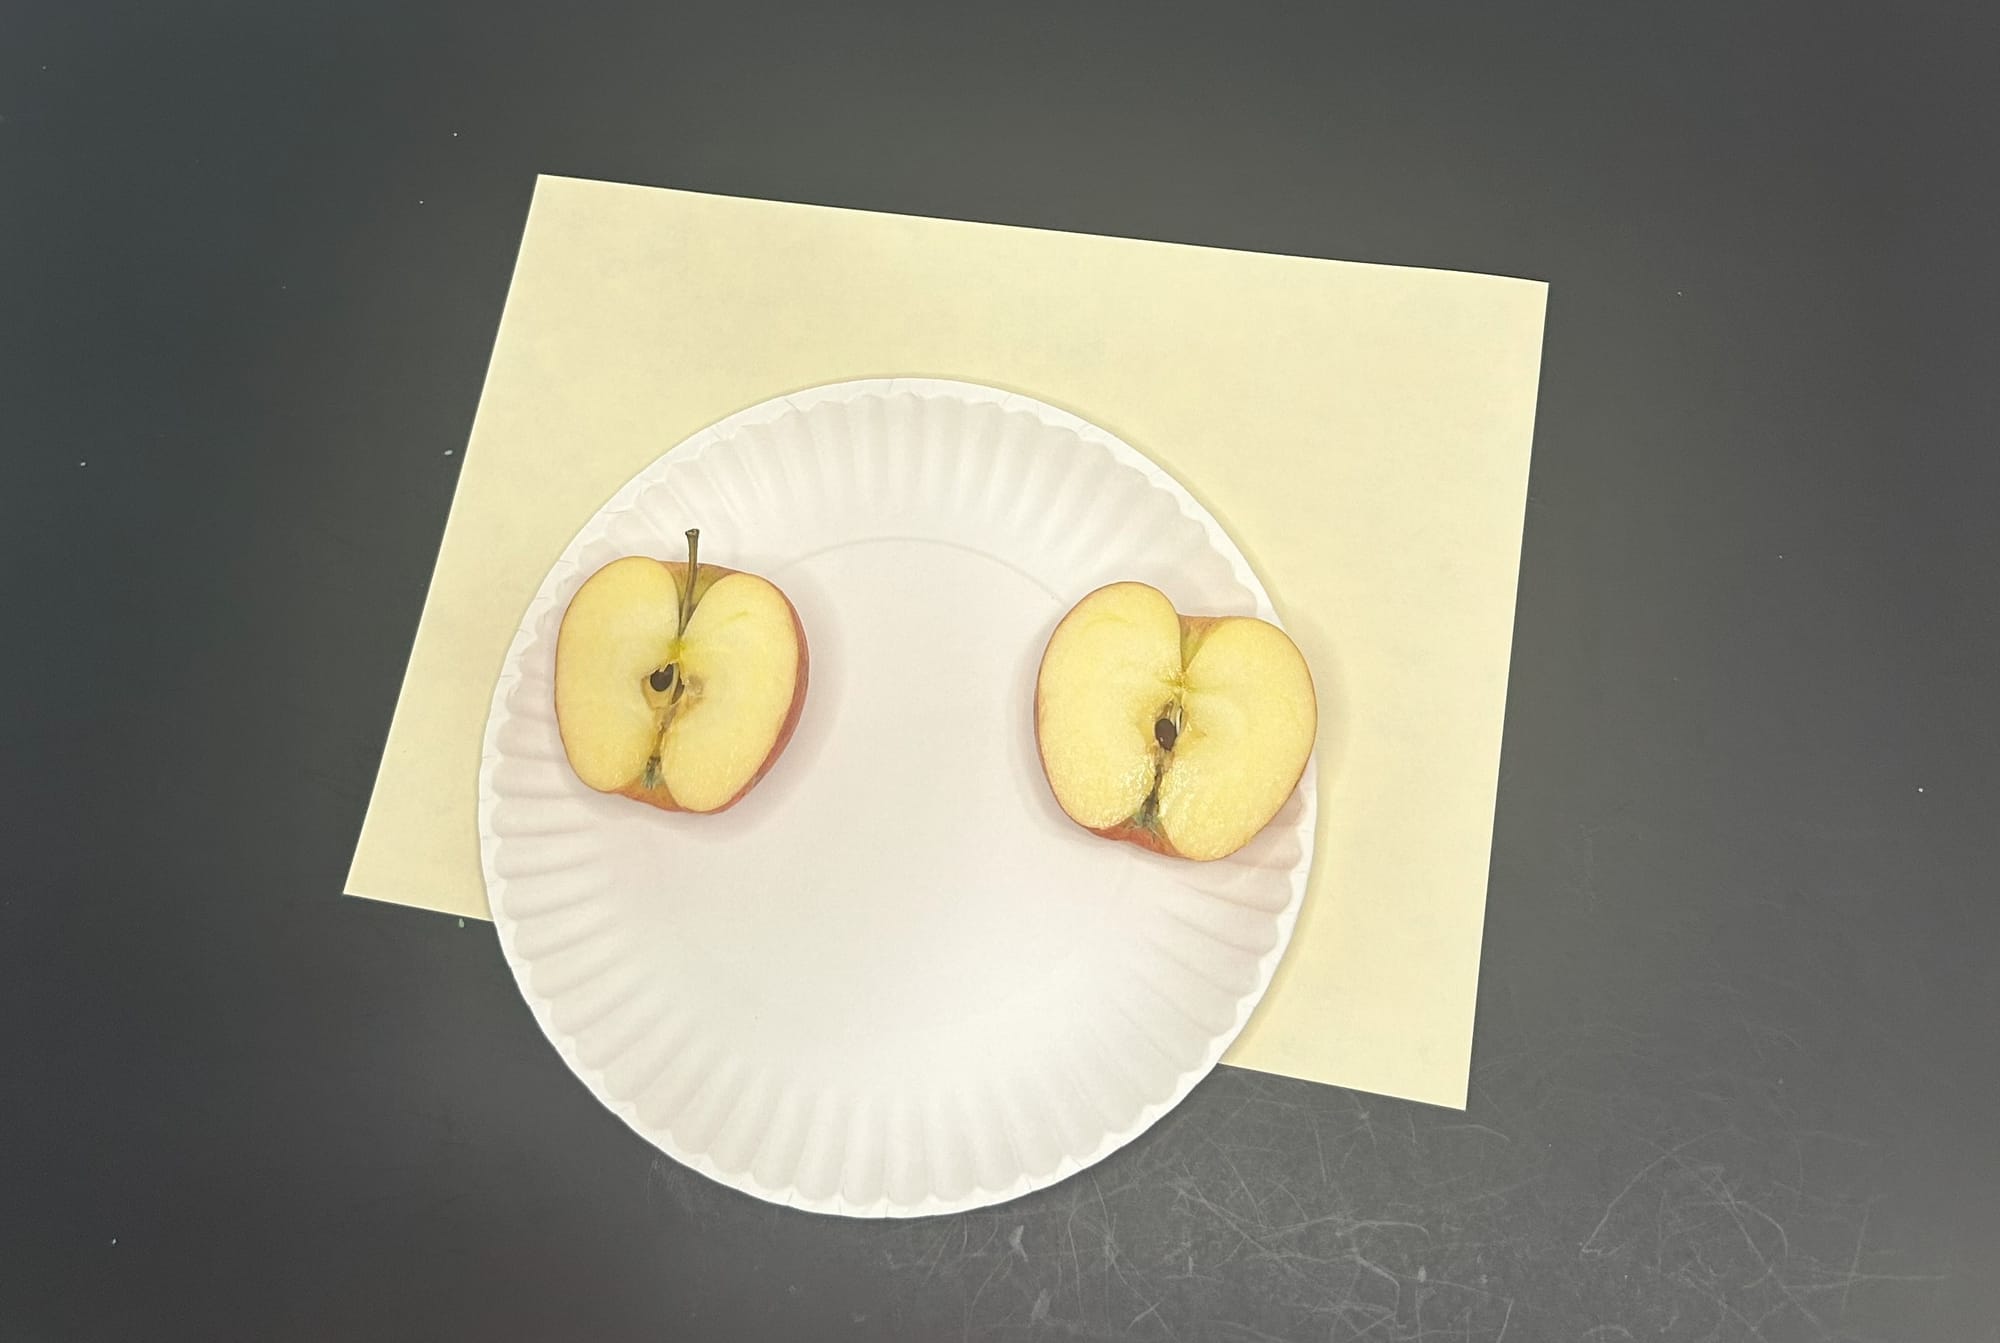
Looking at a real apple is such a good way to talk to kids about the parts of plants.
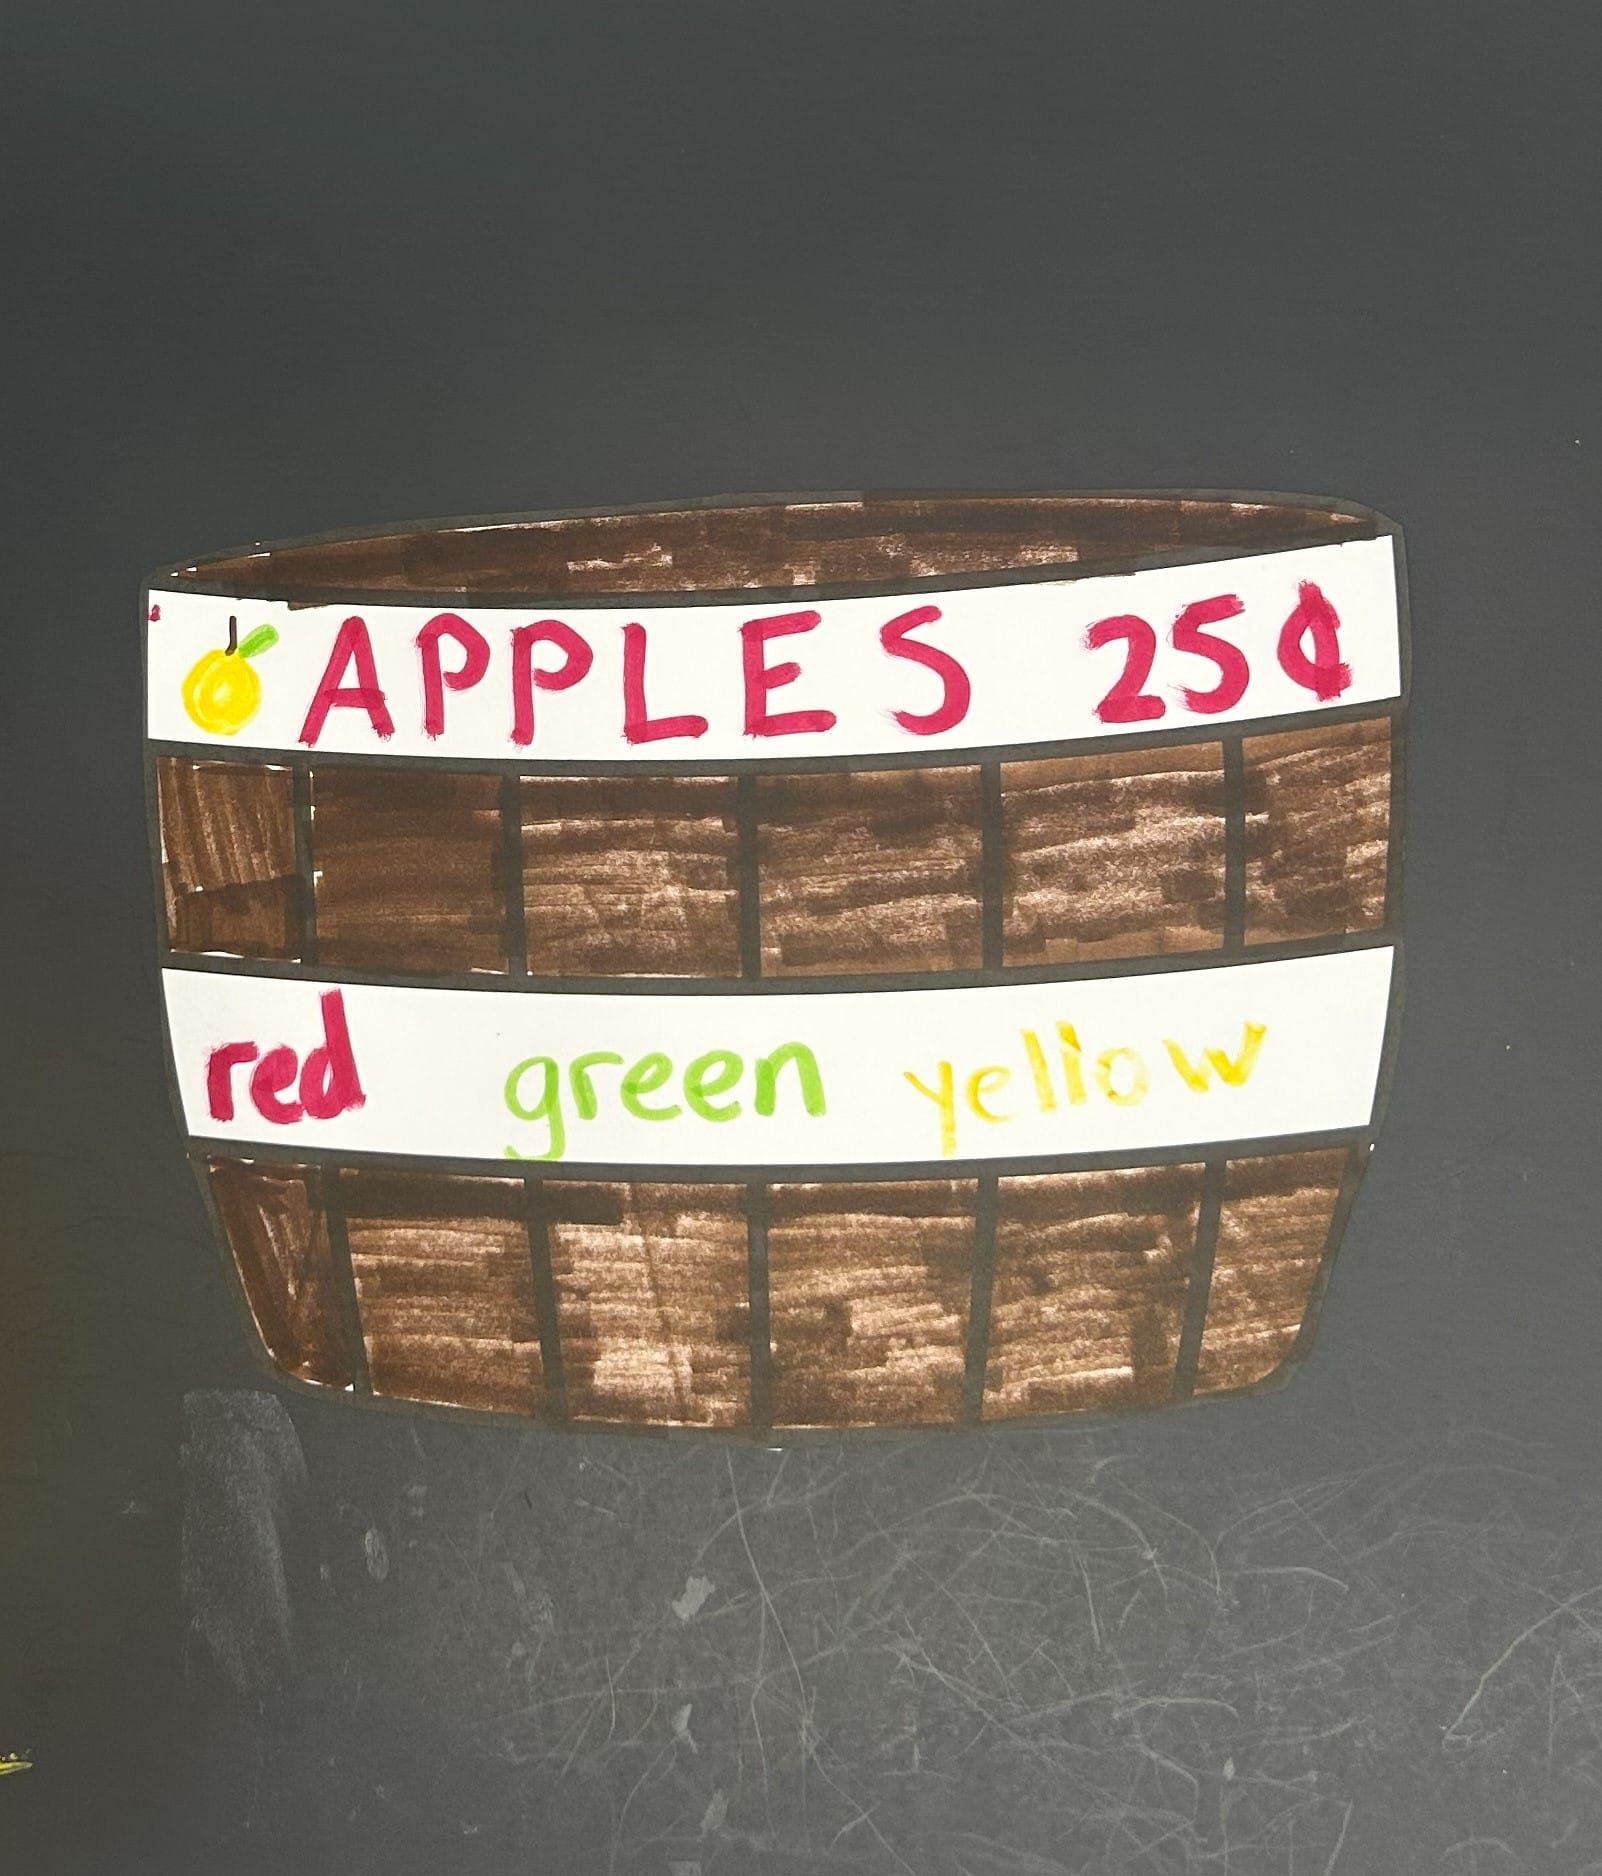
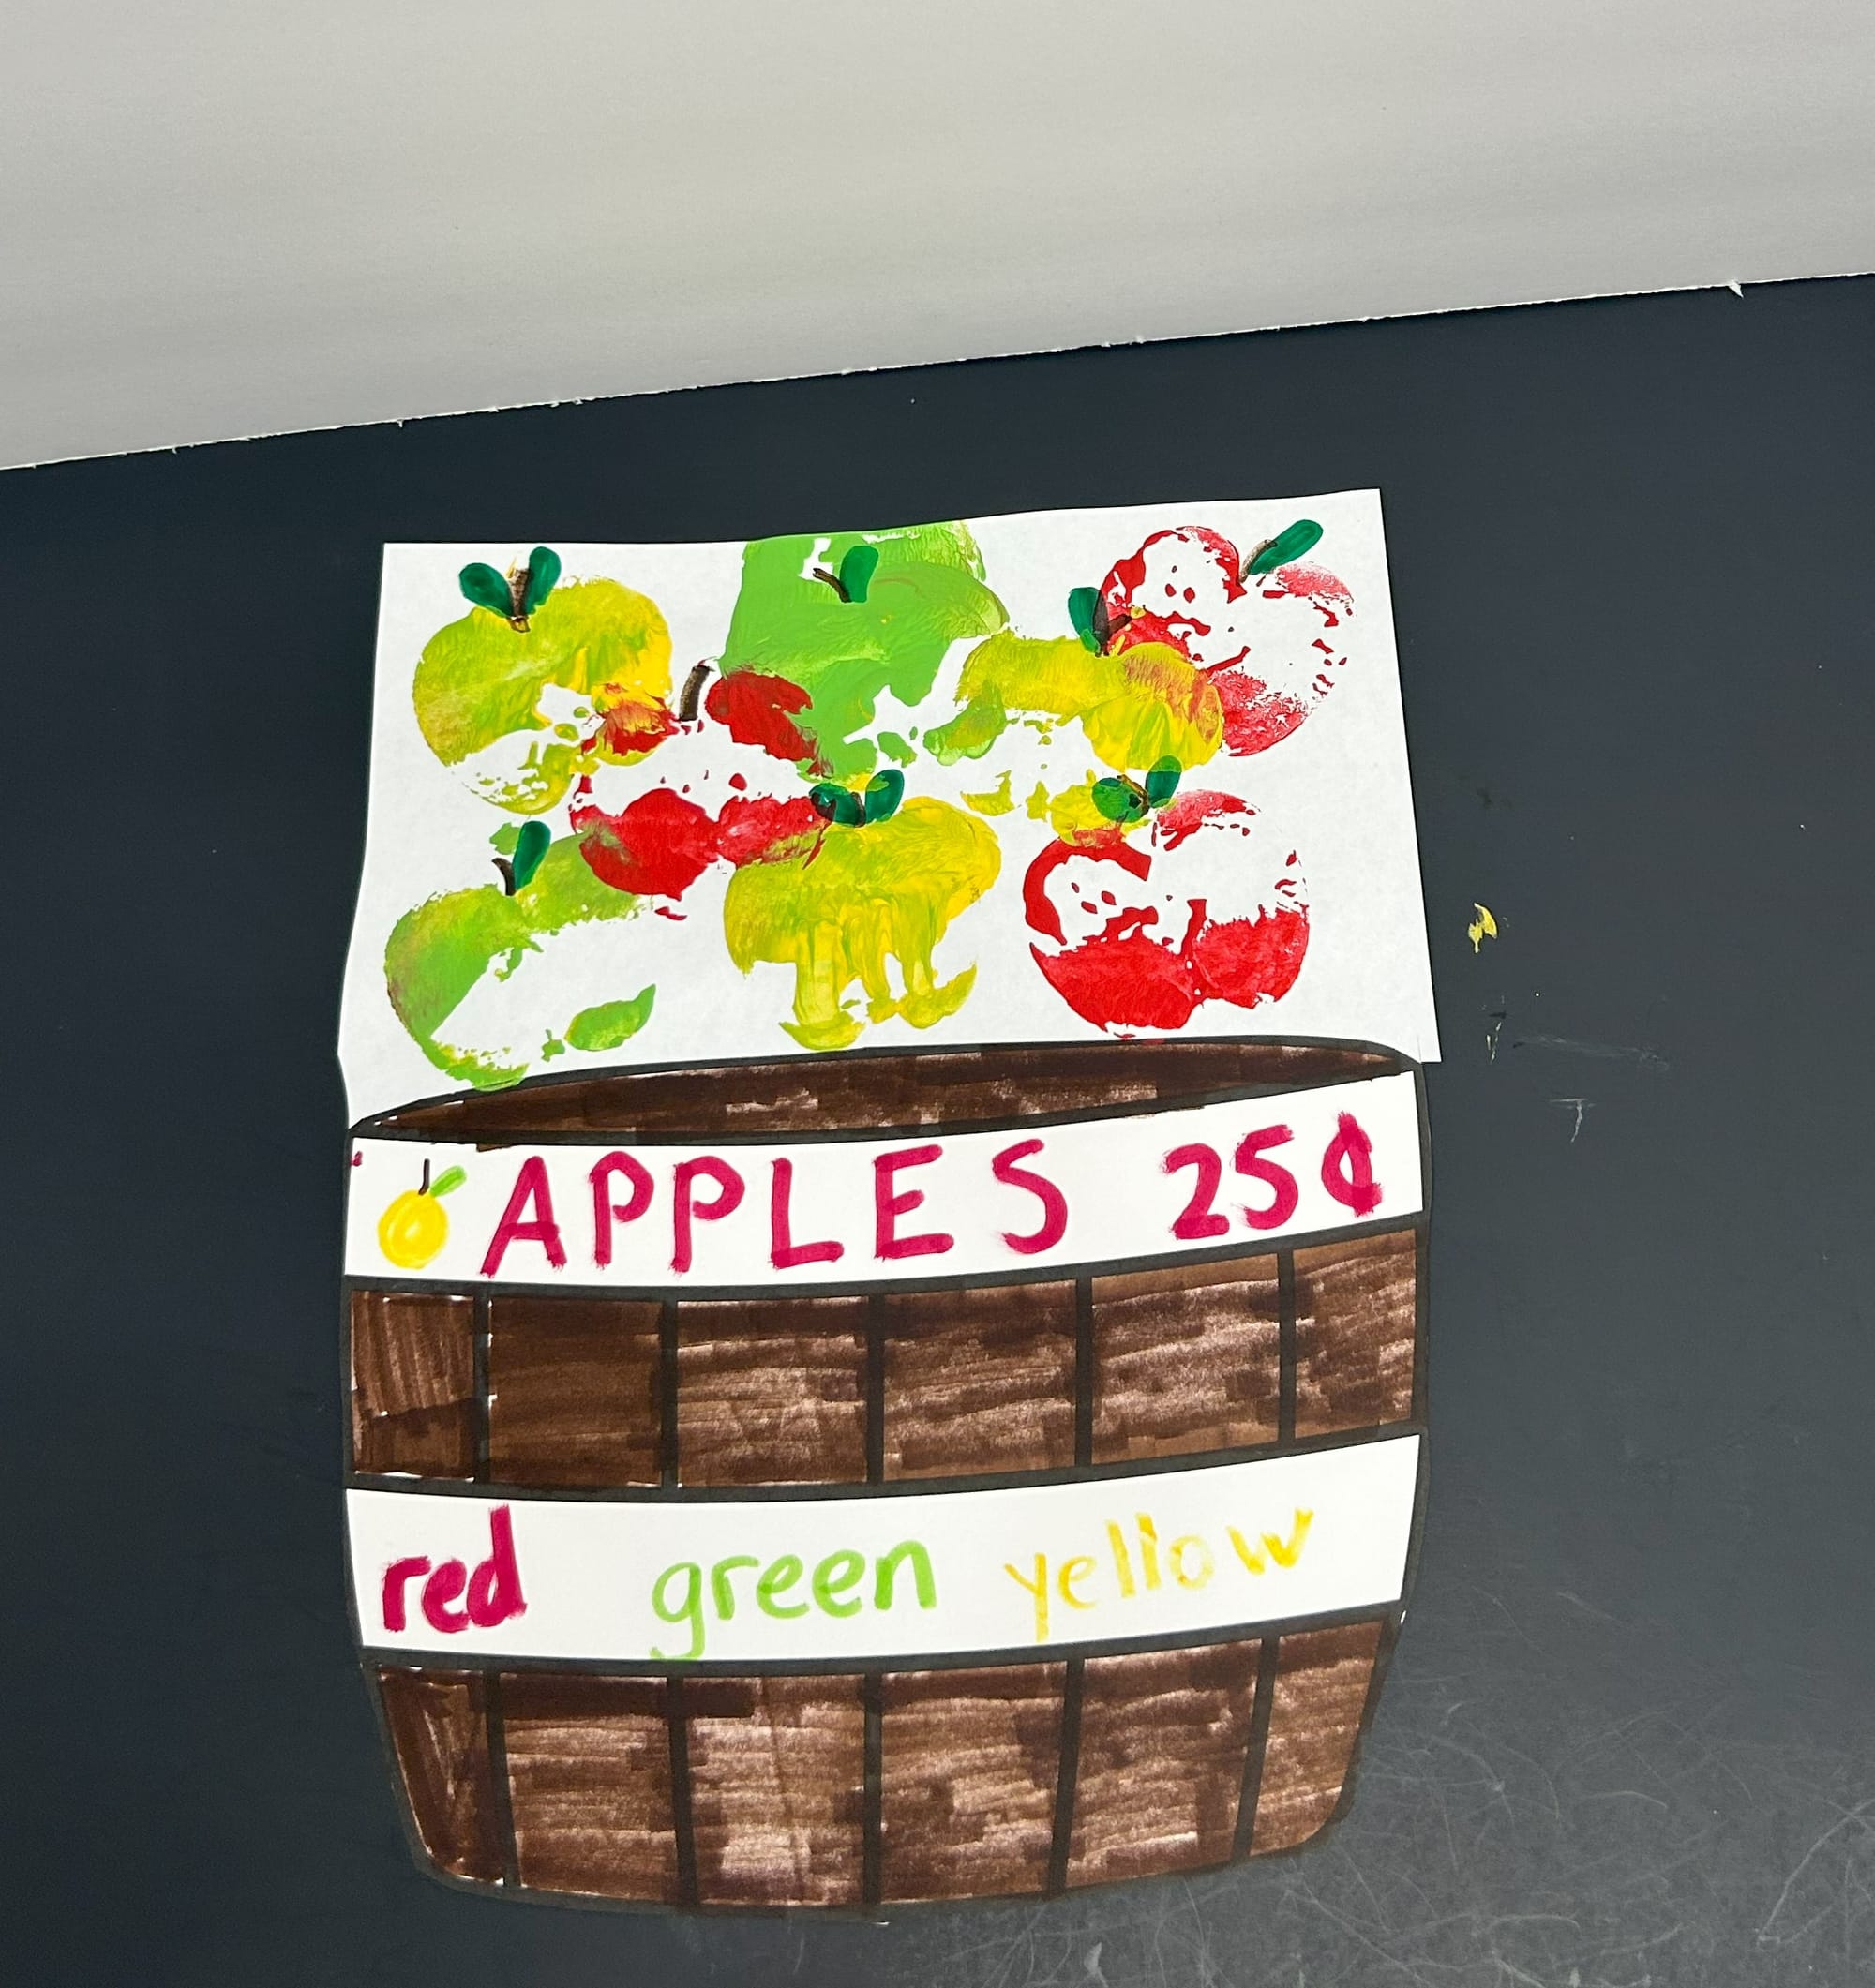
- Glue a piece of white paper to the top of the apple basket.
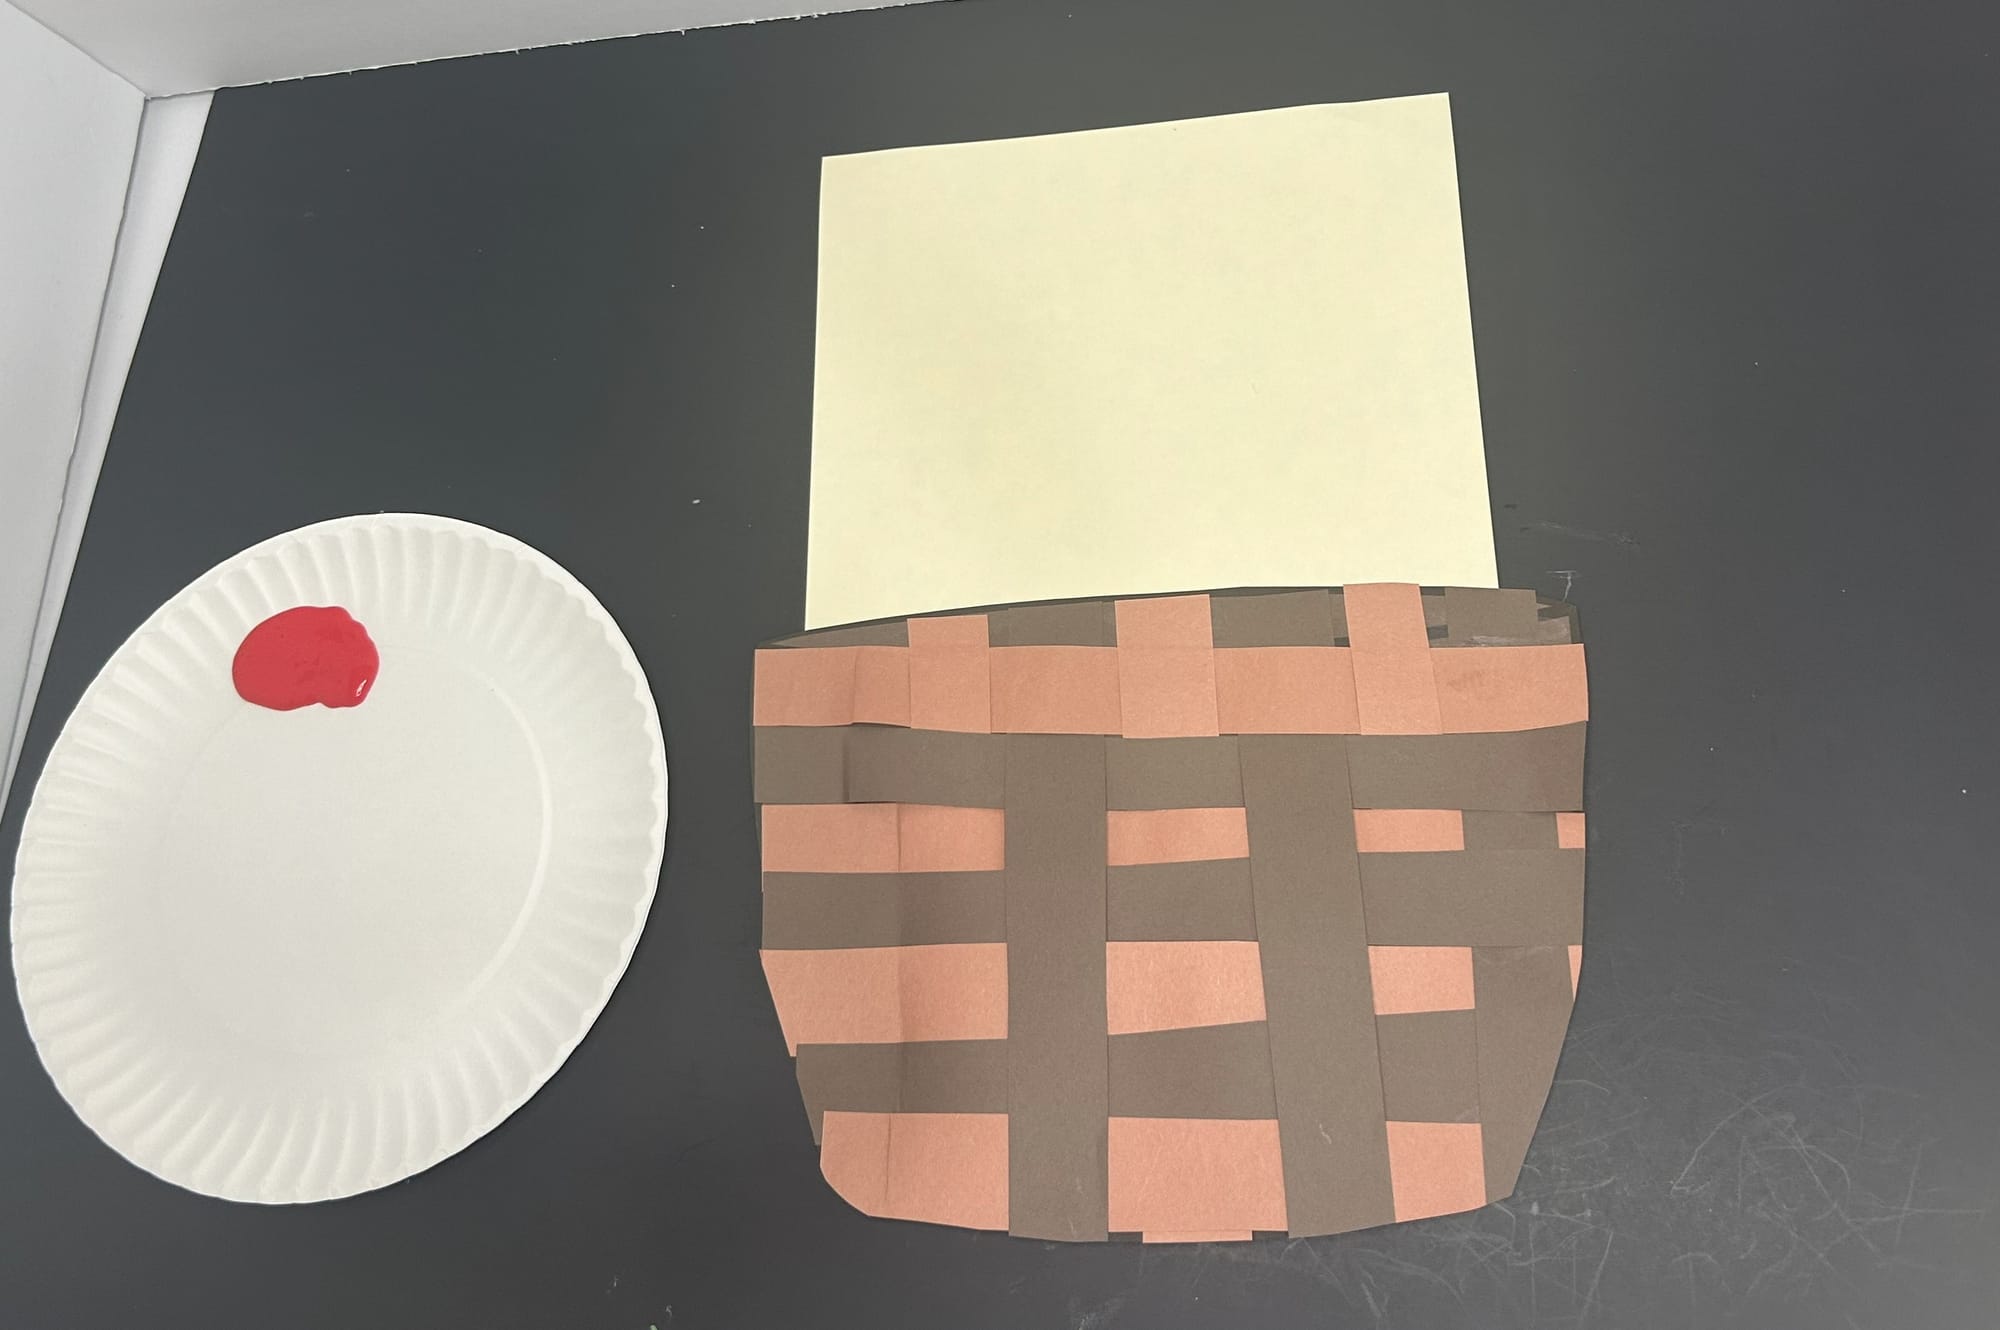
Glue a piece of white paper to the apple basket created.
- Use red, yellow and green paint to stamp the apple half on the white paper.
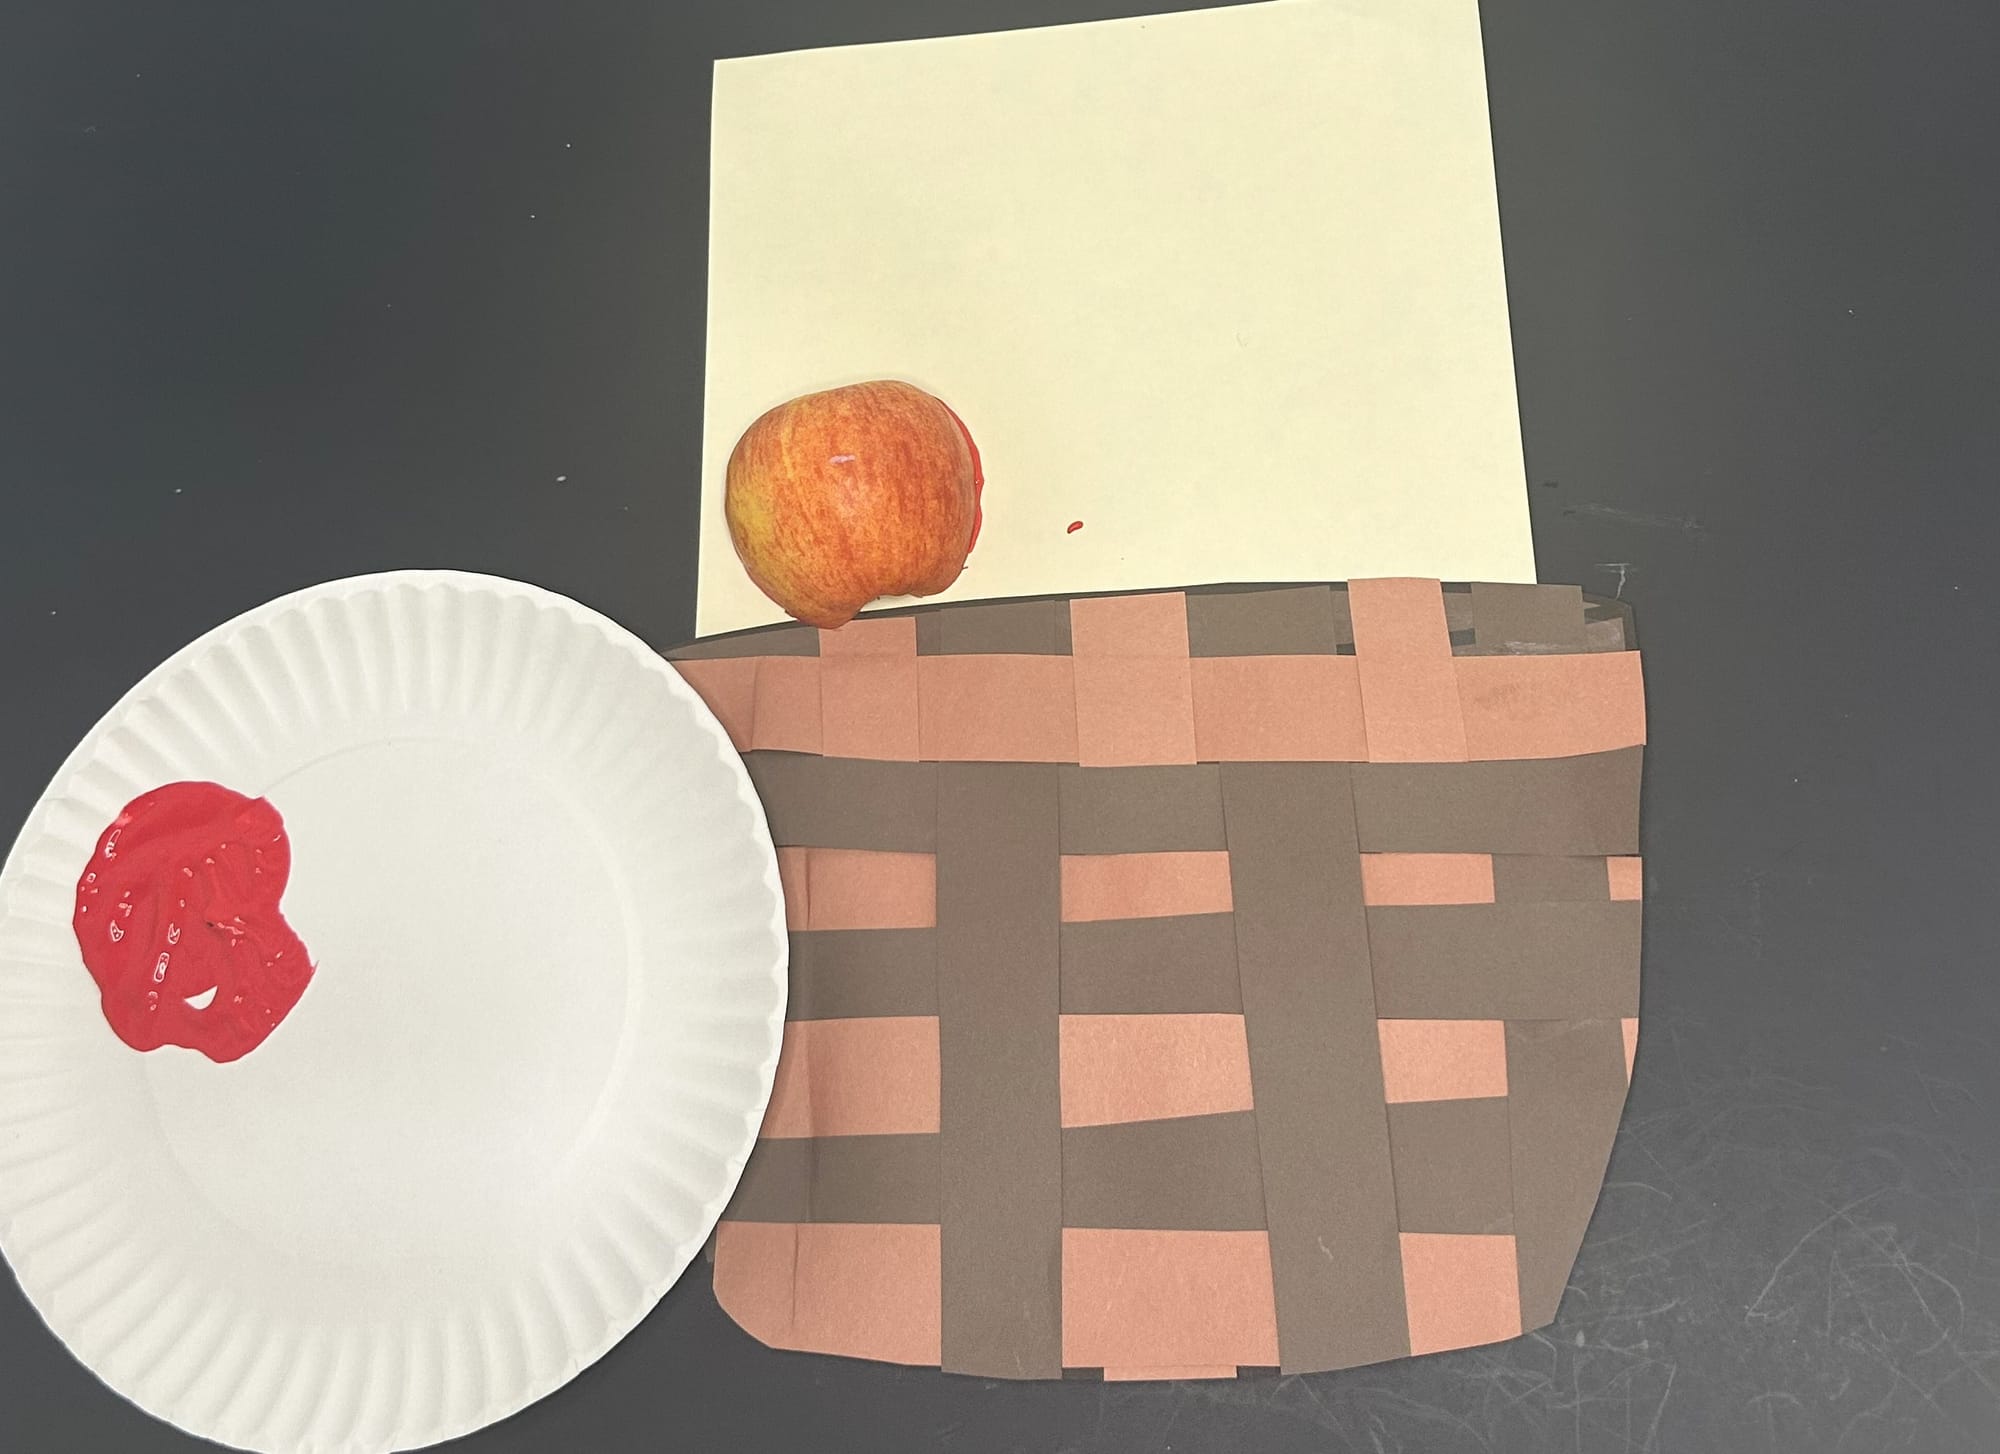
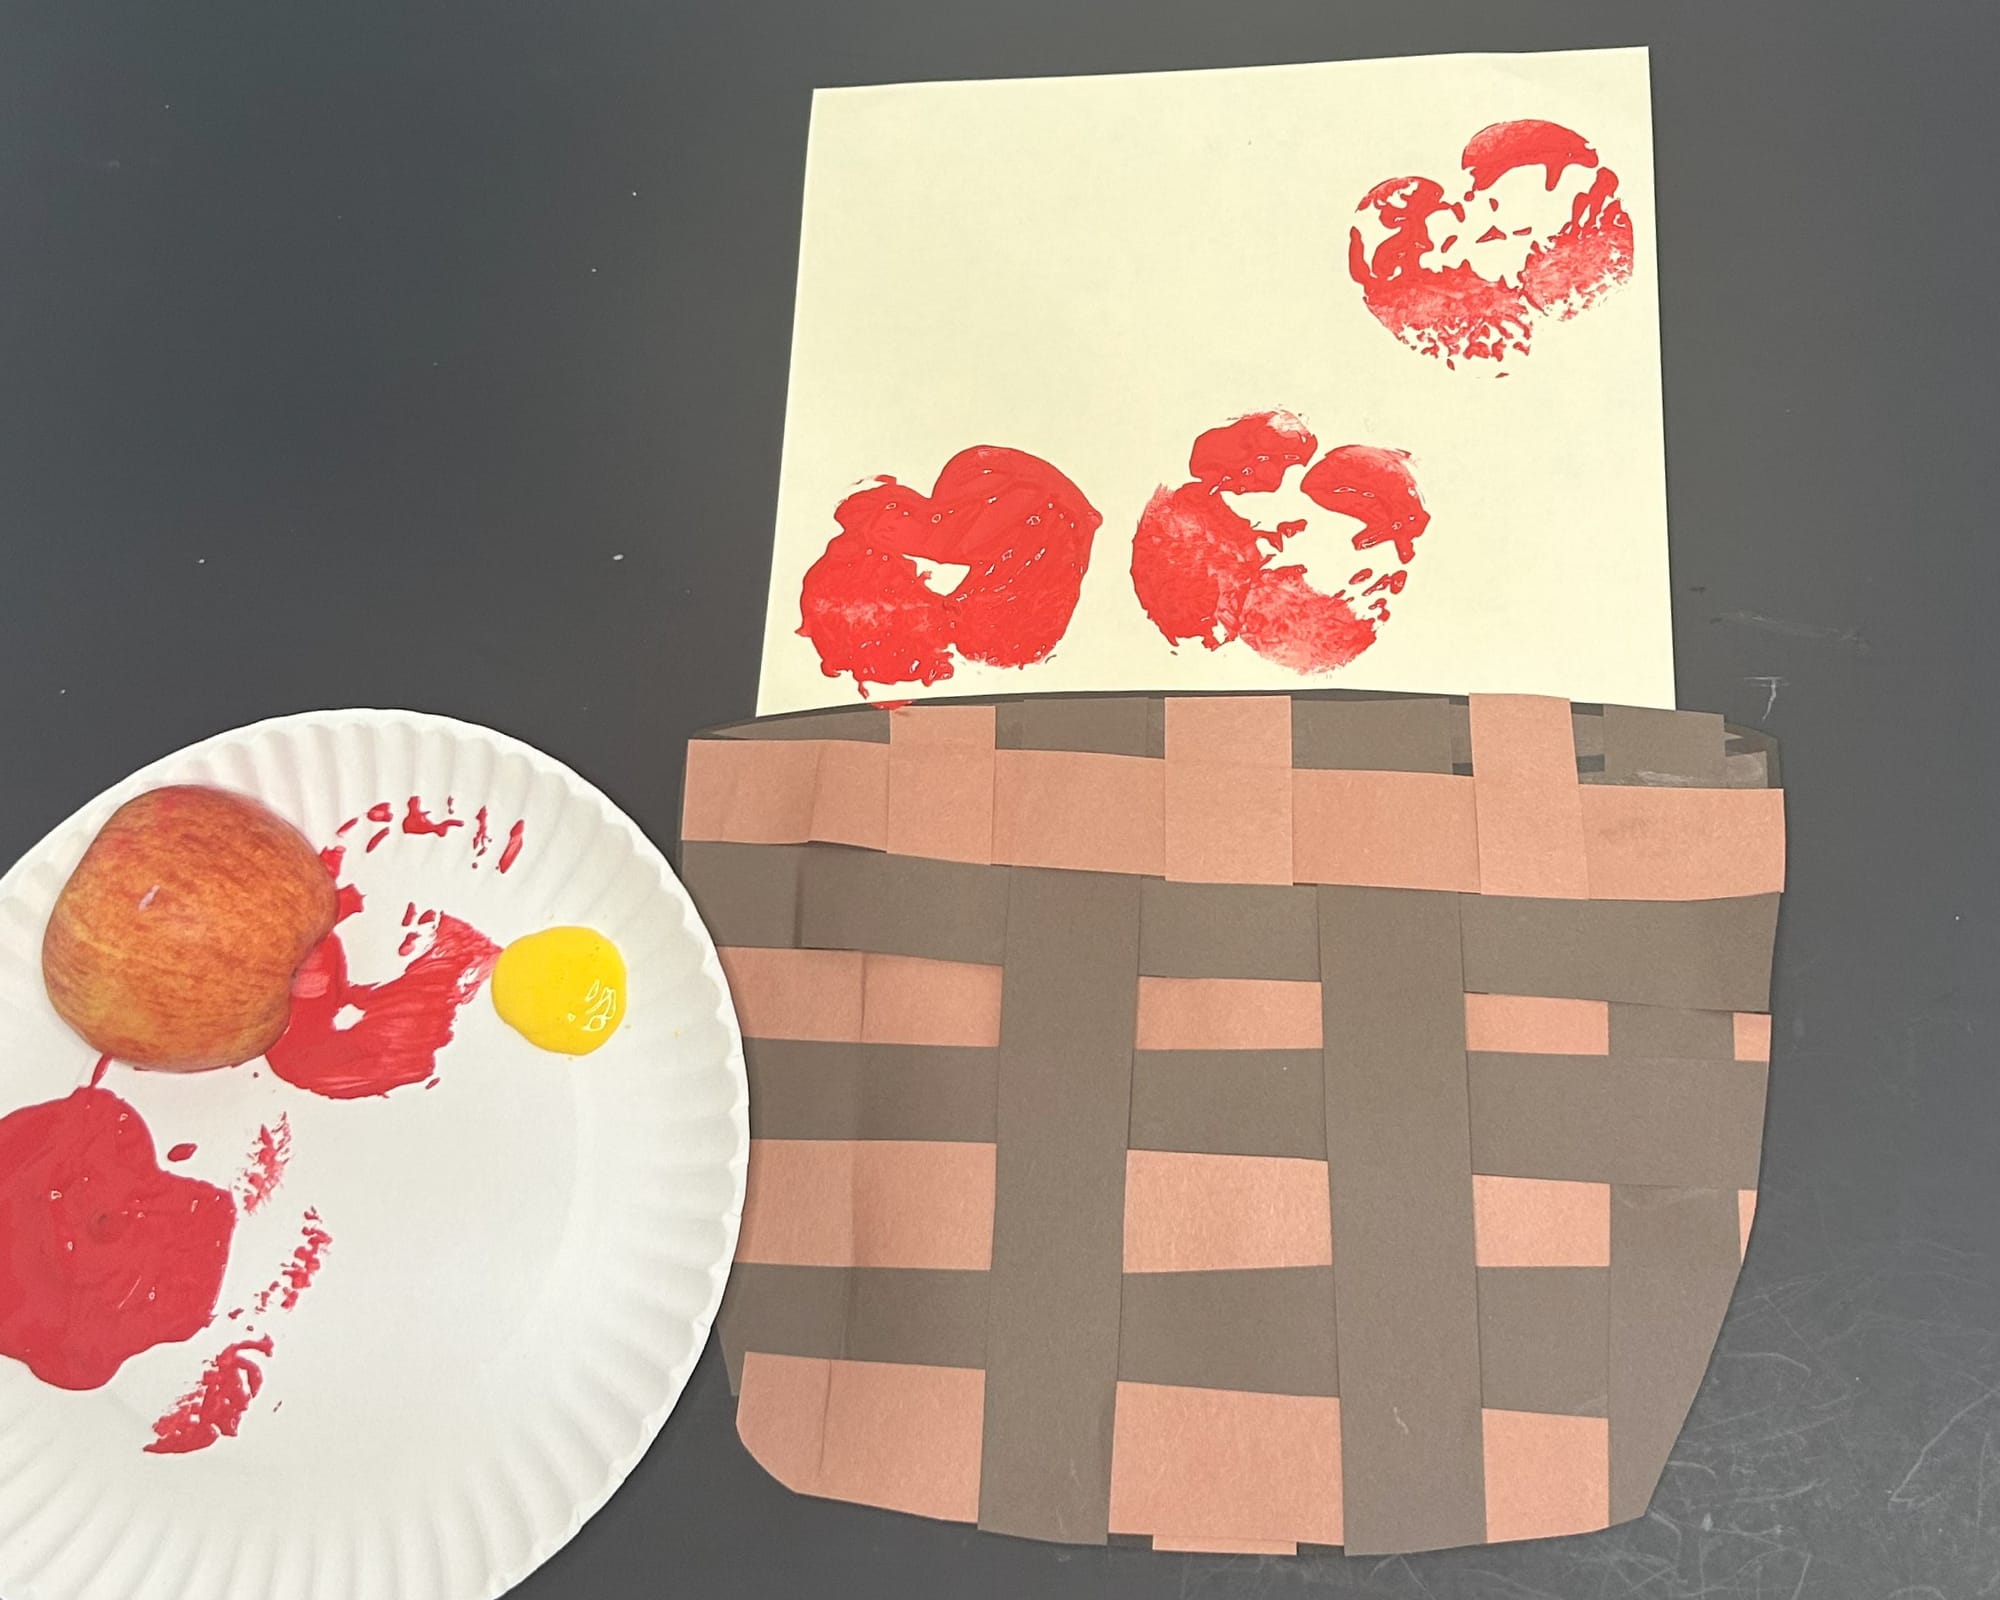
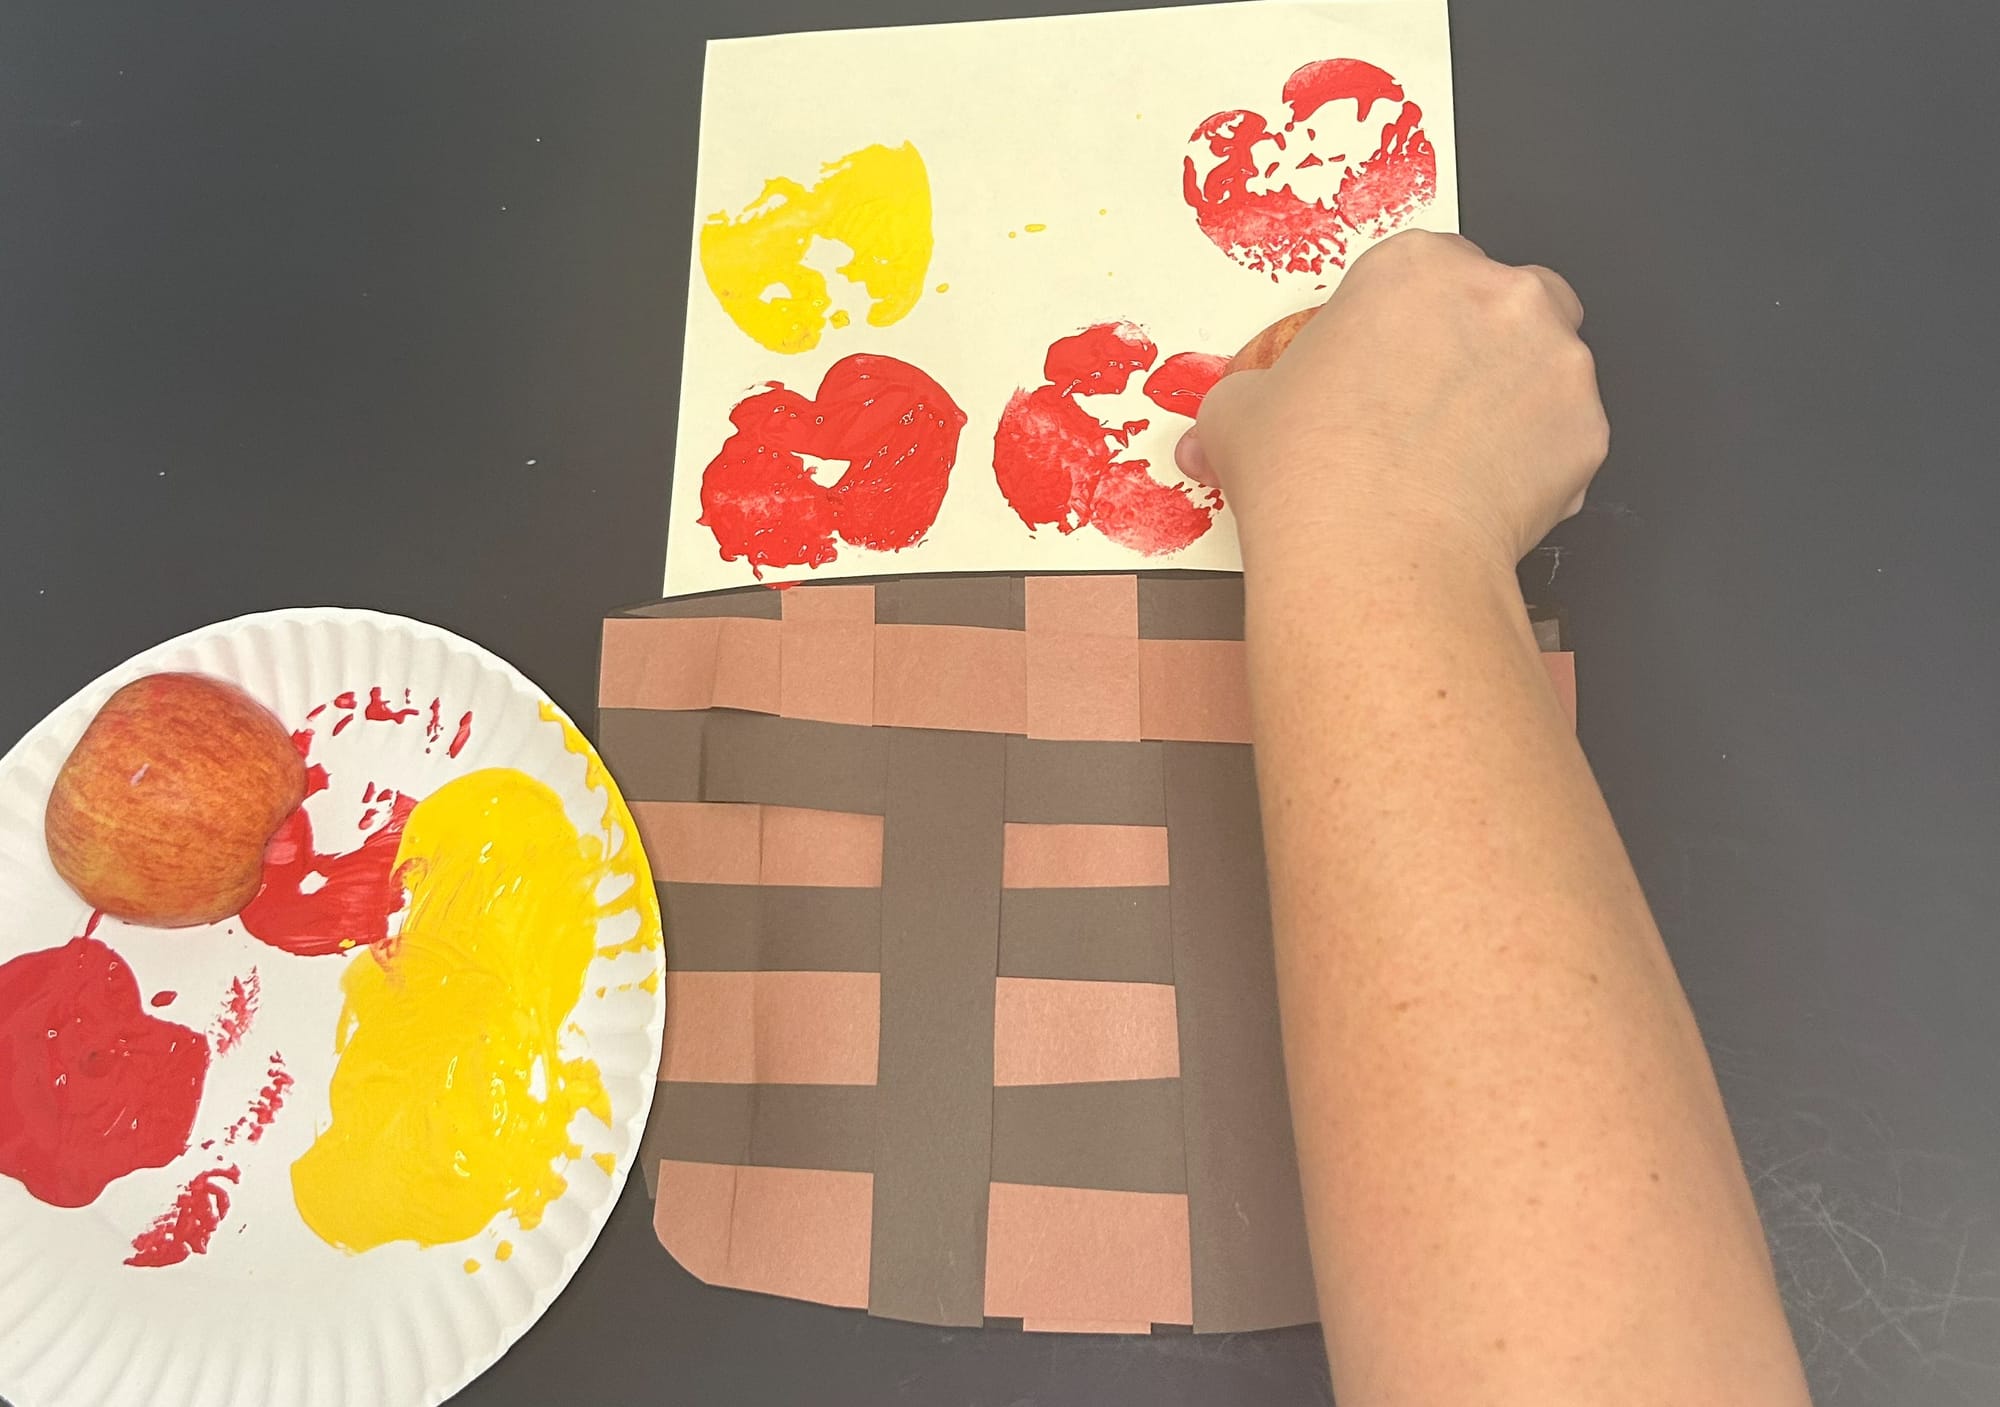
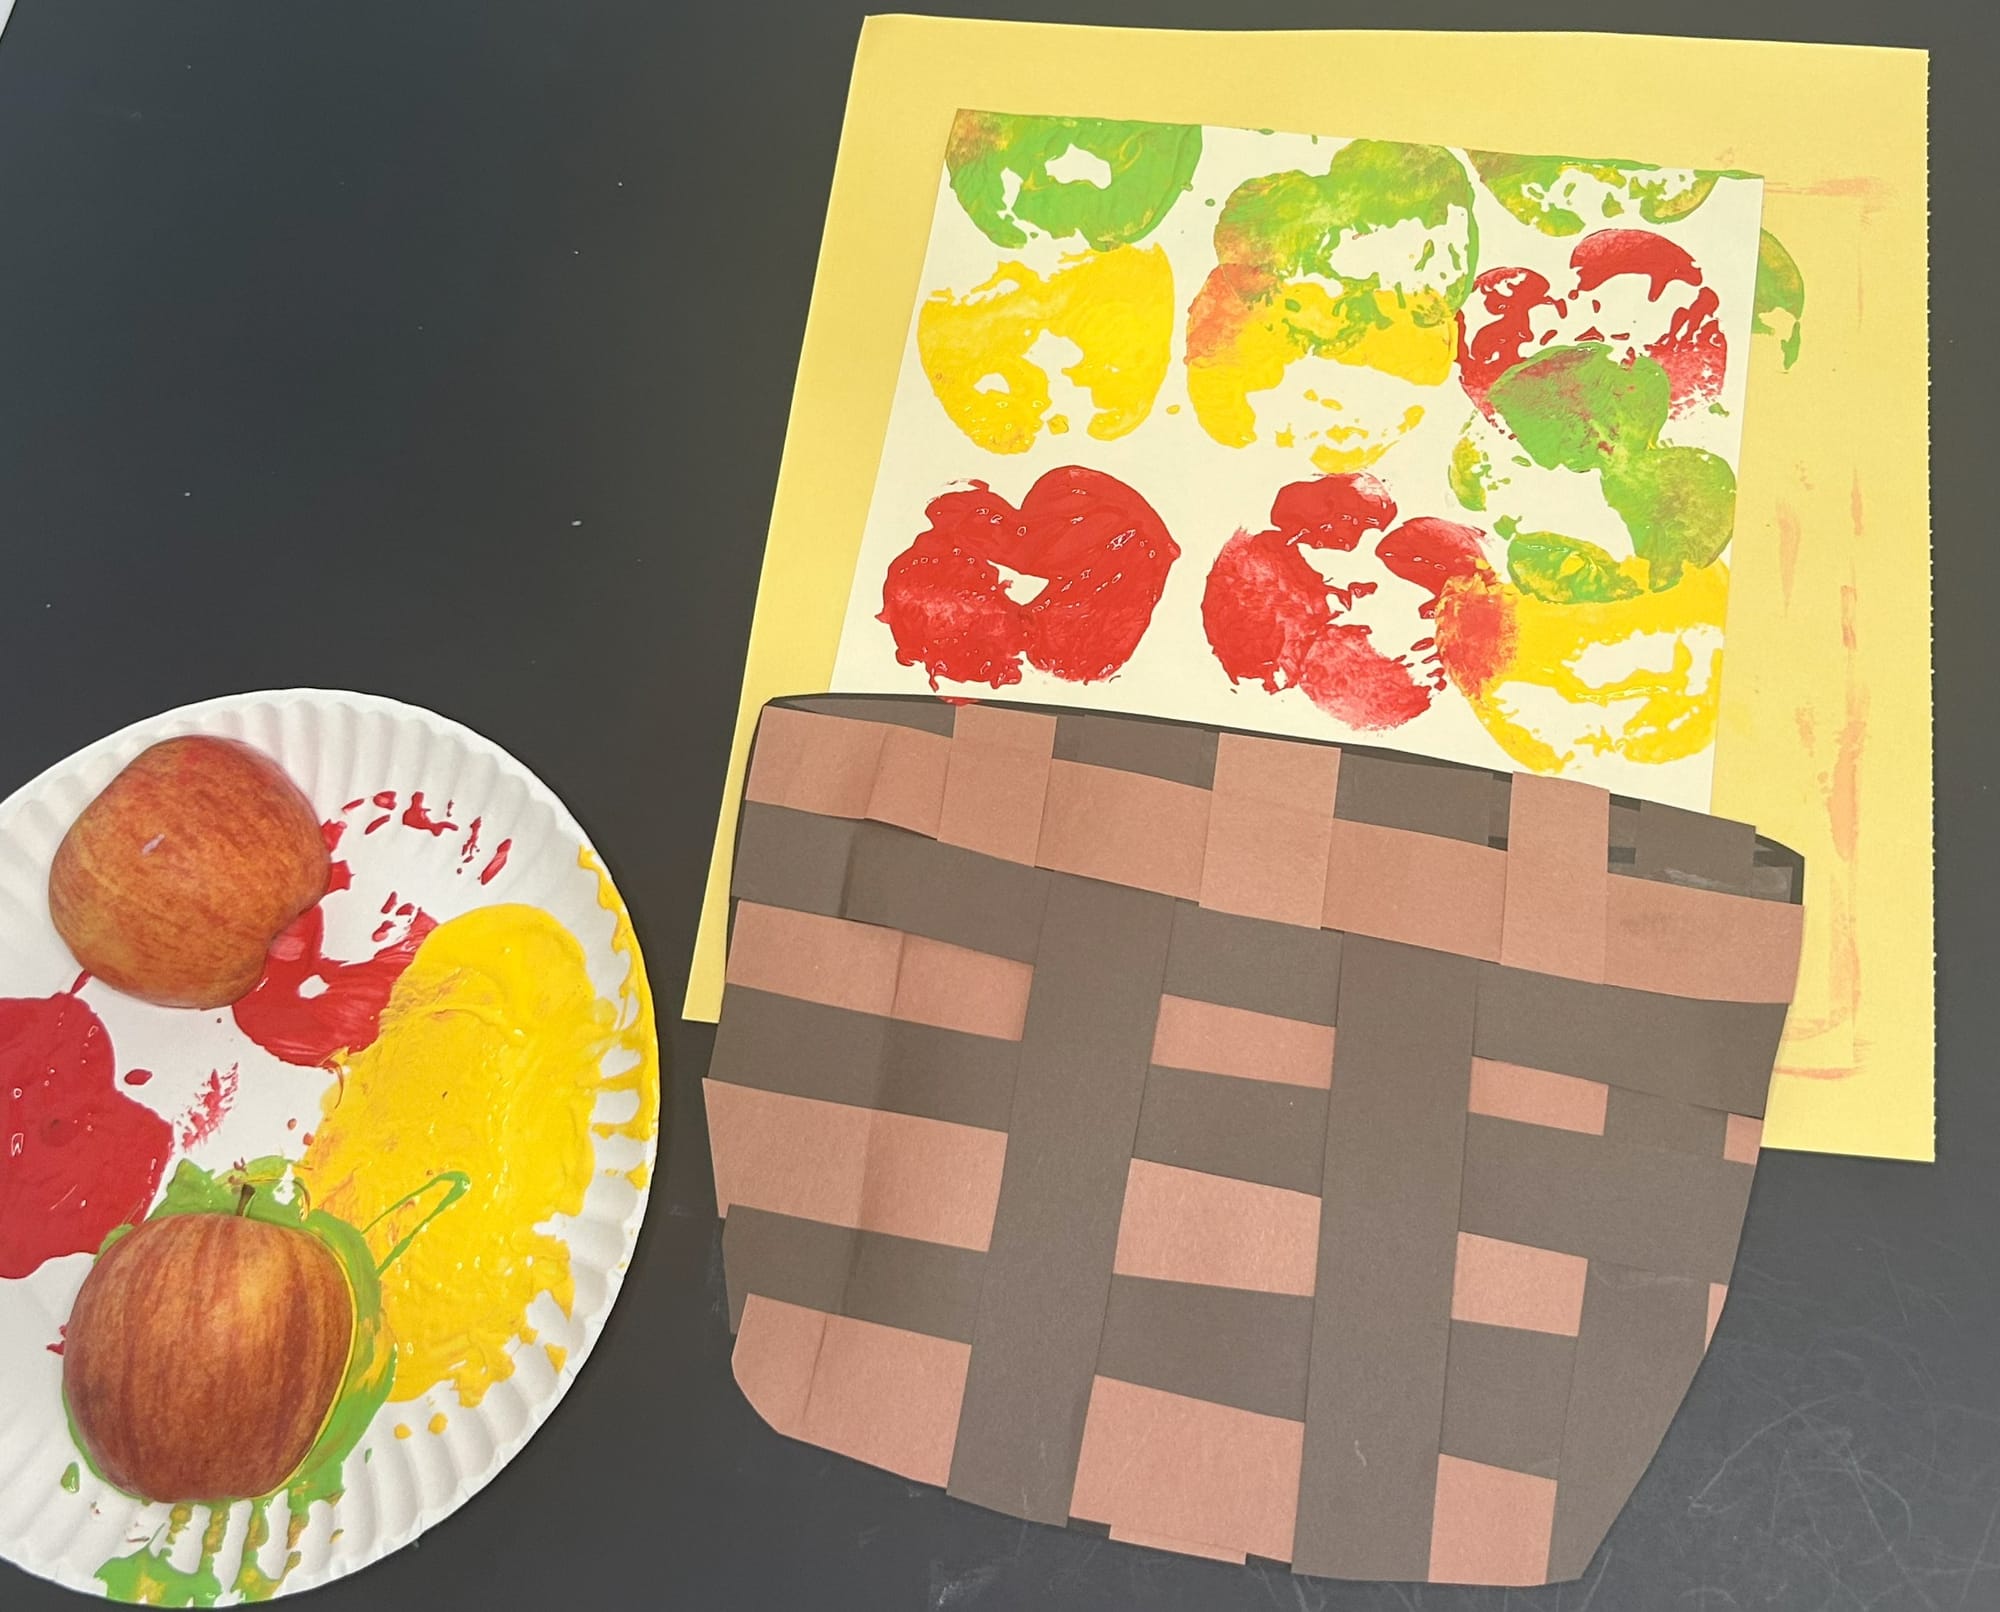
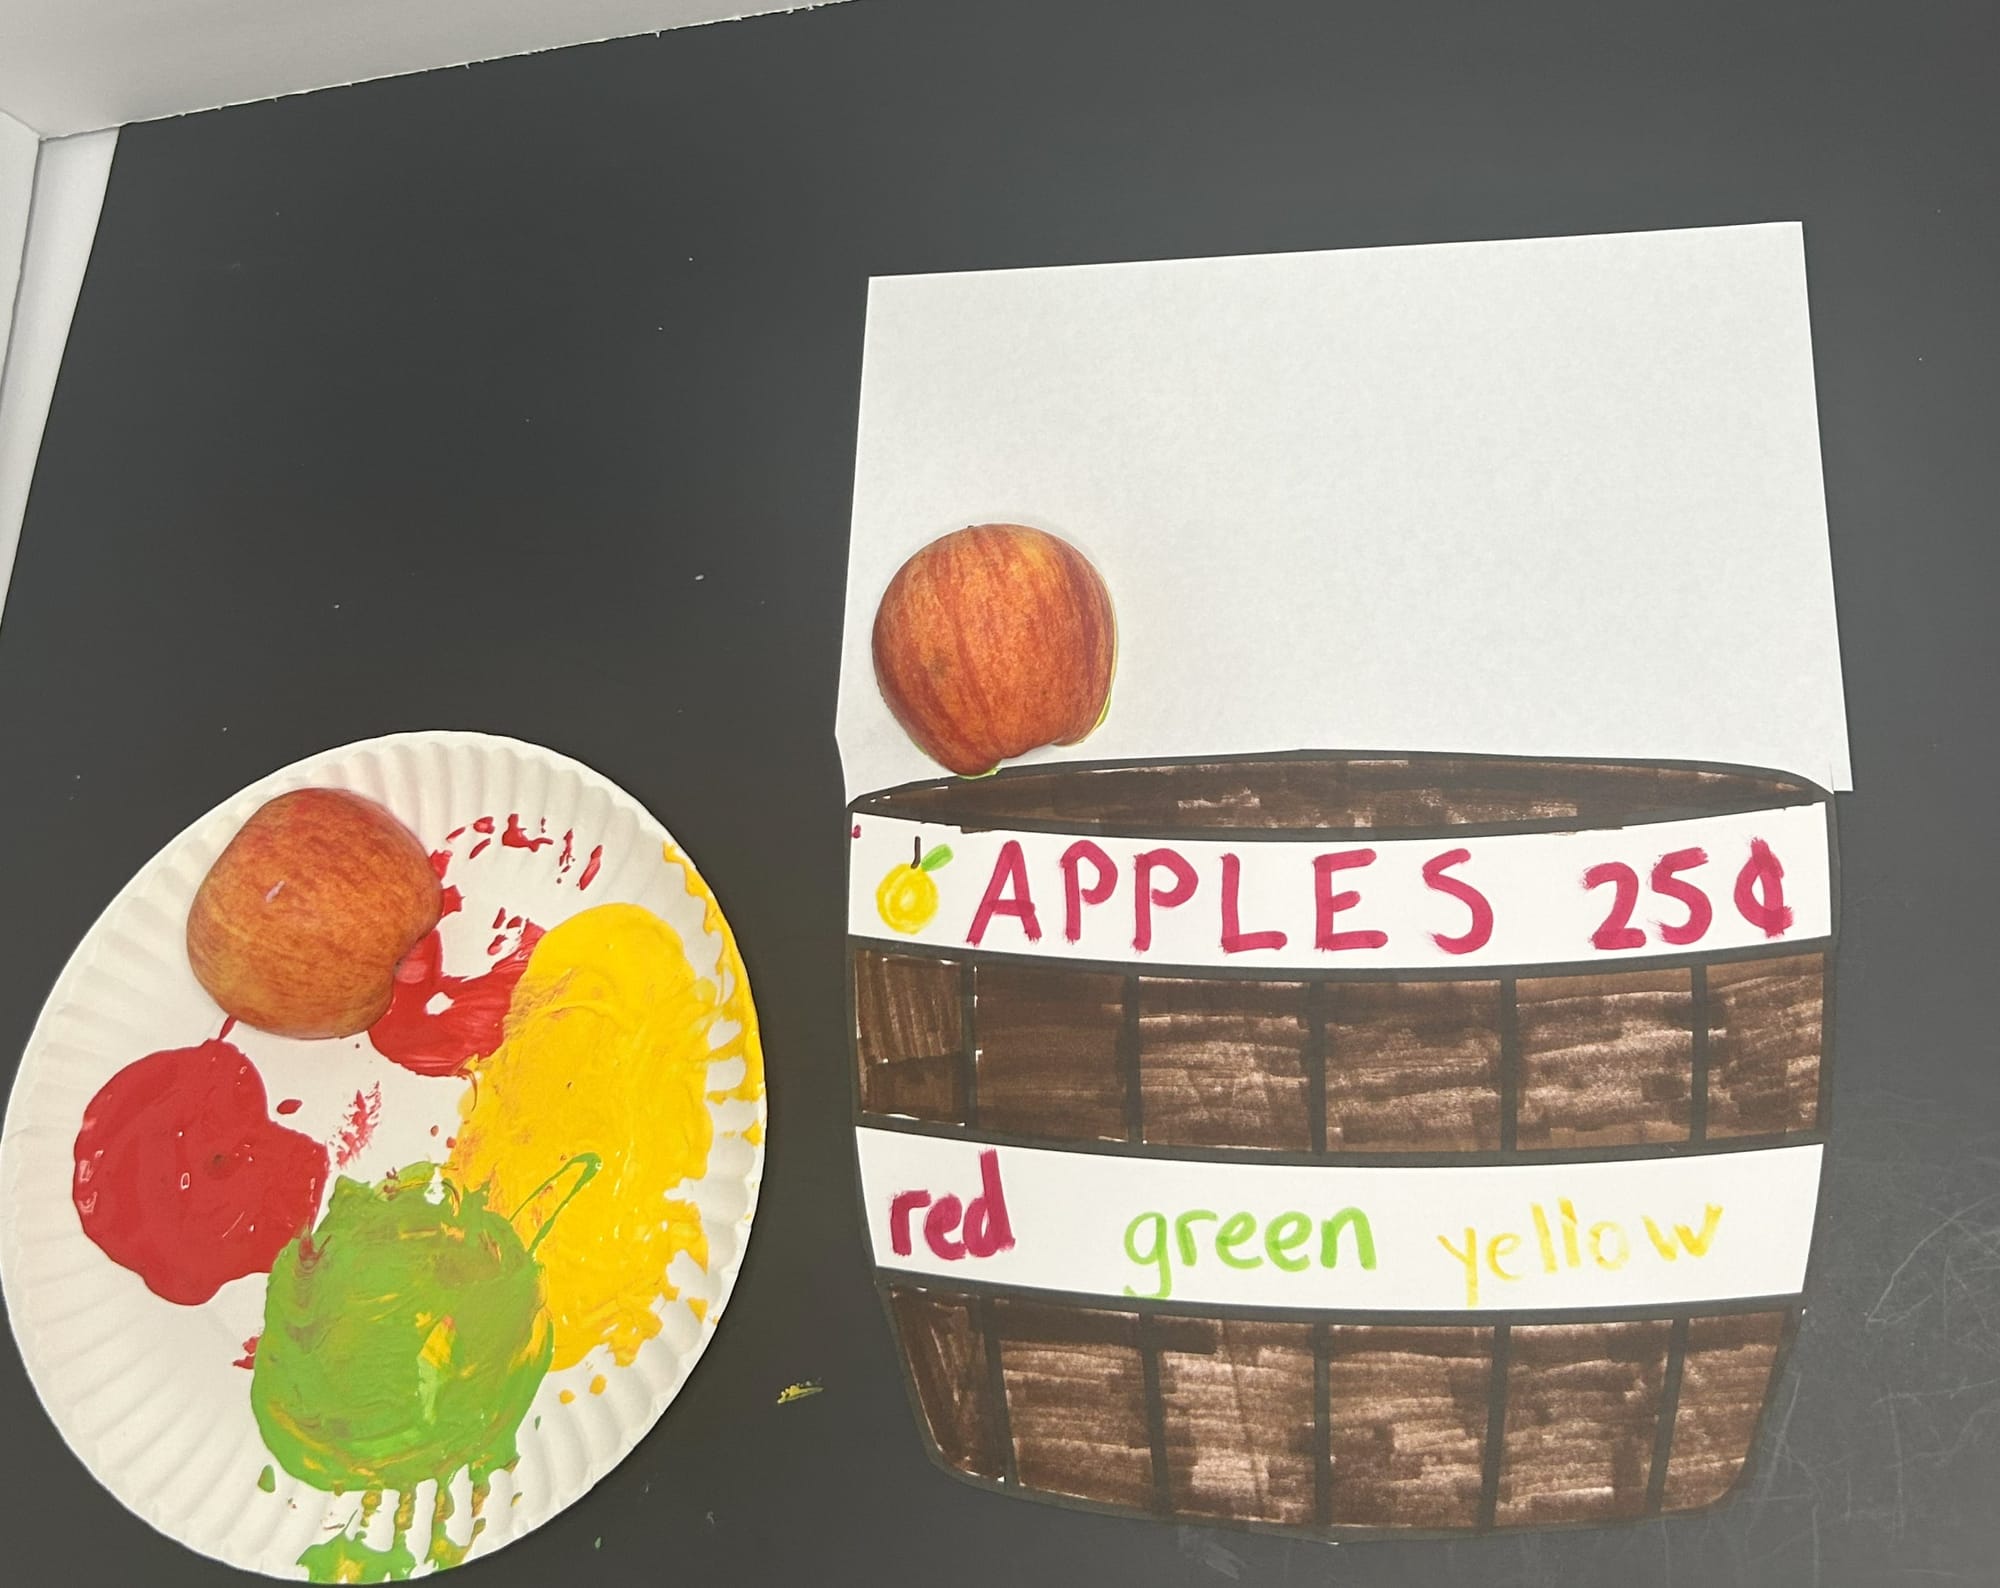
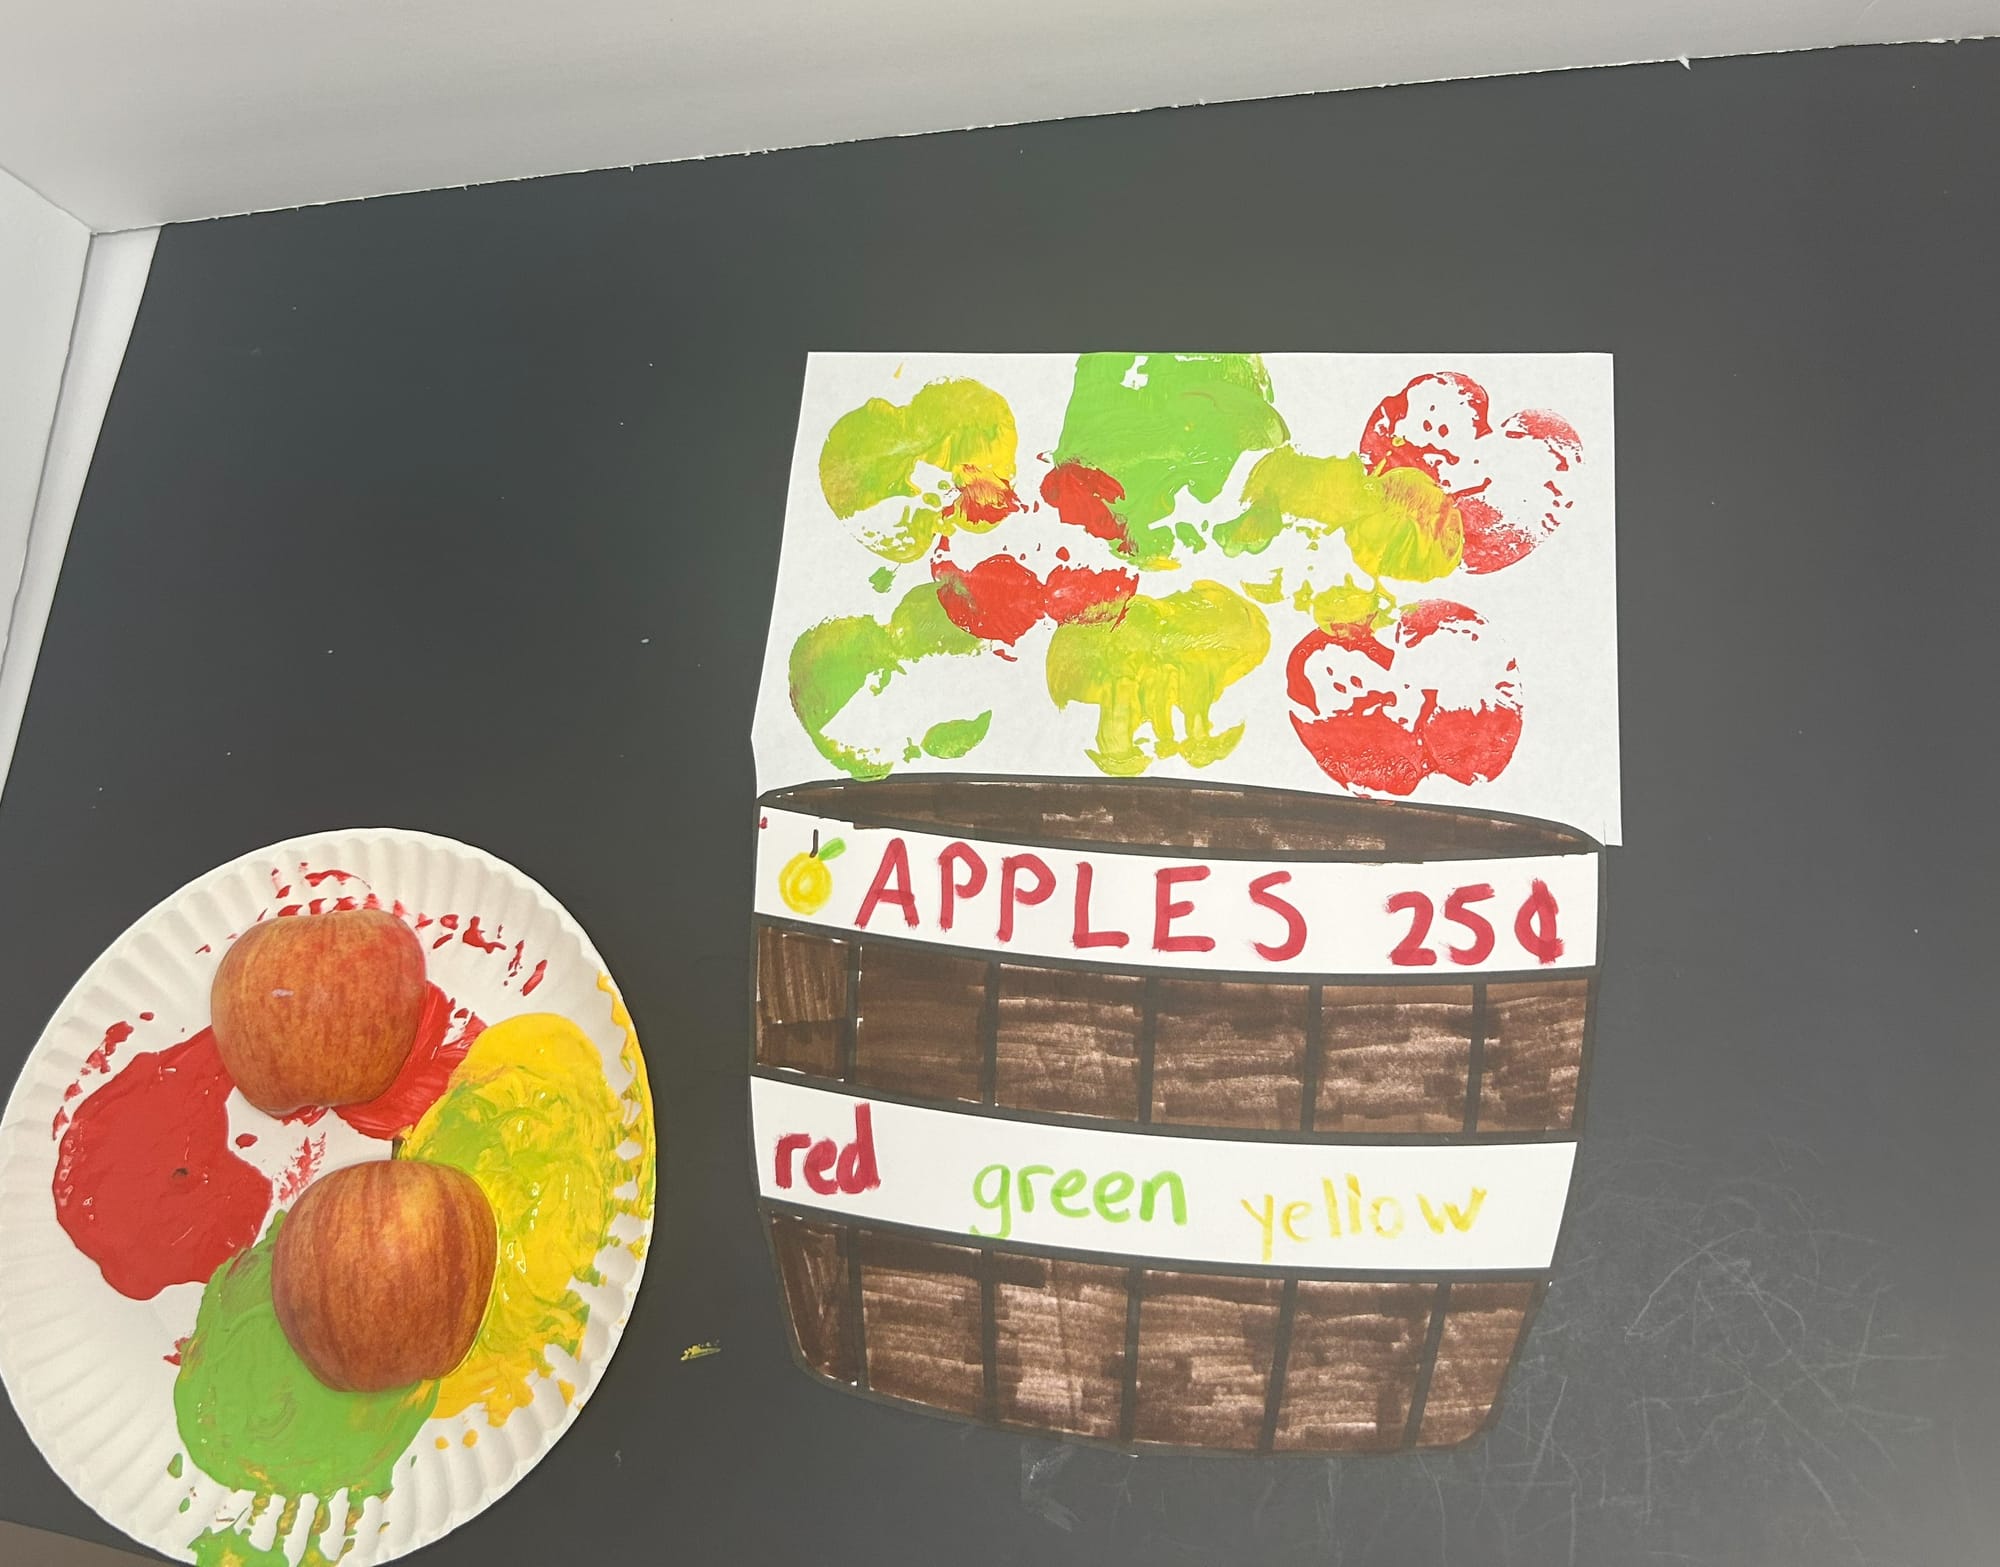
Stamp apples on top of one another like they are piled in the basket.
- Once the paint is dried, use markers to draw stems and leaves on the apples.
Great fall apple activity with your child or for the classroom